Network Engineers use the OpenDaylight (ODL) platform to craft, deploy and manage interesting virtual network services.

Internet Service Providers, Cloud Service Providers, Data Center Engineers and Academics use ODL to address the following use-cases:
- Network Service Delivery Automation
- Network services include site to site links (remember T1?) and virtual private networks. OpenDaylight provides an API so that robots (e.g. web apps) can provision these services on demand. No need to wait for the Cisco certified technician to stop by!
- Cloud and NFV
- Old school Firewalls block ports and IP addresses. NextGen firewalls scan application traffic for bad things. Routers provide path discovery and switches scope broadcast domains. No need for clunky appliances. OpenDaylight lets Architect execute these network functions in Software. (See Virtual Private Clouds for NFV in action)
- Network Resources Optimization (NRO)
- Bandwidth costs money and consumers get angry if they can't watch Netflix. Your cable provider wants to keep you happy so their nerds find ways to use every inch of glass laid across the country (and under the sea). They move traffic (network packets) around to avoid "traffic jams" and prioritize certain data flows (e.g. 911 calls) so that they can break through all of the cat memes. OpenDaylight lends a helping hand.
- Visibility and Control
- Metrics help ISPs and companies make decisions about upgrades. Find out, for example, if you need to drop half a million on that new refrigerator sized BGP router. The OpenDaylight dashboards don't lie!
UPDATE: Click here to install OpenDaylight on Ubuntu LTS 22.04
I've compiled the following instructions to help Engineers and Software developers get up and running on ODL quickly and efficiently. This HOWTO collects the quickest method to install OpenDaylight with all features and includes instructions on how to install legacy versions.
The following list records the steps necessary to install OpenDaylight on Ubuntu LTS 20.04
- Prepare the operating system
- Install the Java JRE
- Set JAVA_HOME
- Select the desired OpenDaylight version
- Download the OpenDaylight Zip
- Unzip OpenDaylight
- Start OpenDaylight
I crafted this HOWTO to minimize the time it takes for you to install OpenDaylight, and therefore I focus on the Zip Method to install ODL. I also wrote two other related blog posts that cover more intricate installation approaches:
- Click here if you would like to build OpenDaylight from Source
- Click here to learn how to install OpenDaylight as a Service
1. Prepare operating system
Update your operating system, applications and security tools through the apt package manager.
Execute an apt-get update, which refreshes the list of available packages.
$ sudo apt-get -y update
Now upgrade the packages via the upgrade option.
$ sudo apt-get -y upgrade
Install unzip, to unzip the OpenDaylight archive.
$ sudo apt-get -y install unzip
2. Install the Java JRE
The OpenDaylight Architects designed OpenDaylight for the Java ecosystem. OpenDaylight requires a Java runtime environment (JRE) to run. OpenDaylight can leverage either a stand alone JRE on the JRE bundled in a Java Software Development Kit.
The following command installs the JAVA 8 JRE.
$ sudo apt-get -y install openjdk-8-jre
Use the update-alternatives command to set the default Java to JAVA 8. update-alternatives presents a list of installed Java versions and allows you to select the desired default version. If update-alternatives provides a list of versions, select JAVA 8 from the list.
$  sudo update-alternatives --config java
There is only one alternative in link group java (providing /usr/bin/java): /usr/lib/jvm/java-8-openjdk-amd64/jre/bin/java
Nothing to configure.
update-alternatives will output a useful piece of information - the full path to your JAVA executable. Copy this path down, you will need it to set the JAVA_HOME environment variable in the next step.
3. Set JAVA_HOME
Retrieve the full path to your JAVA executable. If you lost track, you can run the following command:
~$ ls -l /etc/alternatives/java
lrwxrwxrwx 1 root root 46 Sep 27 20:24 /etc/alternatives/java -> /usr/lib/jvm/java-8-openjdk-amd64/jre/bin/java
OpenDaylight wants the JAVA_HOME environment variable to reflect the location the entire JAVA toolset, and not just the JAVA executable. For that reason, remove bin/java from the path. This sets JAVA_HOME to the location of the JRE.
On Ubuntu LTS 20.04, the JAVA 8 JRE resides in /usr/lib/jvm/java-8-openjdk-amd64/jre
To set (and persist) the value of JAVA_HOME, edit your BASH resource file.
$ echo 'export JAVA_HOME=/usr/lib/jvm/java-8-openjdk-amd64/jre' >> ~/.bashrc
Ubuntu reads your BASH resource file whenever you log into the shell. To set JAVA_HOME for the first time, you can either log out of and then back into your shell or simply source the resource file. To source the file, execute the following command:
$ source ~/.bashrc
Once you source the file, ensure that $JAVA_HOME ends with /jre.
$ echo $JAVA_HOME
/usr/lib/jvm/java-8-openjdk-amd64/jre
4. Download the OpenDaylight Zip Archive
You have two choices in downloading the OpenDaylight Zip archive. You can either navigate through the OpenDaylight download page, or use my table. The OpenDaylight download page may be tricky to navigate, so I recommend you use my table to Download the Zip.
Option 1: The Sobanski Table Method
OpenDaylight does not make it obvious how to download pre-compiled binaries of the software. I did some detective work and compiled the following table. Please let me know in the comments below if you run into any issues.
| Release | Version | Year | Month |
|---|---|---|---|
| Aluminum | 0.13.1 | 2020 | Nov |
| Magnesium | 0.12.2 | 2020 | Jul |
| Sodium | 0.11.4 | 2020 | Aug |
| Neon | 0.10.3 | 2019 | Dec |
| Flourine | 0.9.3 | 2019 | Jun |
| Oxygen | 0.8.4 | 2018 | Dec |
| Nitrogen | 0.7.3 | 2018 | May |
| Carbon | 0.6.4 | 2018 | Apr |
| Boron | 0.5.4 | 2017 | Jun |
| Beryllium | 0.4.4 | 2016 | Nov |
| Lithium | 0.3.4 | 2016 | Mar |
| Helium | 0.2.4 | 2015 | Aug |
Right click the desired version in the table above and then select Copy link address from the context menu.
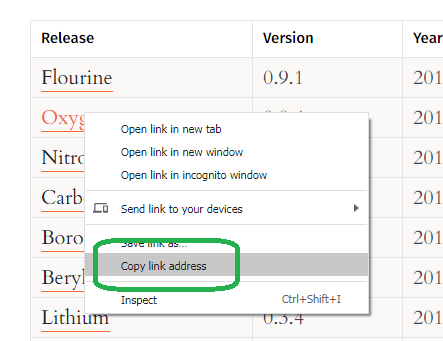
Paste the link into a CURL command, as follows. Be sure to use the capital O ("O" as in "Oscar") flag to save the Zip. I use the Oxygen release in the example below.
$ curl -XGET -O https://nexus.opendaylight.org/content/repositories/opendaylight.release/org/opendaylight/integration/karaf/0.8.4/karaf-0.8.4.zip
  % Total    % Received % Xferd  Average Speed   Time    Time     Time  Current
                                 Dload  Upload   Total   Spent    Left  Speed
100  351M  100  351M    0     0  27.7M      0  0:00:12  0:00:12 --:--:-- 30.0M
If you downloaded your Zip, and the Zip name starts with the word karaf, then you have the correct download and you can skip the next section.
Option 2: Navigate the OpenDaylight Download page.
If you want to use the OpenDaylight Download page, first go to the OpenDaylight project's home page and click on the hamburger icon.

Click Tech Community.

Click Getting Started for Developers.

Click Downloads.
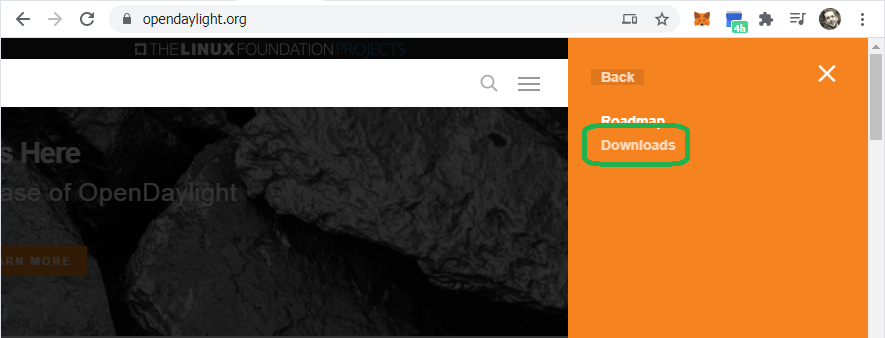
NOTE: If you can't navigate the menu, then click the direct link to the OpenDaylight downloads page
Once you hit the OpenDaylight download page, you may be tempted to right click and save the Zip of the current release.
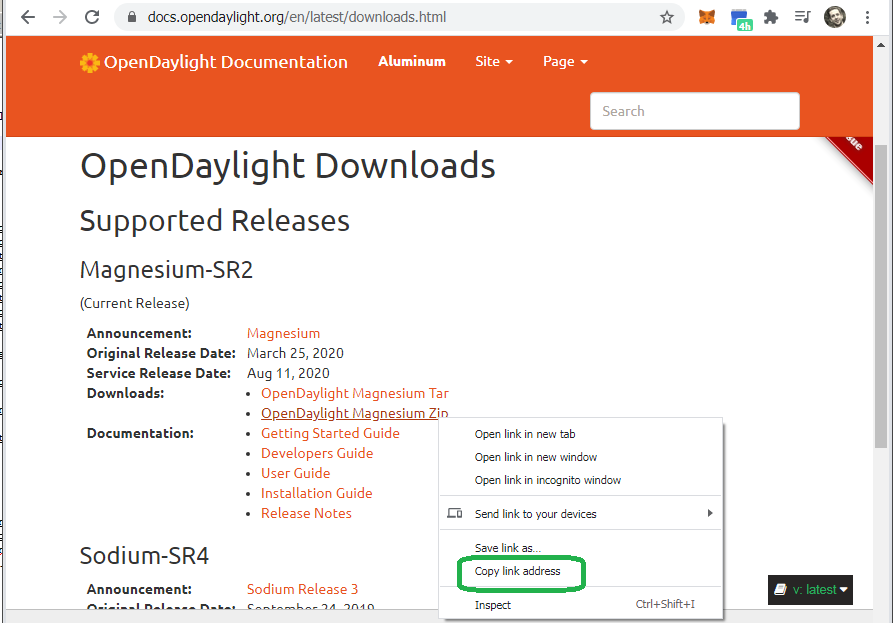
Do not download this Zip! This Zip includes the source code of OpenDaylight for builds. You do not want the source code, you want the pre-compiled binaries.
Instead, navigate to the section that reads "Archived Releases."

Click one of the OpenDaylight links, e.g. Nitrogen and Newer.
Now, select the version you want, for example, 0.12.2. Once you hit the child folder, download a Karaf zip.
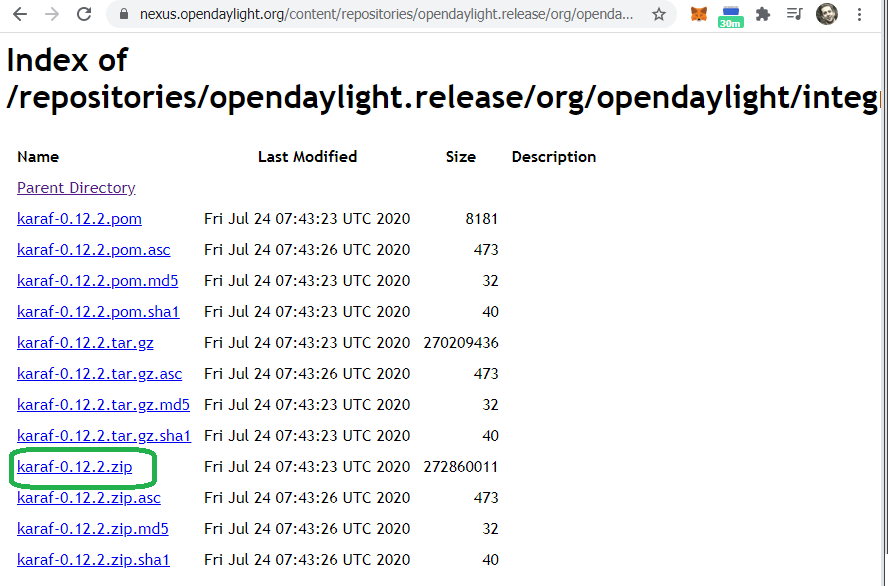
Right click the link to the karaf zip and then, in your terminal, paste the link into a CURL command.
NOTE: To save a Zip file, use CURL with the O flag (Capital letter O)
$ curl -XGET -O https://nexus.opendaylight.org/content/repositories/opendaylight.release/org/opendaylight/integration/karaf/0.12.2/karaf-0.12.2.zip
  % Total    % Received % Xferd  Average Speed   Time    Time     Time  Current
                                 Dload  Upload   Total   Spent    Left  Speed
100  260M  100  260M    0     0  32.5M      0  0:00:07  0:00:07 --:--:-- 35.6M
5. Install OpenDaylight
Ensure that you downloaded the file.
NOTE: You may have downloaded a different version than me. If this is the case, you will see a different version name.
$ ls
karaf-0.8.4.zip
NOTE: Ensure that the name of your Zip begins with the word karaf and not opendaylight, if it does not, then go back to the previous section and follow the directions on how to download the correct Zip
If you have the correct Zip, then unzip the file.
$ unzip karaf-0.8.4.zip
If you enter the un-zipped directory and list the contents, you should see a bin directory.
~$ cd karaf-0.8.4/
~/karaf-0.8.4$ ls
CONTRIBUTING.markdown  bin            data    karaf-0.12.2.zip  taglist.log
LICENSE                build.url      deploy  lib
README.markdown        configuration  etc     system
6. Start OpenDaylight
Now you can start OpenDaylight.
ubuntu@ip-172-31-92-223:~/karaf-0.8.4$ ./bin/karaf
Apache Karaf starting up. Press Enter to open the shell now...
100% [========================================================================]

Karaf started in 0s. Bundle stats: 13 active, 13 total

    ________                       ________                .__  .__       .__     __
    \_____  \ ______   ____   ____ \______ \ _____  ___.__.|  | |__| ____ |  |___/  |_
     /   |   \\____ \_/ __ \ /    \ |    |  \\__  \<   |  ||  | |  |/ ___\|  |  \   __\
    /    |    \  |_> >  ___/|   |  \|    `   \/ __ \\___  ||  |_|  / /_/  >   Y  \  |
    \_______  /   __/ \___  >___|  /_______  (____  / ____||____/__\___  /|___|  /__|
            \/|__|        \/     \/        \/     \/\/            /_____/      \/


Hit '<tab>' for a list of available commands
and '[cmd] --help' for help on a specific command.
Hit '<ctrl-d>' or type 'system:shutdown' or 'logout' to shutdown OpenDaylight.

opendaylight-user@root>

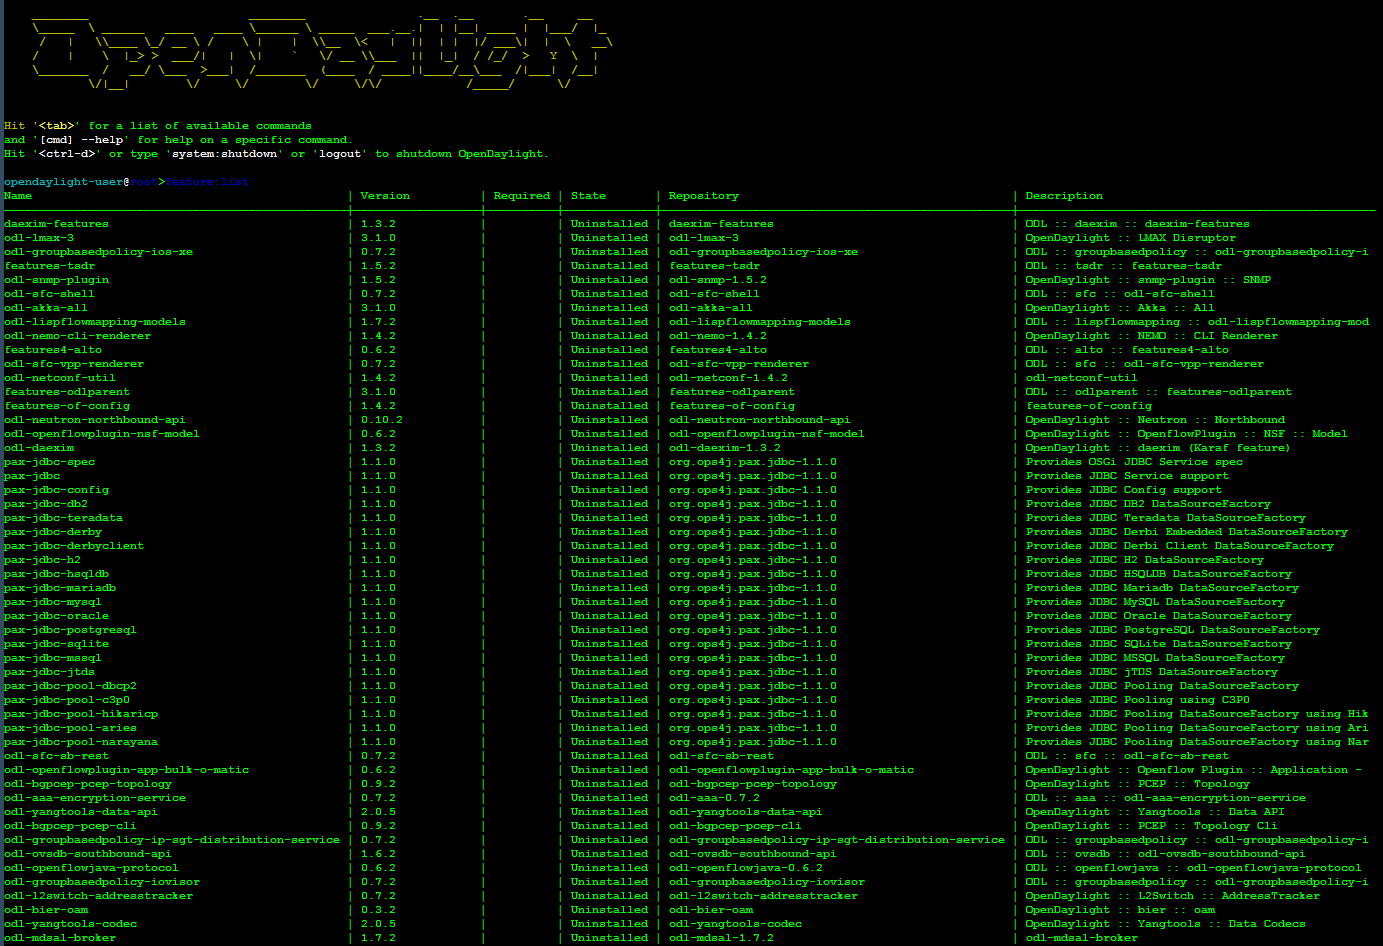
You just installed a release distribution, which provides you with the ability to select from all features for install.
opendaylight-user@root>feature:list
Conclusion
You now have the knowledge and experience to install any release version of OpenDaylight with all the karaf features. If you would like a challenge, you can try some more complicated methods of install, to include building OpenDaylight from Source or installing OpenDaylight as a Service.
You might also want to check out the demonstration I gave at the Linux Foundation OpenDaylight summit in Santa Clara, Califonia. I uploaded the slides to SlideShare and the Linux Foundation uploaded the video to YouTube.
UPDATE: Click here to install OpenDaylight on Ubuntu LTS 22.04