Internet Service Providers (ISP), Cloud Service Providers (CSP), Data Center Engineers and Academics use the OpenDaylight (ODL) platform to tailor and automate computer networks.

Professionals and Academics use ODL to execute several use-cases:
- Network Service Delivery Automation
- Use an Application Programming Interface (API) to provision network connections and virtual private networks on demand. Tell your Cisco certified technician to stay home!
- Cloud and NFV
- Throw out your burdensome appliances and execute port blocking, application scanning and path discovery (routing) functions in Software. Example: Amazon Web Services (AWS) Virtual Private Clouds (VPC)
- Network Resources Optimization (NRO)
- OpenDaylight allows ISP Network Nerds to squeeze value out of every inch of glass laid across the country (and under the sea). ODL identifies, forecasts and resolves packet traffic jams to let customers enjoy their cat videos without interruption.
- Visibility and Control
- Information helps ISPs and companies make decisions about network upgrades. Do you need to drop half a million on a new washing-machine sized BGP router? The OpenDaylight dashboards will tell you.
Since 2018 I have provided the definitive guide to quickly install OpenDaylight without hassle.
This HOWTO describes the easiest and most focused method to install ODL with all features for both recent and legacy versions.
The steps necessary to install OpenDaylight on Ubuntu LTS 22.04 include:
- Prepare the operating system
- Install the Java JRE
- Set JAVA_HOME
- Download the OpenDaylight Zip
- Unzip OpenDaylight
- Start OpenDaylight
- Bonus: Where did DLUX go?
This battle tested HOWTO minimizes OpenDaylight installation time, and focuses on the Zip Method to install ODL.
If you desire more intricate and configurable installation approaches, please see:
1. Prepare operating system
Use the Ubuntu apt package manager to update your operating system, applications and security posture.
The apt-get update command refreshes the catalog of available packages.
$ sudo apt-get -y update
Execute the command with the upgrade option to download and install the new packages.
$ sudo apt-get -y upgrade
Install unzip, to unzip the ODL archive.
$ sudo apt-get -y install unzip
2. Install the Java JRE
OpenDaylight runs on the Java platform.
Install the most recent version of Java to comply with security best practices.
In the past, we would install a Java Runtime Environment (JRE) to enable OpenDaylight.
The Java foundation switched gears with Java 11, however, and no longer provides a JRE. They encourage developers to create their own JRE based on need.
Oracle owns the Java foundation and writes:
In this release, the JRE or Server JRE is no longer offered. Only the JDK is offered. Users can use jlink to create smaller custom runtimes.
To avoid any irrelevant hassle, I recommend you install the Java Development Kit (JDK), which includes all of the features of the JRE with some extras. If you really want a JRE then take a look at the alternative suggestions captured in this Stackoverflow answer.
The following command installs the JAVA 11 JDK.
$ sudo apt-get -y install openjdk-11-jre
Note: Even though we requested the JRE Ubuntu will install a JDK.
Execute the update-alternatives command to find JAVA 11. If your server includes more than one installation of Java, update-alternatives will allow you to select a default version. If update-alternatives provides a list of versions on your server, select JAVA 11 from the list.
$  sudo update-alternatives --config java
There is only one alternative in link group java (providing /usr/bin/java): /usr/lib/jvm/java-11-openjdk-amd64/bin/java
Nothing to configure.
update-alternatives outputs critical information for OpenDaylight - the full path to your JAVA executable. Copy this path down since you will need it to set the JAVA_HOME environment variable in the next step.
3. Set JAVA_HOME
Retrieve the full path to your JAVA executable. If you lost track, you can run the following command:
~$ ls -l /etc/alternatives/java
lrwxrwxrwx 1 root root 43 July 30 19:09 /etc/alternatives/java -> /usr/lib/jvm/java-11-openjdk-amd64/bin/java
For OpenDaylight to run, the JAVA_HOME environment variable must point to the location of the entire JAVA toolset, and not just the JAVA executable.
For that reason, remove bin/java from the path. This sets JAVA_HOME to the location of the JDK and not the binary.
On Ubuntu LTS 22.04, the JAVA 11 JDK resides in /usr/lib/jvm/java-11-openjdk-amd64
Edit your BASH resource file to set (and persist) the value of JAVA_HOME, .
$ echo 'export JAVA_HOME=/usr/lib/jvm/java-11-openjdk-amd64' >> ~/.bashrc
Ubuntu reads your BASH resource file upon shell login.
To set JAVA_HOME for the first time, either (1) log out of and then back into your shell or (2) source the resource file:
$ source ~/.bashrc
Once you source the file, ensure that $JAVA_HOME ends with /java-11-openjdk-amd64 and not /bin/java.
$ echo $JAVA_HOME
/usr/lib/jvm/java-11-openjdk-amd64
4. Download the OpenDaylight Zip Archive
I present two methods to download the Zip archive. Either (1) navigate to the OpenDaylight download page, or (2) use my time-tested, indispensable table.
The OpenDaylight download page includes landmines (described below), so I recommend you use my table to Download the Zip.
Option 1: The John Sobanski Table Method
OpenDaylight makes finding pre-compiled binaries of the software very difficult. I did a ton of detective work and created the following table.
Please post in the comments at the end of this blog post (below) if you run into any issues.
| Release | Version | Year | Month |
|---|---|---|---|
| Chlorine | 0.17.2 | 2023 | Jan |
| Sulfur | 0.16.3 | 2022 | Dec |
| Phosphorus | 0.15.3 | 2022 | May |
| Silicon | 0.14.4 | 2022 | Jan |
| Aluminum | 0.13.4 | 2021 | Jun |
| Magnesium | 0.12.3 | 2020 | Dec |
| Sodium | 0.11.4 | 2020 | Aug |
| Neon | 0.10.3 | 2019 | Dec |
| Fluorine | 0.9.3 | 2019 | Jun |
| Oxygen | 0.8.4 | 2018 | Dec |
| Nitrogen | 0.7.3 | 2018 | May |
| Carbon | 0.6.4 | 2018 | Apr |
| Boron | 0.5.4 | 2017 | Jun |
| Beryllium | 0.4.4 | 2016 | Nov |
| Lithium | 0.3.4 | 2016 | Mar |
| Helium | 0.2.4 | 2015 | Aug |
Right click the desired version in the table above and then select Copy link address from the context menu.
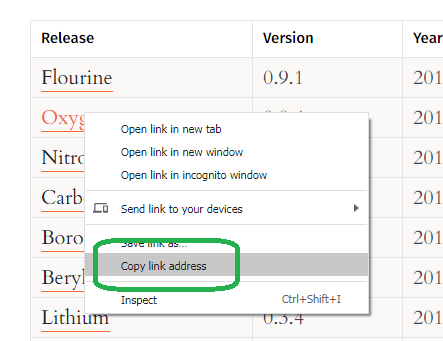
Paste the link into a CURL command. Use a capital O ("O" as in "Oscar") flag to save the Zip, not the number zero.
In the example below, I download the Sulfur release.
$ curl -XGET -O https://nexus.opendaylight.org/content/repositories/opendaylight.release/org/opendaylight/integration/karaf/0.16.1/karaf-0.16.1.zip
  % Total    % Received % Xferd  Average Speed   Time    Time     Time  Current
                                 Dload  Upload   Total   Spent    Left  Speed
100  351M  100  351M    0     0  27.7M      0  0:00:12  0:00:12 --:--:-- 30.0M
You have the correct download if the Zip name starts with the word karaf and not opendaylight.
If you have the correct download, then skip the next section.
Option 2: Navigate the OpenDaylight Download page.
You can skip this section if you completed the section above.
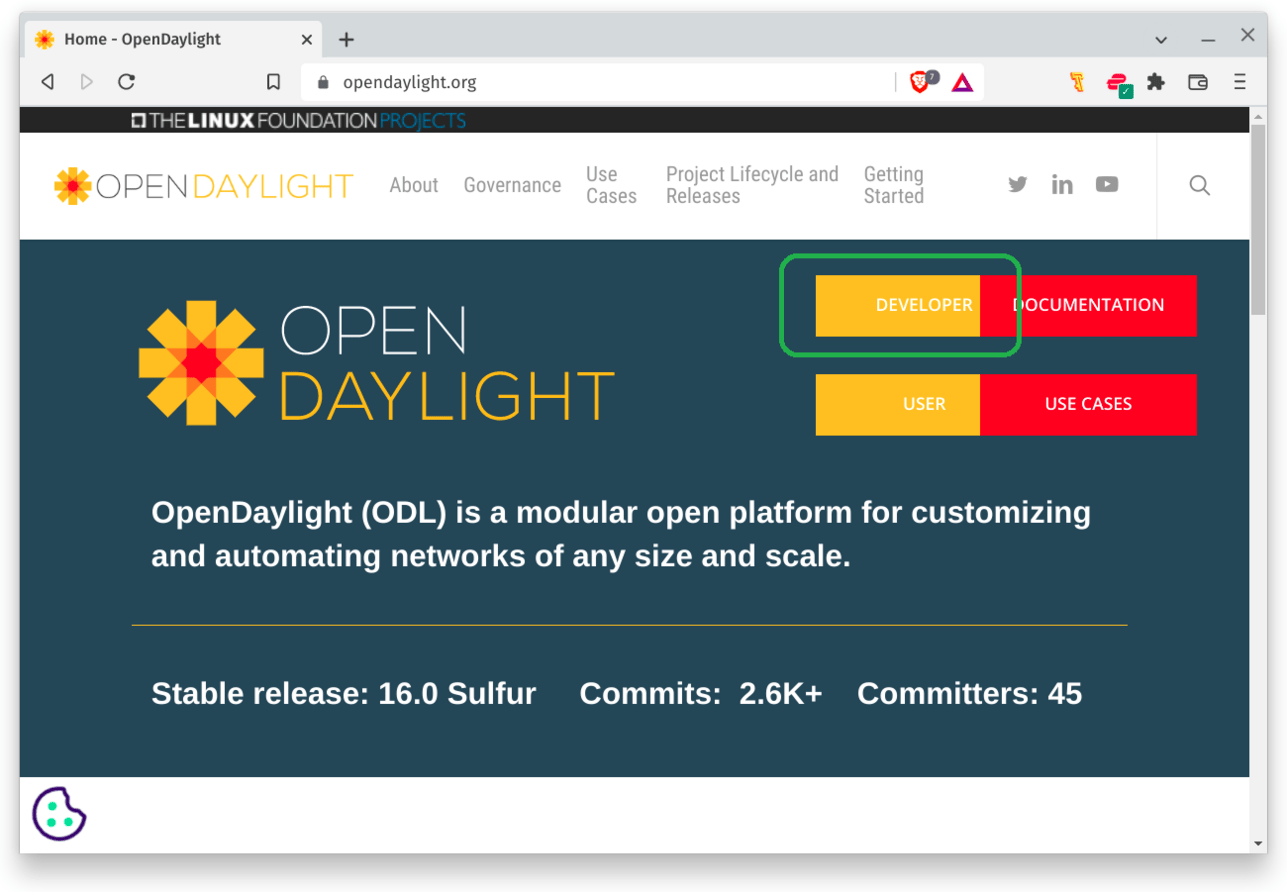
If you really want to use the website, navigate to the OpenDaylight project's home page and click Developer.
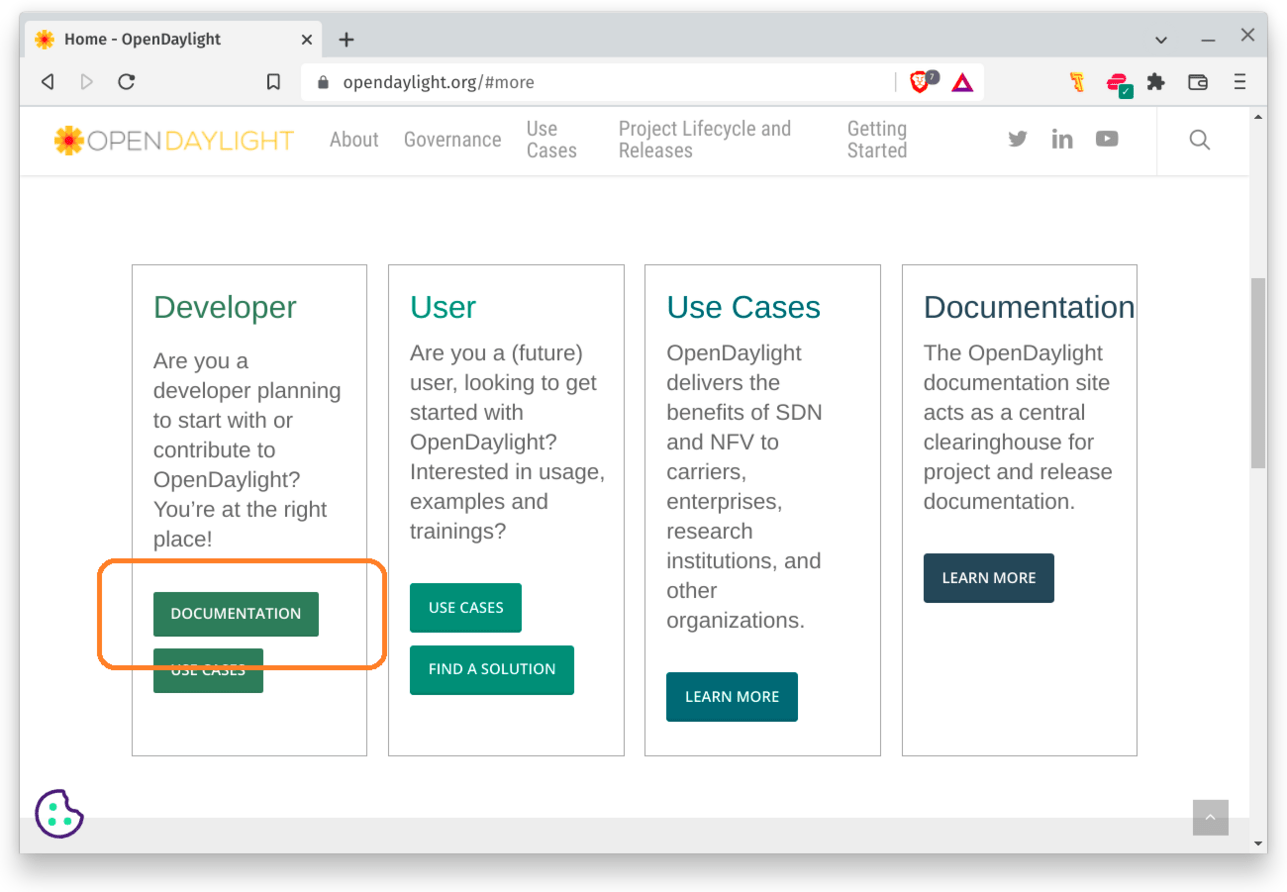
Click Documentation under Developer.
Click Downloads.
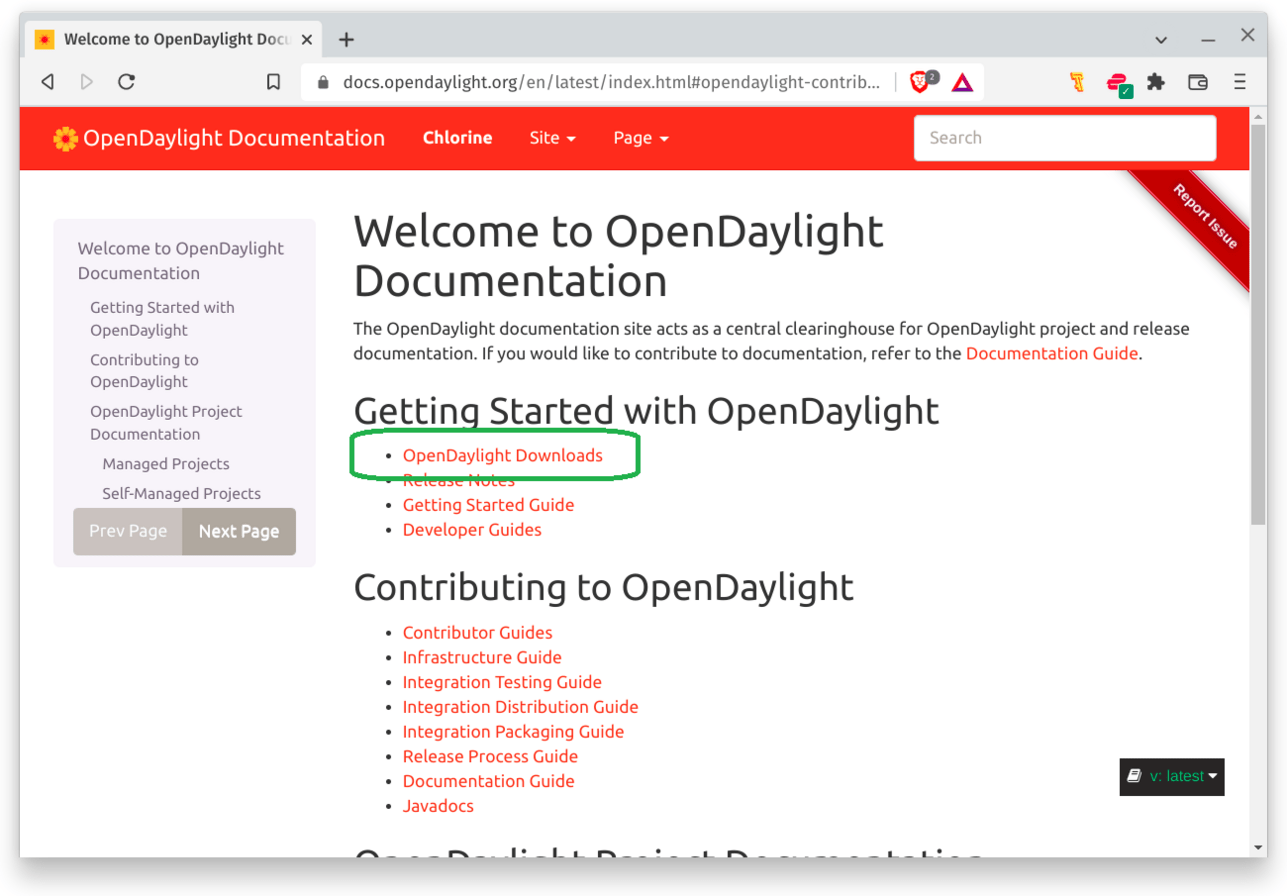
NOTE: If you can't navigate the menu, then click the direct link to the OpenDaylight downloads page
Once you hit the OpenDaylight download page, the current release section may tempt you with a download.
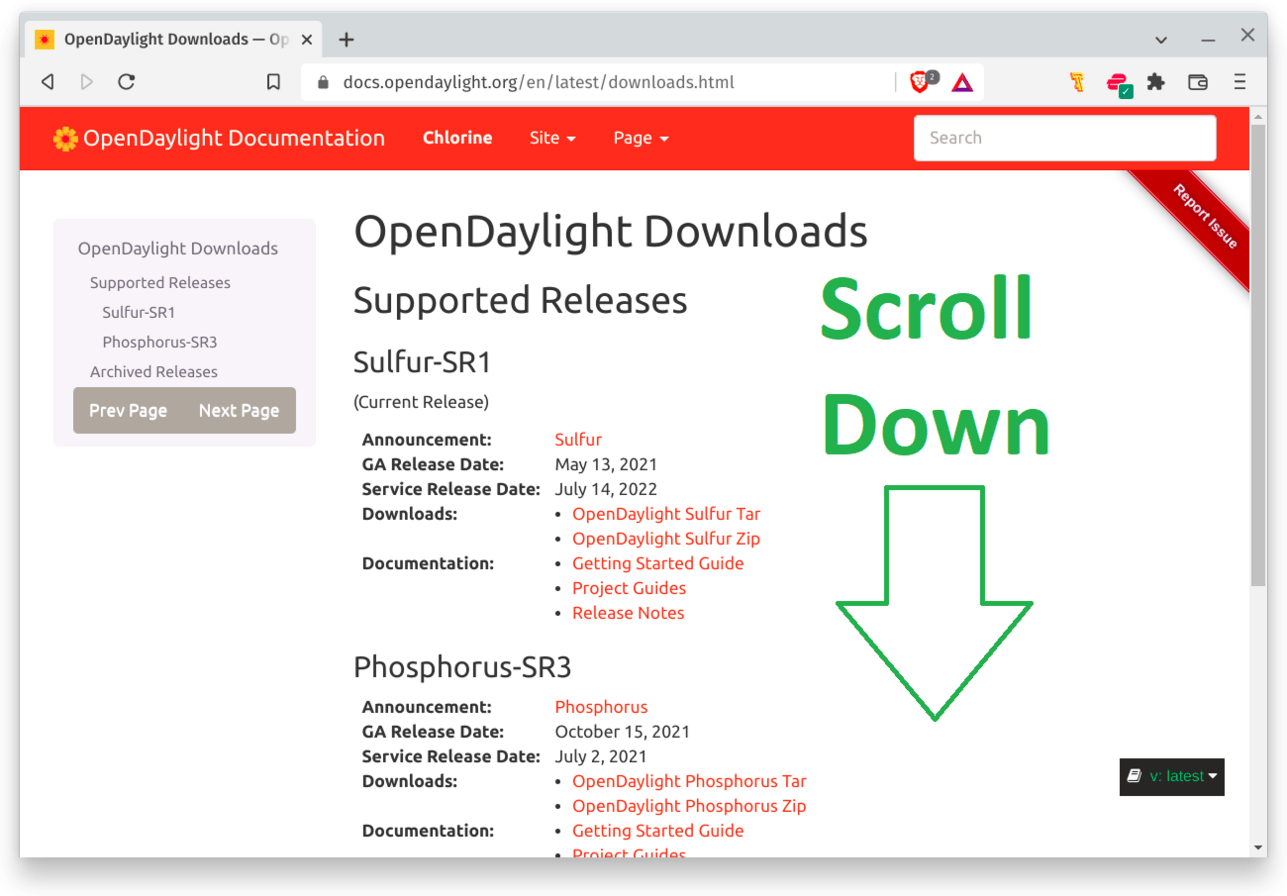
Do not download either of these Zips! These Zips only include the source code of OpenDaylight for builds, which you do not want.
You don't want the source code, you want a pre-compiled binary.
Instead, scroll down to the section that reads Archived Releases.
If you hover over the Fluorine and Newer link, you will not see the word karaf in the path, which indicates this link directs you to the unwanted source code.
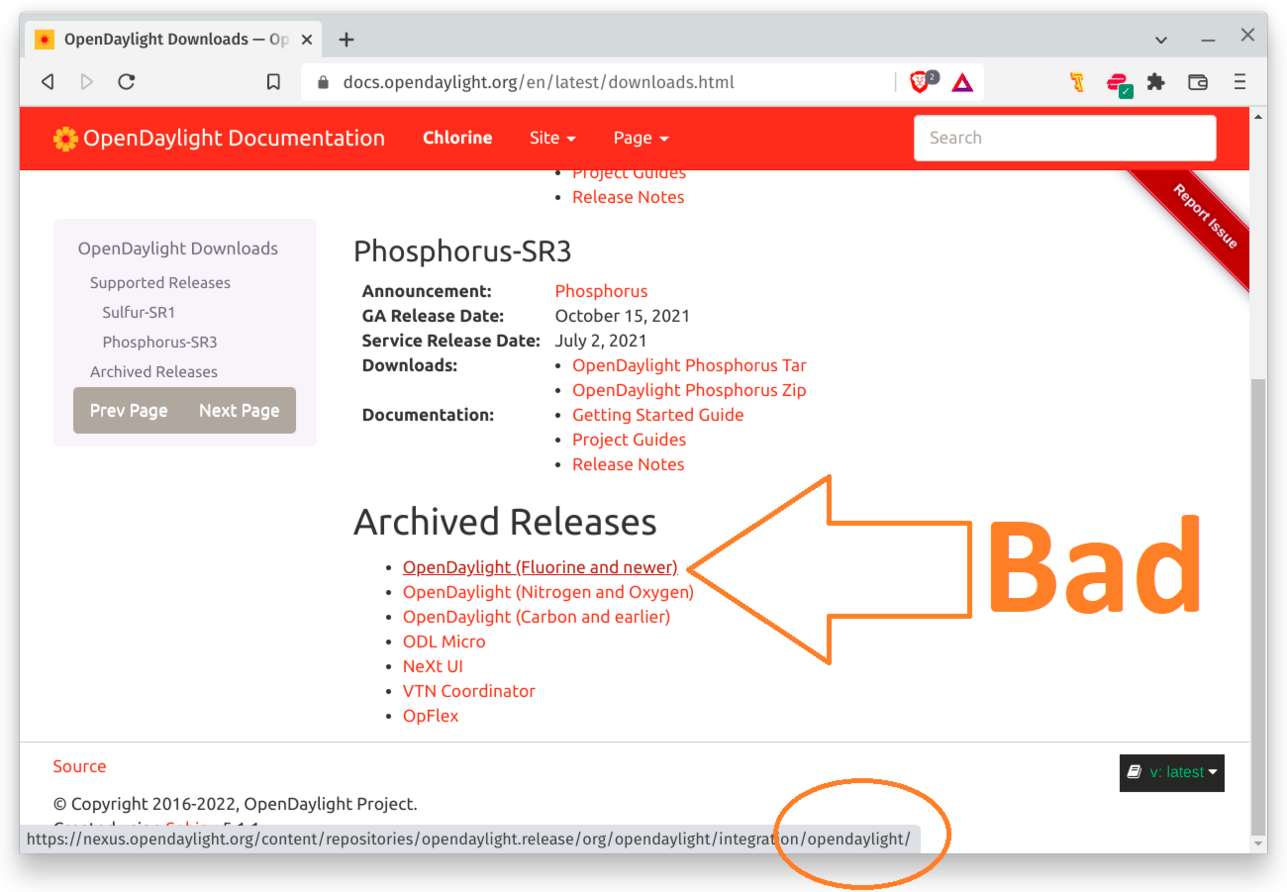
BEWARE: The Fluorine and Newer link contains links to the source code, and not the binary.
If you want Fluorine or newer, then scroll up to the table in this blog post above and download from there. My table provides links to the binaries and not the source code.
The remaining links under Archived Releases provide paths that contains the desired binaries (includes the word karaf).
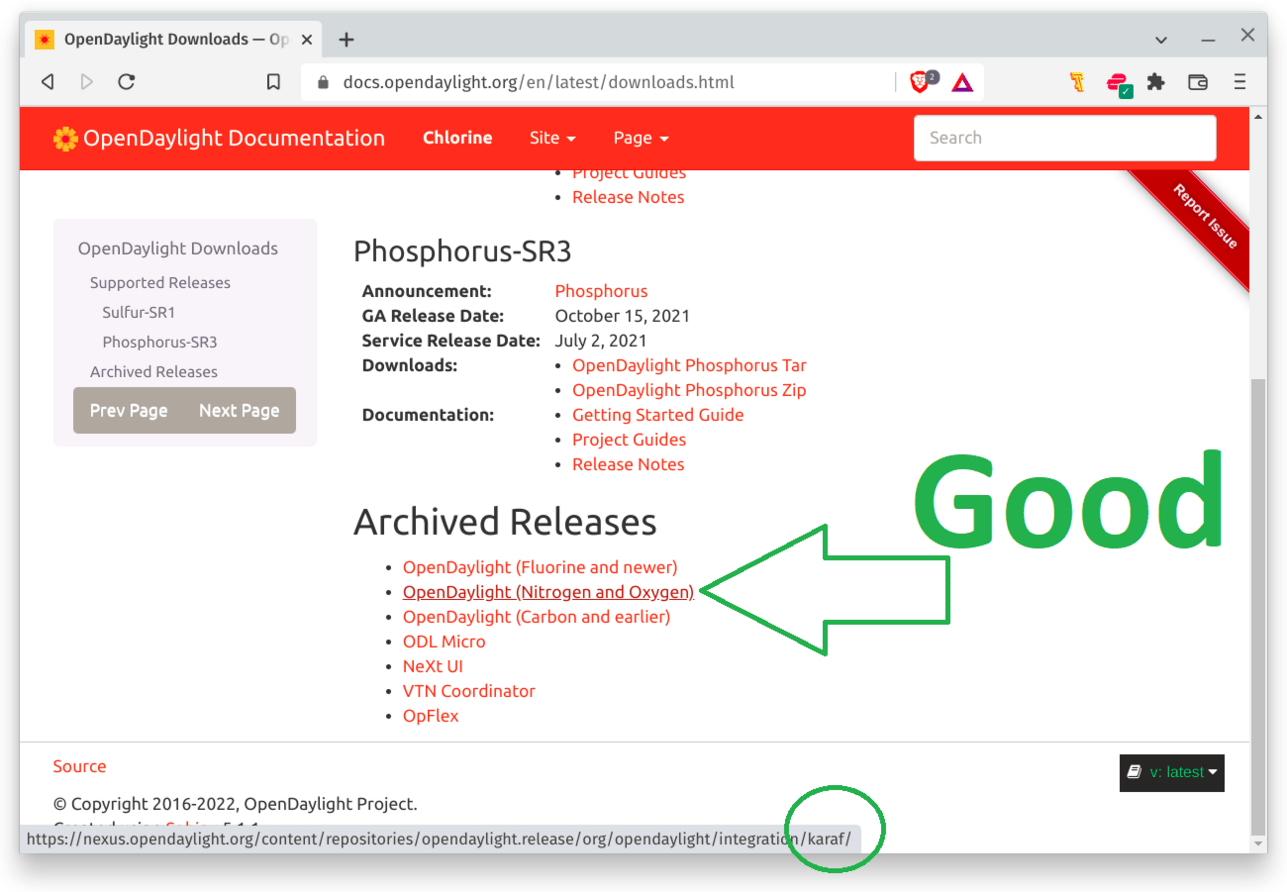
Click one of the good OpenDaylight links, e.g. Nitrogen and Oxygen.
Now, select the version you want, for example, 0.12.2.
Once you hit the child folder, download a Karaf zip.
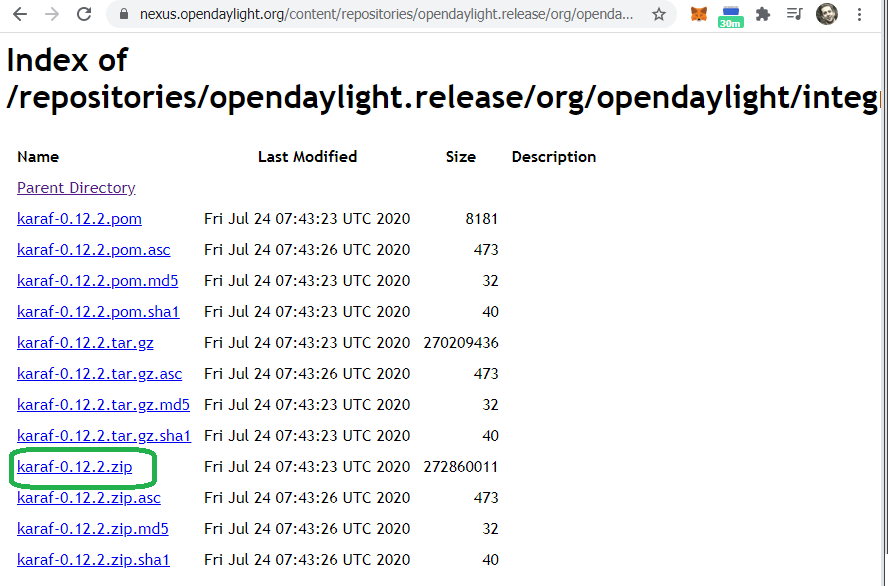
Right click the link to the karaf zip and then, in your terminal, paste the link into a CURL command.
NOTE: To save a Zip file, use CURL with the O flag (Capital letter O)
$ curl -XGET -O https://nexus.opendaylight.org/content/repositories/opendaylight.release/org/opendaylight/integration/karaf/0.12.2/karaf-0.12.2.zip
  % Total    % Received % Xferd  Average Speed   Time    Time     Time  Current
                                 Dload  Upload   Total   Spent    Left  Speed
100  260M  100  260M    0     0  32.5M      0  0:00:07  0:00:07 --:--:-- 35.6M
5. Install OpenDaylight
Verify a successful file downloaded.
NOTE: If you downloaded a different version than me, you will see a different version name.
$ ls
karaf-0.16.1.zip
NOTE: Verify that your Zip's name begins with the word karaf and not opendaylight. If you don't see karaf at the start of the name then return to the previous section and follow the directions on how to download the correct Zip
If you have the correct Zip, then unzip the file.
$ $ unzip karaf-0.16.1.zip
If you enter the un-zipped directory and list the contents, you should see a bin directory.
~$ :~$ cd karaf-0.16.1/
~/karaf-0.16.1$ ls
CONTRIBUTING.markdown  LICENSE  README.markdown
bin  configuration  data  deploy  etc  lib  system
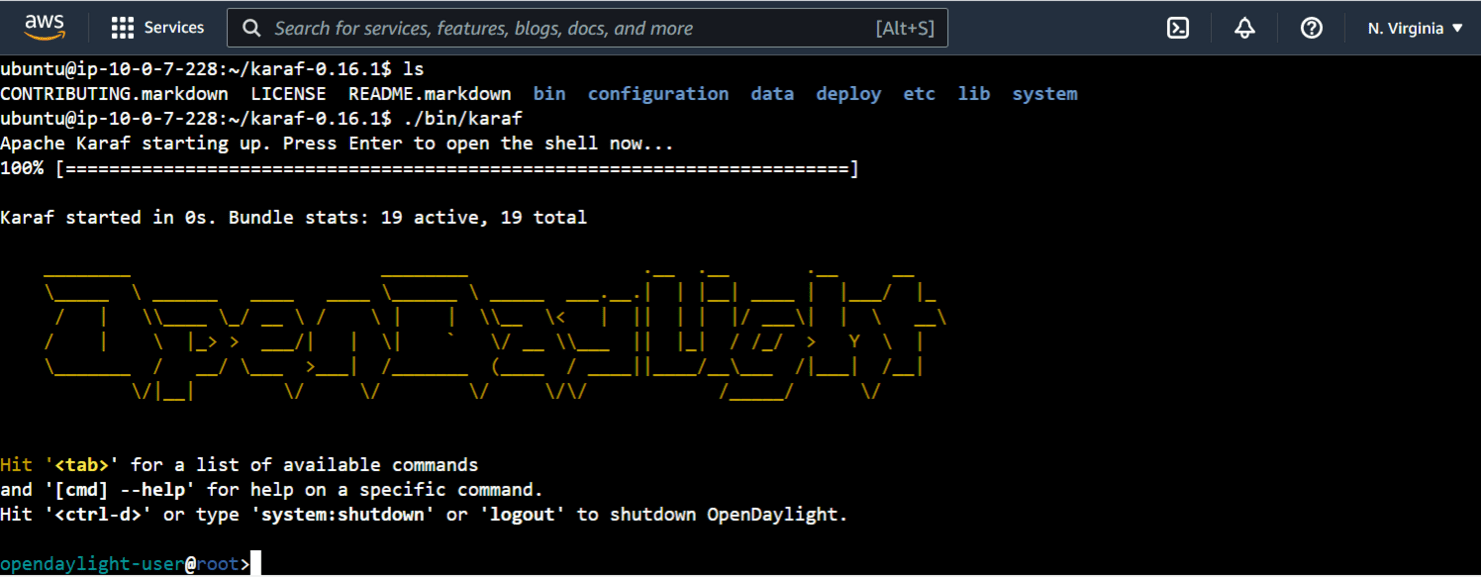
6. Start OpenDaylight
Now you can start OpenDaylight.
~/karaf-0.16.1$ ./bin/karaf
Apache Karaf starting up. Press Enter to open the shell now...
100% [========================================================================]

Karaf started in 0s. Bundle stats: 19 active, 19 total

    ________                       ________                .__  .__       .__     __
    \_____  \ ______   ____   ____ \______ \ _____  ___.__.|  | |__| ____ |  |___/  |_
     /   |   \\____ \_/ __ \ /    \ |    |  \\__  \<   |  ||  | |  |/ ___\|  |  \   __\
    /    |    \  |_> >  ___/|   |  \|    `   \/ __ \\___  ||  |_|  / /_/  >   Y  \  |
    \_______  /   __/ \___  >___|  /_______  (____  / ____||____/__\___  /|___|  /__|
            \/|__|        \/     \/        \/     \/\/            /_____/      \/


Hit '<tab>' for a list of available commands
and '[cmd] --help' for help on a specific command.
Hit '<ctrl-d>' or type 'system:shutdown' or 'logout' to shutdown OpenDaylight.

opendaylight-user@root>
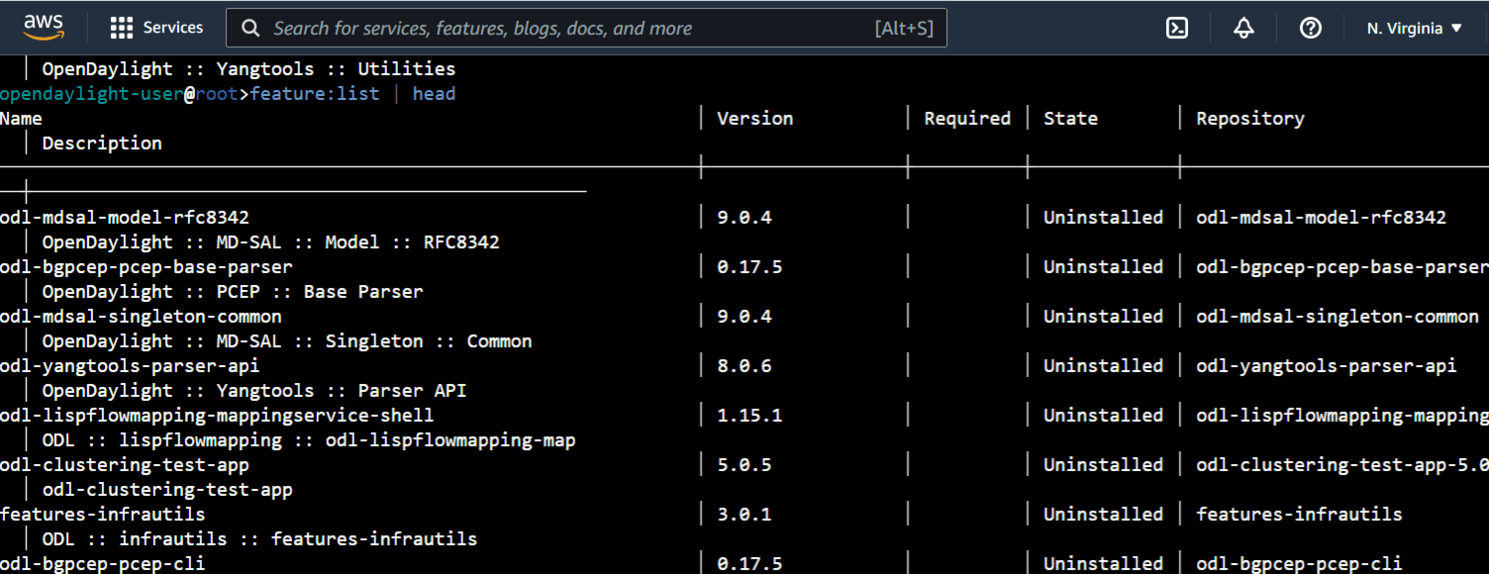
You just installed a release distribution, which provides you with the ability to select from all features for install.
opendaylight-user@root>feature:list
7. Bonus: What happened to DLUX?
Over the past four years I received dozens of Disqus Comments, LinkedIn messages and GitHub issues on the topic of DLUX.
Prior to 2019, OpenDaylight provided the OpenDaylight User Experience (DLUX) User Interface (UI) via the odl-l2switch-switch-ui Karaf module.
ODL no longer provides DLUX. If you attempt to install it, Karaf will present a message that reads Error executing command: No matching features for odl-l2switch-switch-ui.
opendaylight-user@root>feature:install odl-l2switch-switch-ui
Error executing command: No matching features for odl-l2switch-switch-ui/0
opendaylight-user@root>
If you would like to use the DLUX UI, then you must install the Oxygen release or an older release. In addition to Oxygen, Helium, Lithium, Beryllium, Boron, Carbon and Nitrogen support DLUX.
Install a version that supports DLUX
Kill the current Karaf session with Control+D if running.
Change directories to your home folder and then download a legacy version. I download Oxygen here:
~/karaf-0.16.1$ cd ~
~$ curl -O https://nexus.opendaylight.org/content/repositories/opendaylight.release/org/opendaylight/integration/karaf/0.8.4/karaf-0.8.4.zip
  % Total    % Received % Xferd  Average Speed   Time    Time     Time  Current
                                 Dload  Upload   Total   Spent    Left  Speed
100  351M  100  351M    0     0  70.8M      0  0:00:04  0:00:04 --:--:-- 75.8M
Unzip the Zip file (verify the file name starts with karaf and not opendaylight).
~$ unzip karaf-0.8.4.zip
Enter the new directory and start the service.
~$ cd karaf-0.8.4/
~/karaf-0.8.4$ ./bin/karaf
Error occurred during initialization of boot layer
java.lang.module.FindException: Module java.xml.bind not found
Java strikes again! Turns out, Java decided to remove this critical piece of software from JAVA 11.
The Java 11 release notes state:
java.xml.bind (JAXB) - REMOVED
- Java 8 - OK
- Java 9 - DEPRECATED
- Java 10 - DEPRECATED
- Java 11 - REMOVED
To fix the OpenDaylight issue java.lang.module.FindException: Module java.xml.bind not found, install an older version of JAVA.
In the example below, I install JAVA 8.
$ sudo apt-get install openjdk-8-jre
Now, use update-alternatives to command Ubuntu to use JAVA 8, instead of the newer version.
NOTE: You can install multiple versions of JAVA on the same Ubuntu server without issue
Select JAVA 8 from the menu. In the example below I choose option 2.
$ sudo update-alternatives --config java
There are 2 choices for the alternative java (providing /usr/bin/java).

  Selection    Path                                            Priority   Status
------------------------------------------------------------
* 0            /usr/lib/jvm/java-11-openjdk-amd64/bin/java      1111      auto mode
  1            /usr/lib/jvm/java-11-openjdk-amd64/bin/java      1111      manual mode
  2            /usr/lib/jvm/java-8-openjdk-amd64/jre/bin/java   1081      manual mode

Press <enter> to keep the current choice[*], or type selection number: 2
update-alternatives: using /usr/lib/jvm/java-8-openjdk-amd64/jre/bin/java to provide /usr/bin/java (java) in manual mode
Verify that Ubuntu registered the older version:
$ java -version
openjdk version "1.8.0_342"
OpenJDK Runtime Environment (build 1.8.0_342-8u342-b07-0ubuntu1~22.04-b07)
OpenJDK 64-Bit Server VM (build 25.342-b07, mixed mode)
Now, update your bashrc file.
Find the location of the new JAVA 8.
$ ls -l /etc/alternatives/java
lrwxrwxrwx 1 root root 46 Jul 30 14:31 /etc/alternatives/java -> /usr/lib/jvm/java-8-openjdk-amd64/jre/bin/java
For JAVA_HOME, you want to remove the bin/java suffix.
For example:
/usr/lib/jvm/java-8-openjdk-amd64/jre/bin/java
Becomes
/usr/lib/jvm/java-8-openjdk-amd64/jre
Edit your ~/.bashrc file.
~$: vim ~/.bashrc
Replace
export JAVA_HOME=/usr/lib/jvm/java-11-openjdk-amd64
With
export JAVA_HOME=/usr/lib/jvm/java-8-openjdk-amd64/jre
Source the file.
!$: source ~/.bashrc
Check that your session includes the correct JAVA_HOME.
$ echo $JAVA_HOME
/usr/lib/jvm/java-8-openjdk-amd64/jre
Change directories to your legacy version of ODL. You may have a different path if you use a different version than mine.
$ cd ~/karaf-0.8.4/
ubuntu@ip-10-0-7-228:~/karaf-0.8.4$
Start OpenDaylight.
:~/karaf-0.8.4$ ./bin/karaf
Apache Karaf starting up. Press Enter to open the shell now...
100% [========================================================================]

Karaf started in 0s. Bundle stats: 13 active, 13 total

    ________                       ________                .__  .__       .__     __
    \_____  \ ______   ____   ____ \______ \ _____  ___.__.|  | |__| ____ |  |___/  |_
     /   |   \\____ \_/ __ \ /    \ |    |  \\__  \<   |  ||  | |  |/ ___\|  |  \   __\
    /    |    \  |_> >  ___/|   |  \|    `   \/ __ \\___  ||  |_|  / /_/  >   Y  \  |
    \_______  /   __/ \___  >___|  /_______  (____  / ____||____/__\___  /|___|  /__|
            \/|__|        \/     \/        \/     \/\/            /_____/      \/


Hit '<tab>' for a list of available commands
and '[cmd] --help' for help on a specific command.
Hit '<ctrl-d>' or type 'system:shutdown' or 'logout' to shutdown OpenDaylight.
Finally, Install DLUX.
The Autocomplete indicates this version includes odl-l2switch-switch-ui.
opendaylight-user@root>feature:install odl-l2switch-
odl-l2switch-all                       (OpenDaylight :: L2Switch :: All)   odl-l2switch-loopremover       (OpenDaylight :: L2Switch :: LoopRemover)
odl-l2switch-switch                 (OpenDaylight :: L2Switch :: Switch)   odl-l2switch-switch-rest       (OpenDaylight :: L2Switch :: Switch REST)
odl-l2switch-switch-ui           (OpenDaylight :: L2Switch :: Switch UI)   odl-l2switch-packethandler   (OpenDaylight :: L2Switch :: PacketHandler)
odl-l2switch-arphandler         (OpenDaylight :: L2Switch :: ArpHandler)   odl-l2switch-addresstracker (OpenDaylight :: L2Switch :: AddressTracker)
odl-l2switch-hosttracker       (OpenDaylight :: L2Switch :: HostTracker)
If you get an empty command prompt, you installed DLUX.
opendaylight-user@root>feature:install odl-l2switch-switch-ui
opendaylight-user@root>
Enter your URL into a browser and log into the DLUX console with the default credentials admin/admin.
Enter your IP address in the following URL (Keep the port as 8181).
http://<your ip address here>:8181/index.html#/login
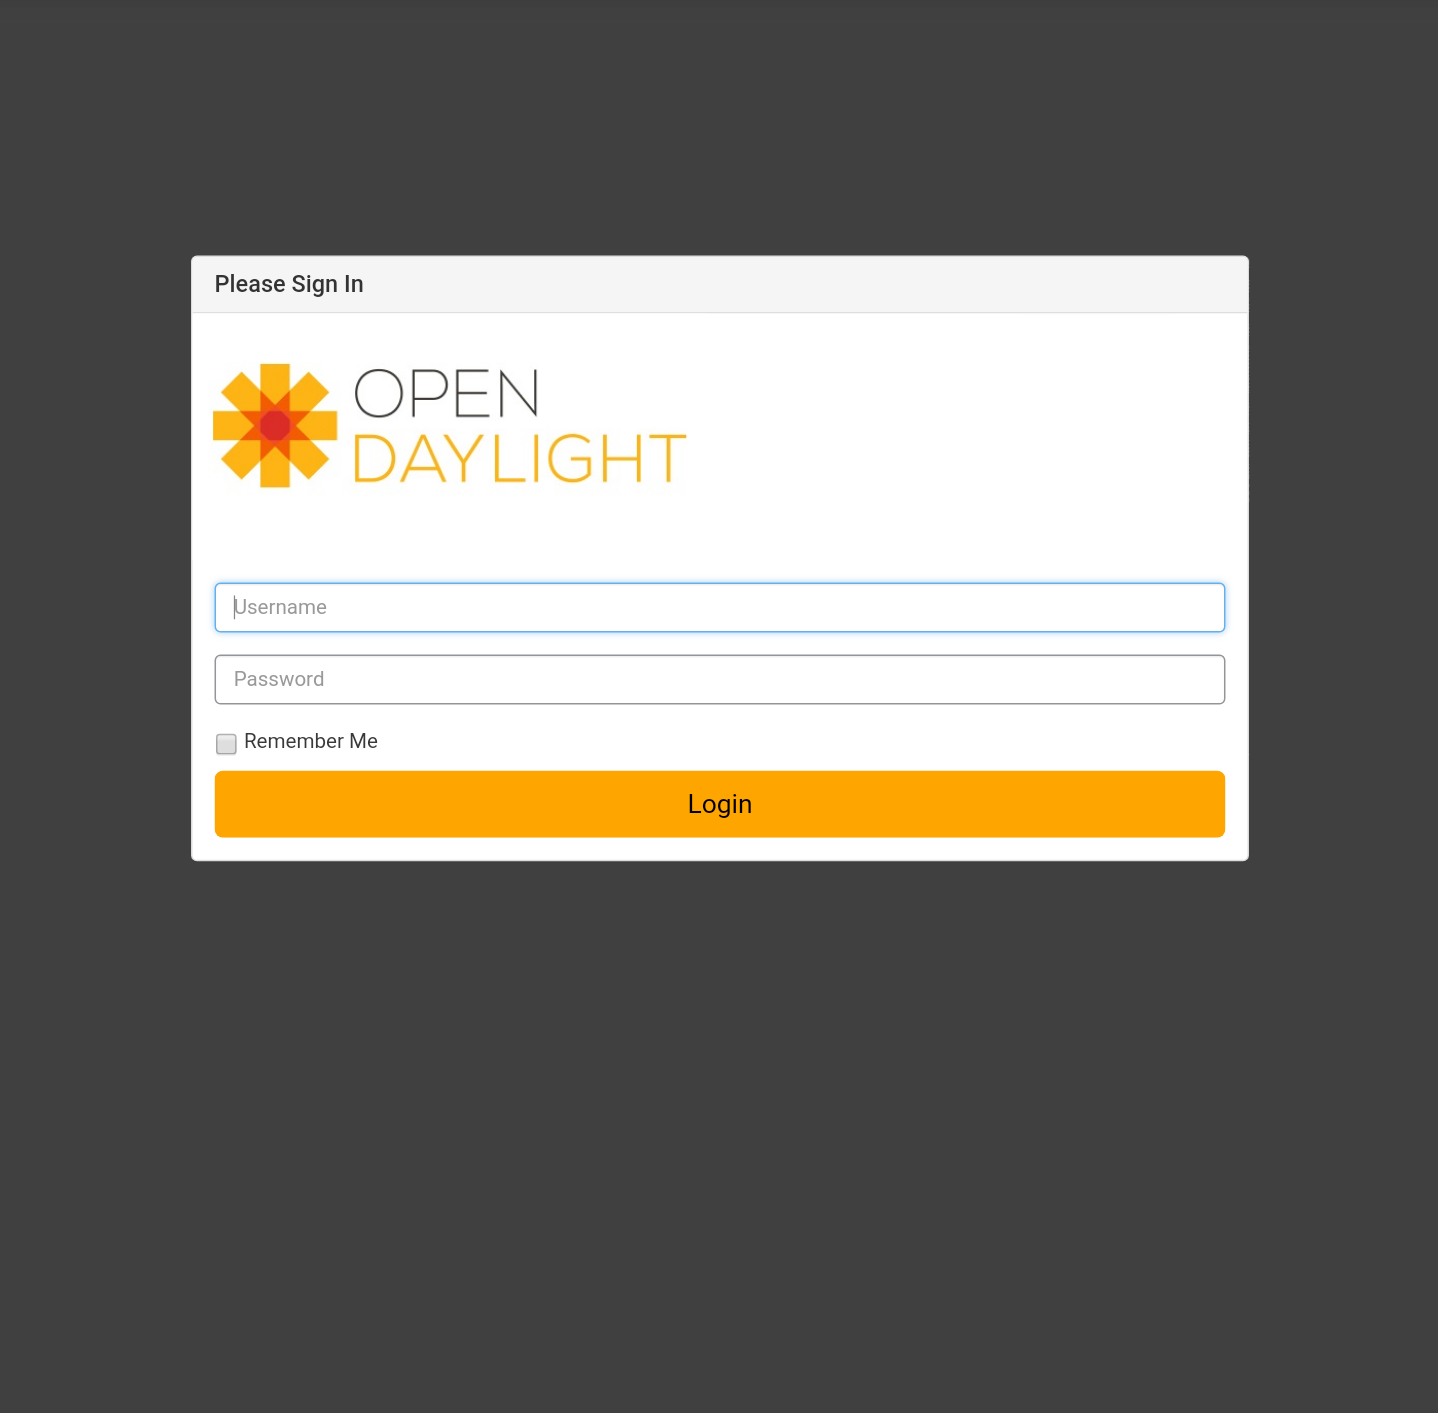
If you log in with admin/admin, DLUX renders the DLUX console.
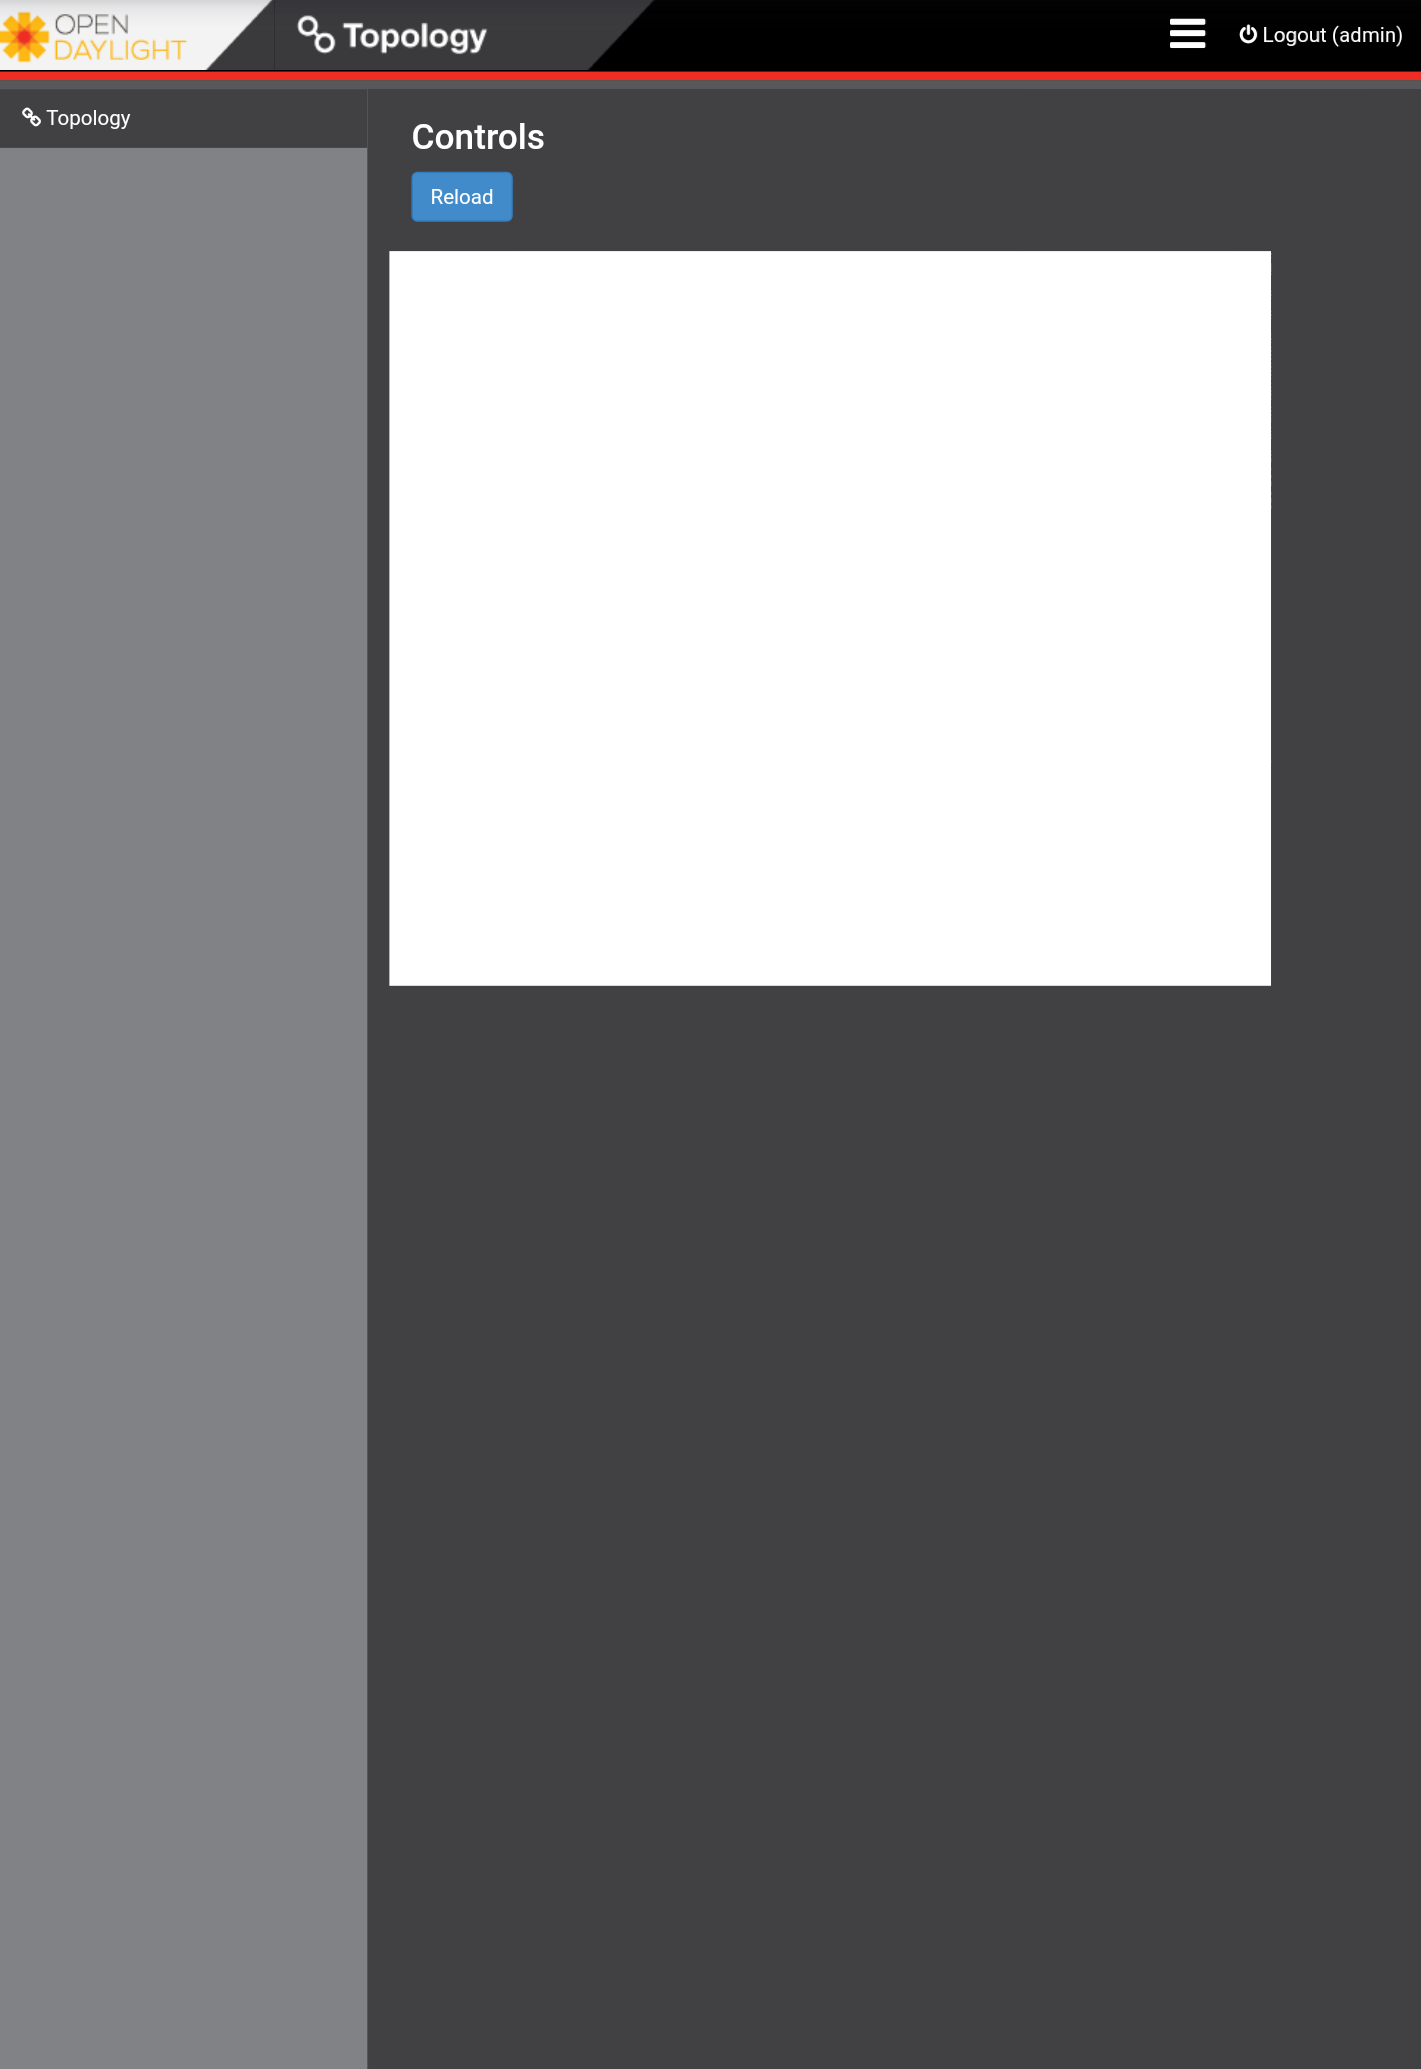
Conclusion
This HOWTO taught you how to install OpenDaylight with all the karaf features.
For more complicated methods of install, click the following:
I spoke at the Linux Foundation OpenDaylight summit in Santa Clara, California.
Please look at my slides on SlideShare and watch my video on YouTube.