Part Two of this HOWTO demonstrates how to secure your S3 hosted website with HTTPS. If you haven't completed part one yet, be sure to click here.
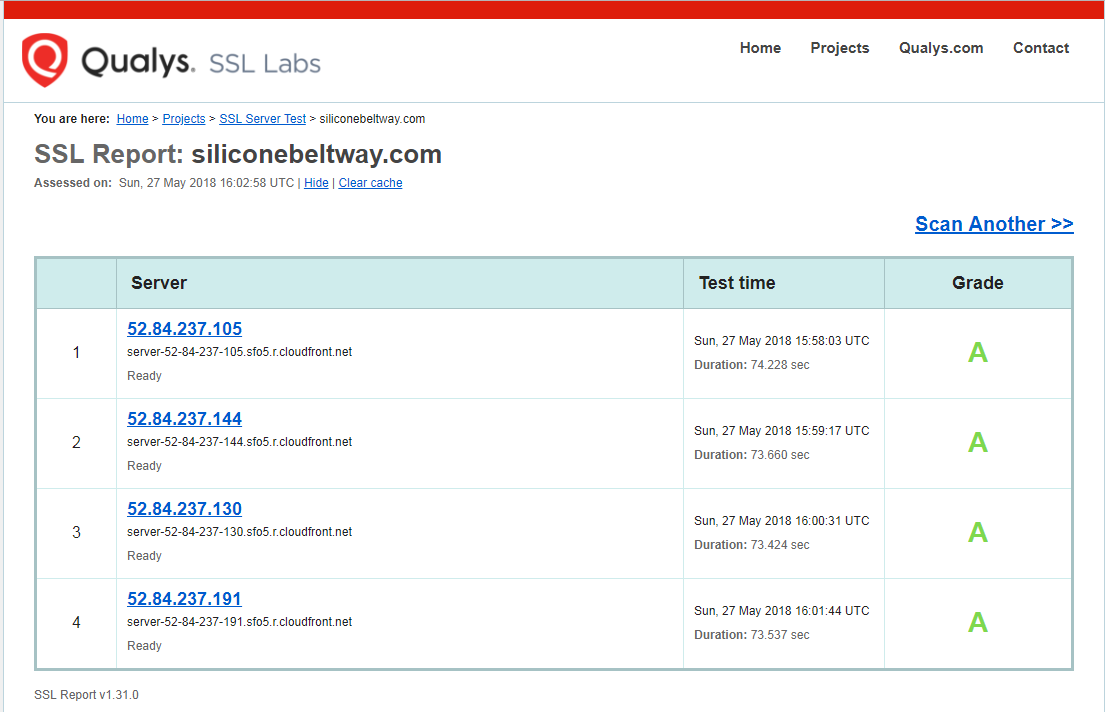
Once you complete this HOWTO, you will have a secure website, that Google approves, as seen in the screengrab below:
HTTPS and Naked Domain redirection will increase your security, reduce customer bounce rate and increase SEO.
Outline
In part one of this tutorial, we executed the following:
- Configure DNS (Route 53)
- Create Log, WWW and Naked Domain S3 Buckets
- Configure S3 Bucket Naked Domain and Protocol Redirection
- Request a Certificate
In part two of this tutorial (this post), we will:
- Upload a web page
- Create CloudFront distribution
- Point DNS (Route 53) to CloudFront distribution
As a reminder, to show the process in action, I demonstrate how to set up HTTPS with Redirection on S3 using a real world site, www.siliconebeltway.com. In this demonstration, you would simply replace siliconebeltway with your website's domain name.
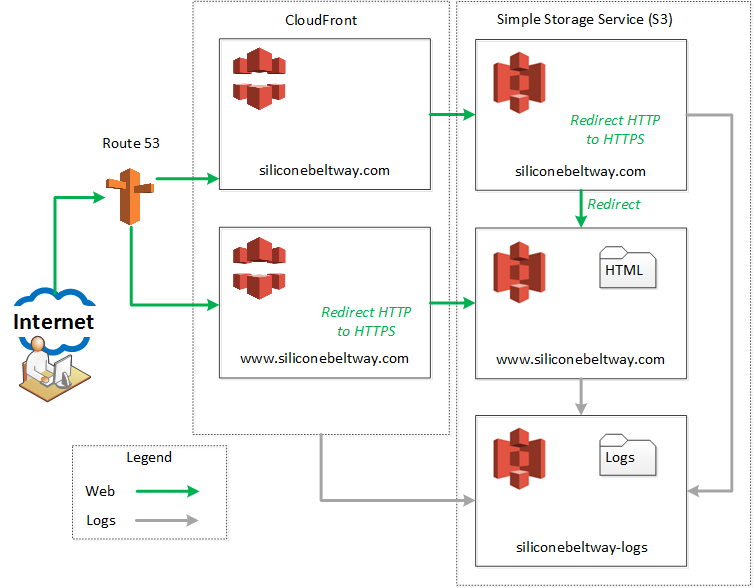
As described in part one, the following diagram depicts our desired Architecture:
Upload a web page
I will use a simple hello world web page to make sure everything works. At this point, you could upload an existing static website. In this example, I assume your site uses index.html for the main page's name.
First, go to the S3 console:
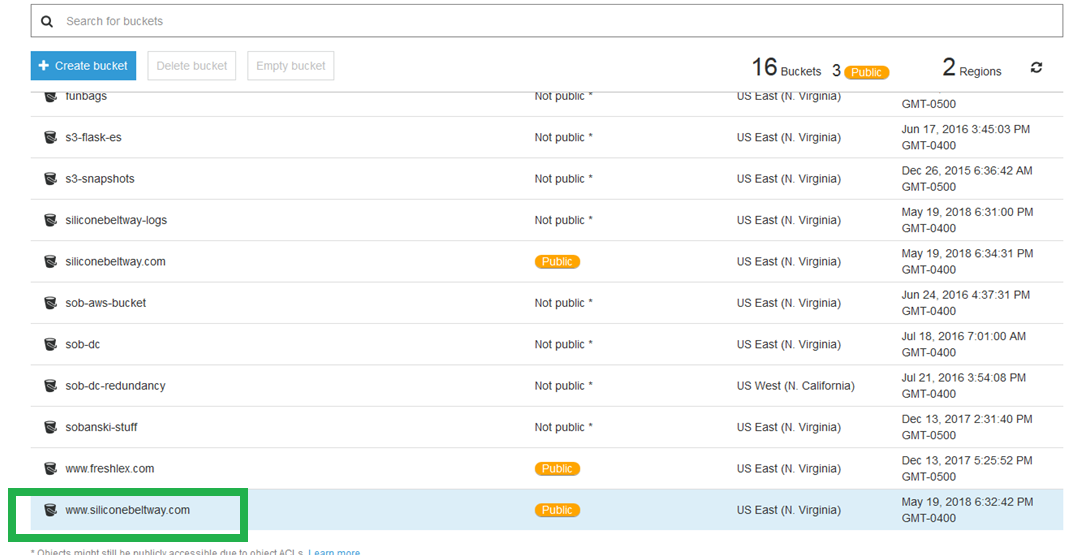
Then, select the bucket that will serve the web pages, the bucket that starts with www. I select www.siliconebeltway.com:
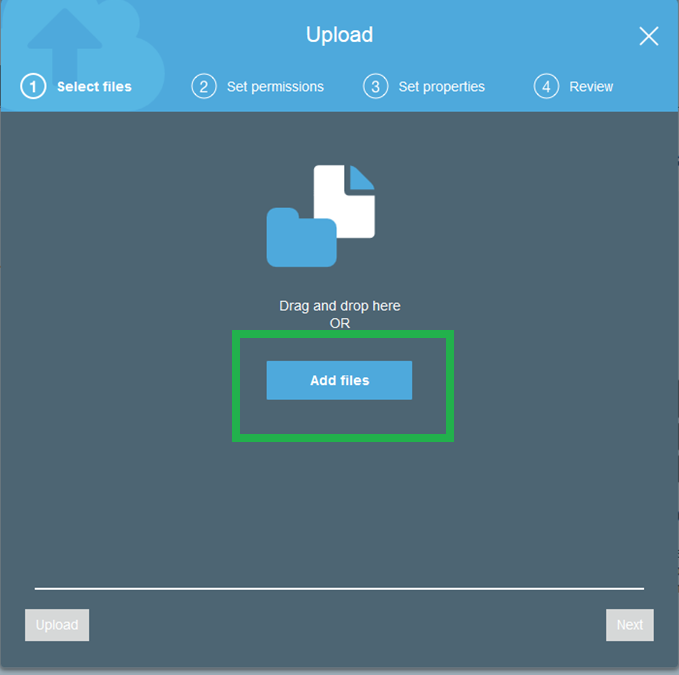
On the "Overview" tab, selct "+ Upload:"

Click the "Add Files" box. I created a document on my Desktop named index.html. I entered the text "Coming Soon!" into the file and saved it. I will upload this index.html file to test the website (once we're finished configuring it).
Click next. Again, for purposes of this demo, ensure that you named the main page index.html.
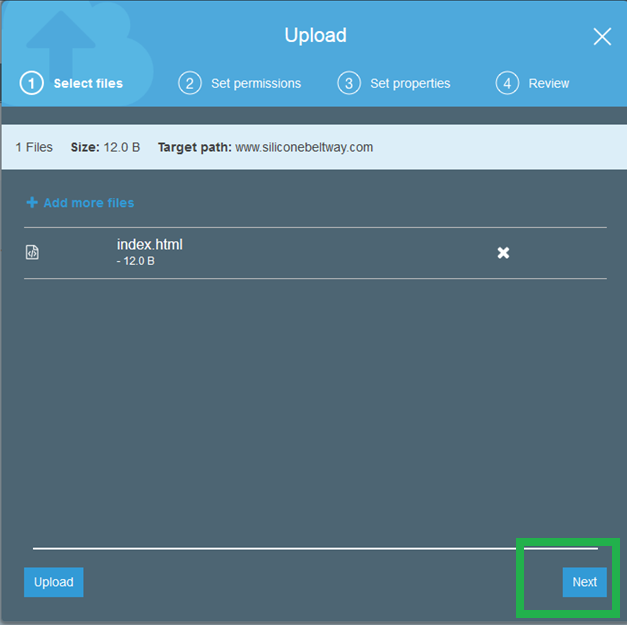
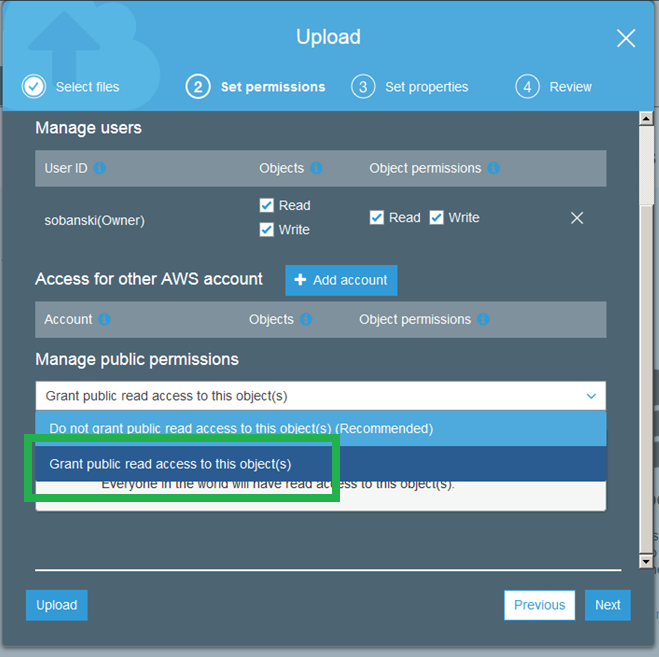
Again, on the 'Upload' screen, ensure that you grant public access.
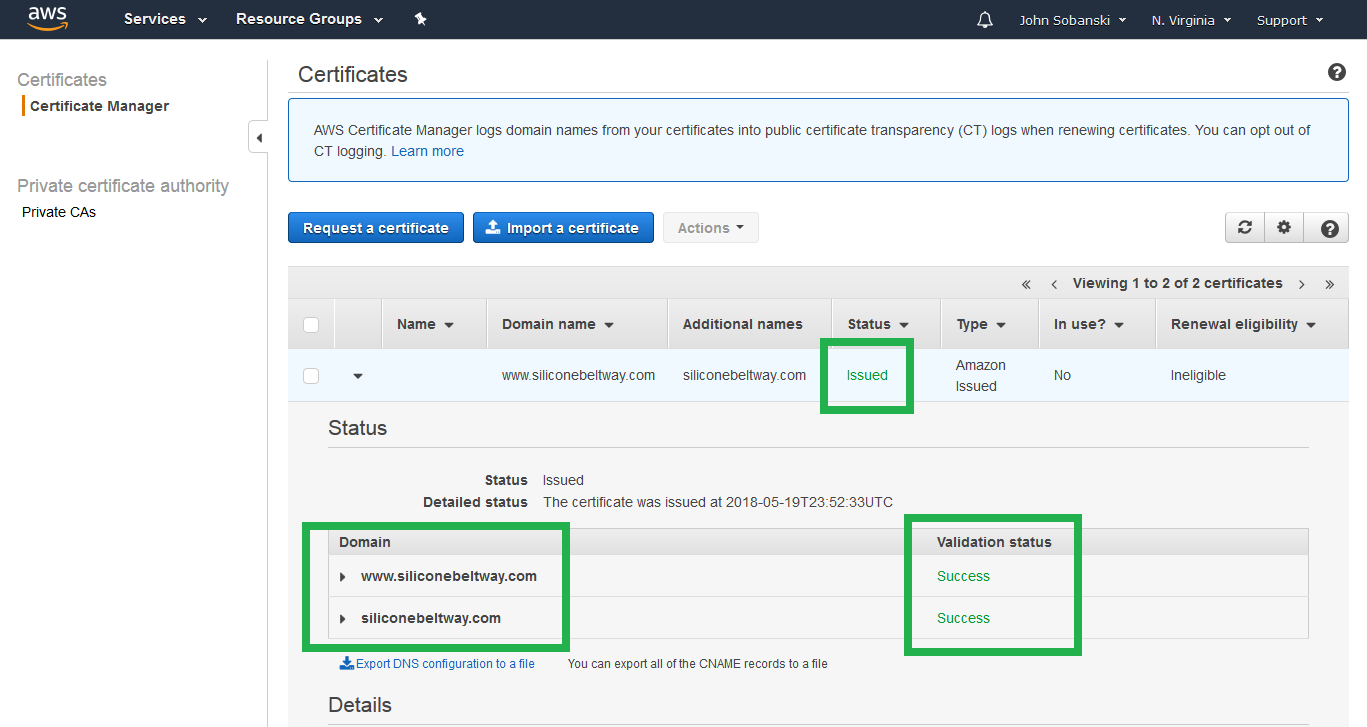
Now that you have a test file uploaded, see if AWS completed your certificate validation.
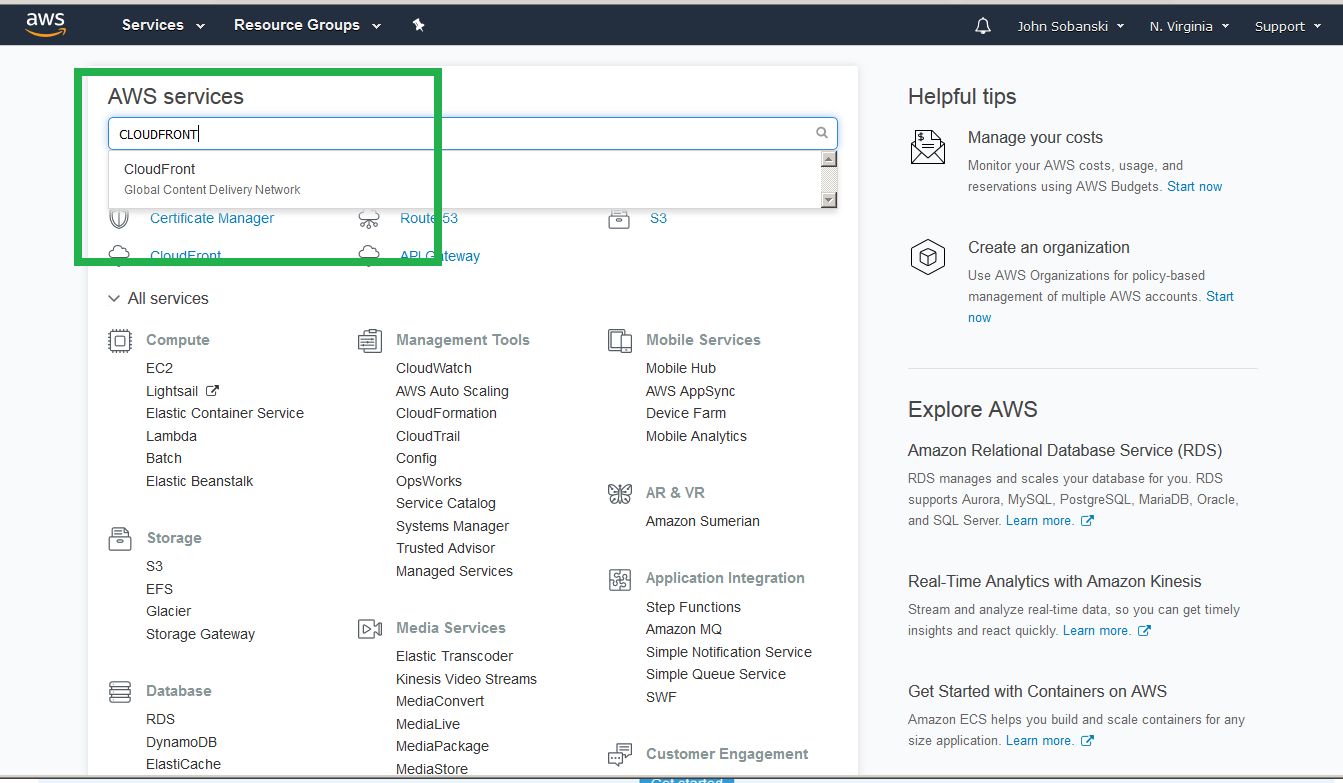
Create CloudFront distribution
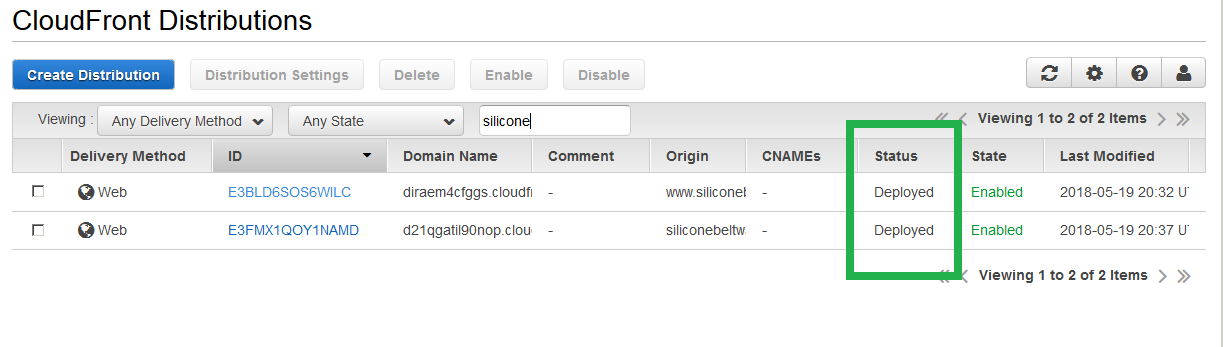
S3 does not natively support HTTPS for websites, so we will use CloudFront. We requested a certificate from ACM to install into CloudFront. Check to see if ACM completed issuing the certificate. It takes about a half of an hour to complete. Go to the Certificate Manager console, click your website, and wait until you see the following success page. Ensure that both the naked and www domain completed.
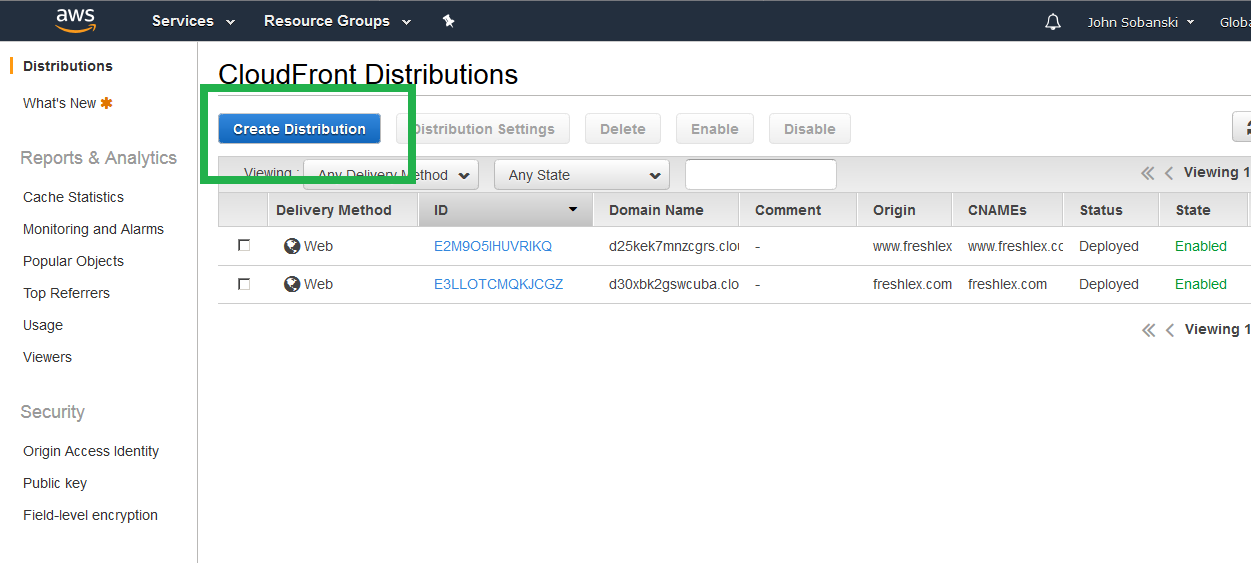
If it completed, open the CloudFront console from the main AWS console.
Select "Create Distribution."
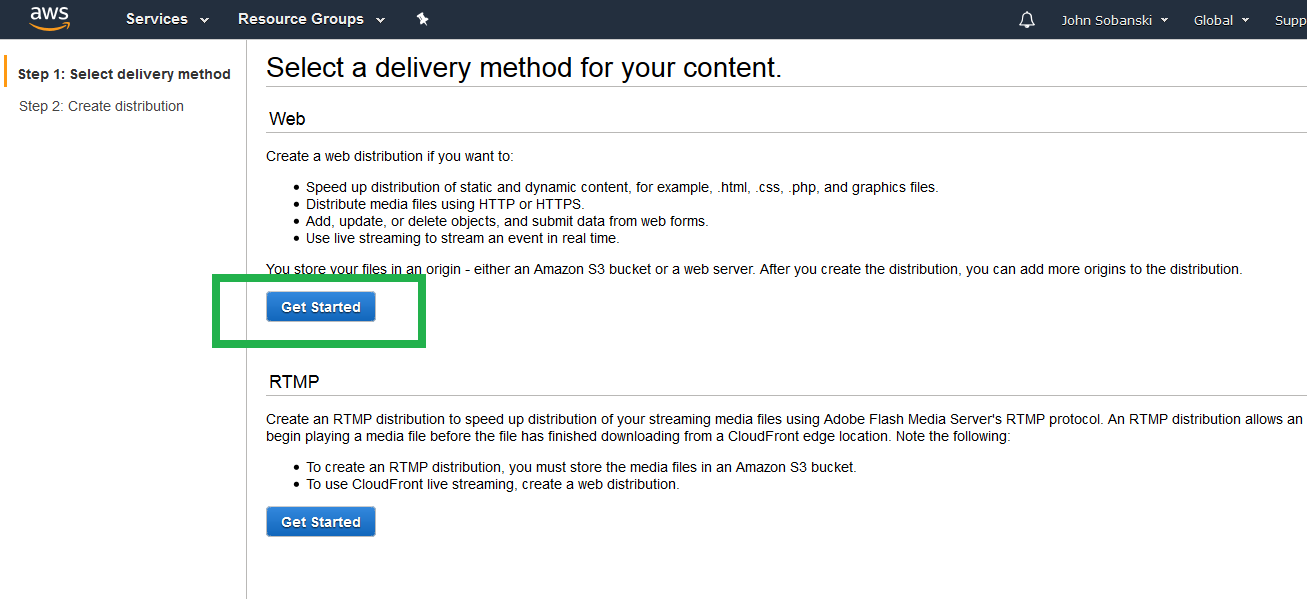
Select "Get Started" under "Web Delivery."
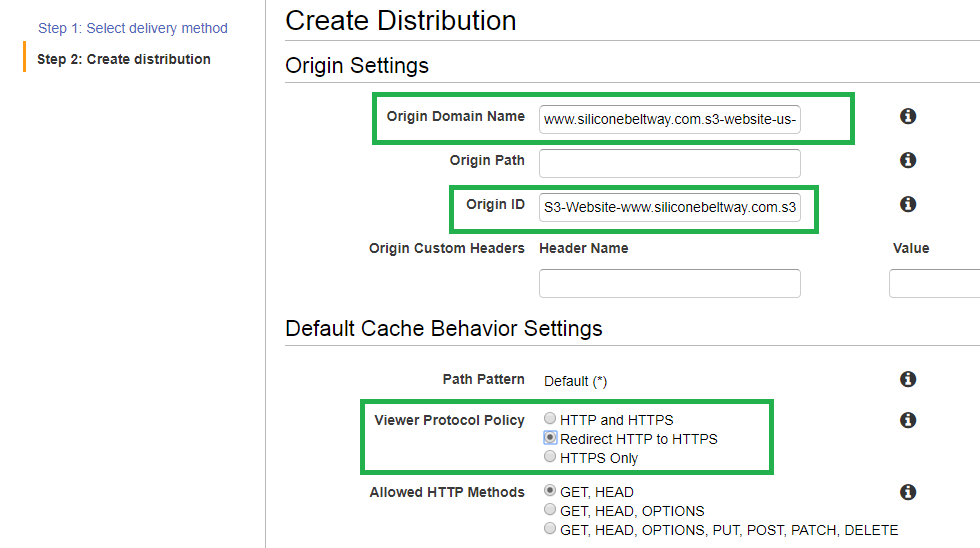
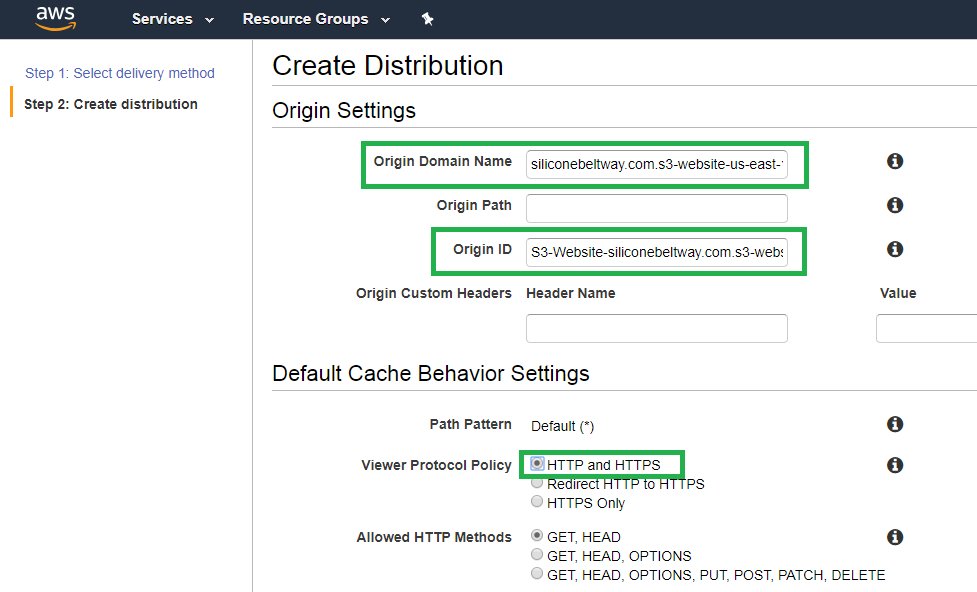
We will first create the www CloudFront distribution. If you look at the architecture diagram at the start at this blog post, you see we enable protocol (HTTP to HTTPS) redirection for the www bucket at the CloudFront distribution. Under "Origin Domain Name," type in the URL for your S3 bucket website. You will see an auto-complete option for the S3 bucket URL, but not the S3 bucket website URL. I, for example, see an auto-complete option for www.siliconebeltway.com.s3.amazonaws.com, but I do not want this. Instead, I type in www.siliconebeltway.com.s3-website-us-east-1.amazonaws.com. Notice, the correct "Origin Domain Name" includes s3-website-us-east-1. Ensure you type in the correct URL for the website and not the bucket, in that this allows CloudFront to load the default page without needing to set a default object. The console will auto-populate the "Orgin-ID" bucket with S3-Website-www.siliconebeltway.com.s3-website-us-east-1.amazonaws.com (contrast this the bucket URL of S3-www.siliconebeltway.com). Once you double check the field, be sure to enable HTTP to HTTPS redirection by selecting that radio button. I highlight the appropriate fields in green below.
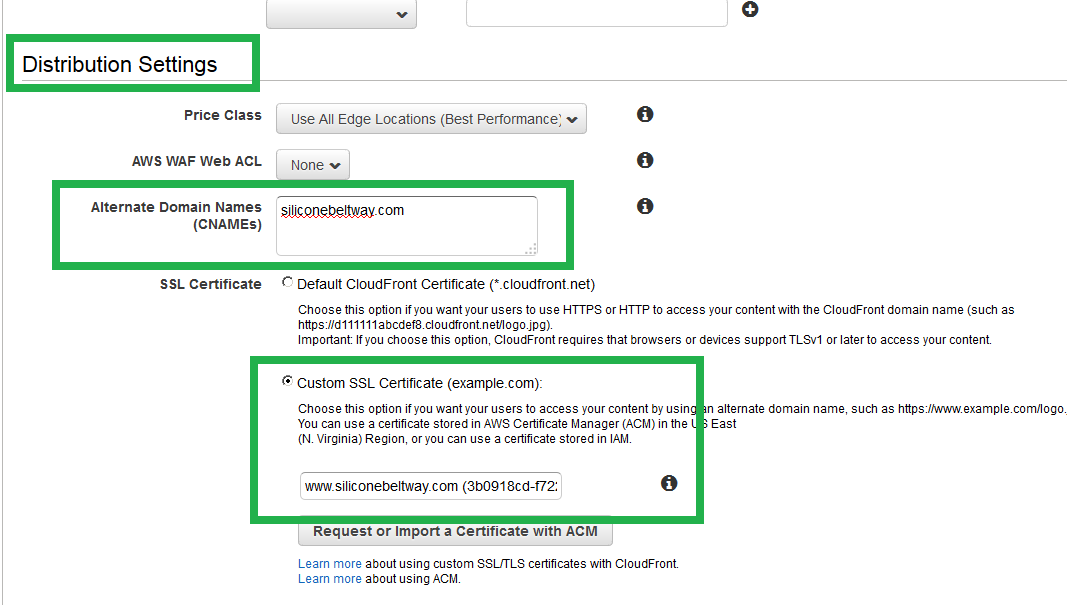
In order to point Route 53 to your cloudfront distribution, you must enter a CNAME under 'Distribution Settings.' Enter www.siliconebeltway.com. You also must select the ACM generated SSL/TLS certificate for your website. Click 'Custom SSL Certificate' and then select the certificate for your domain.

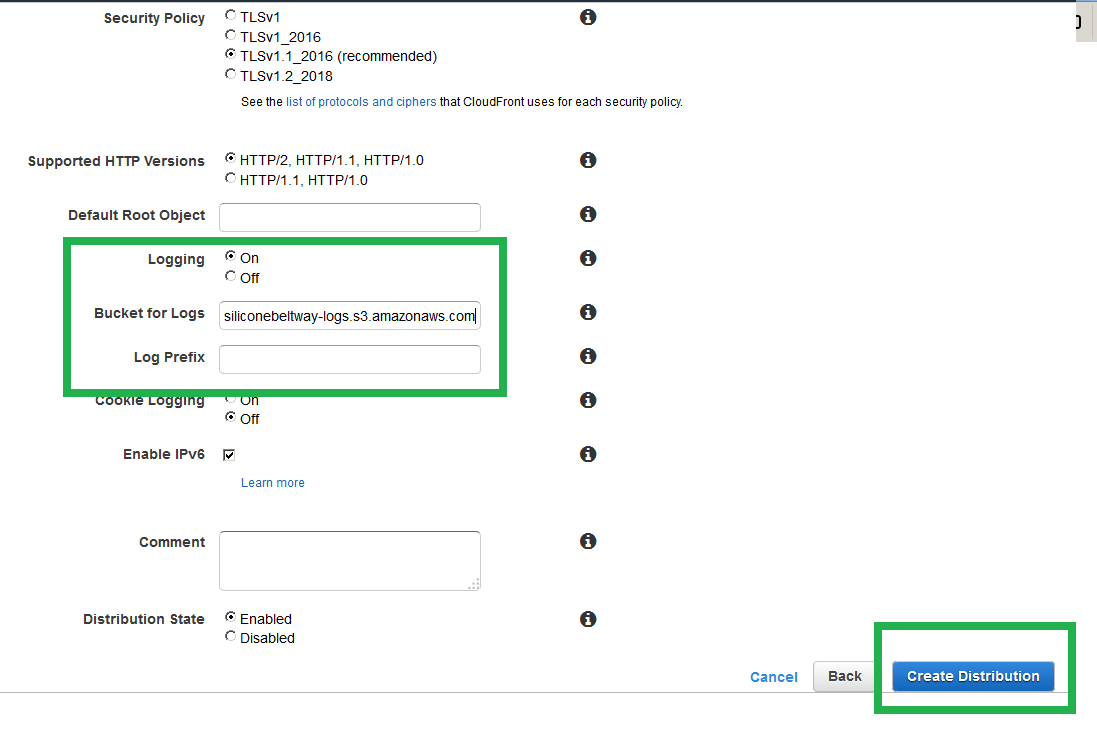
Now enable logging. Turn on logs and select the log bucket you created. These logs will show you who visited your site and their location. I show you one method to view S3 logs in this blog post.
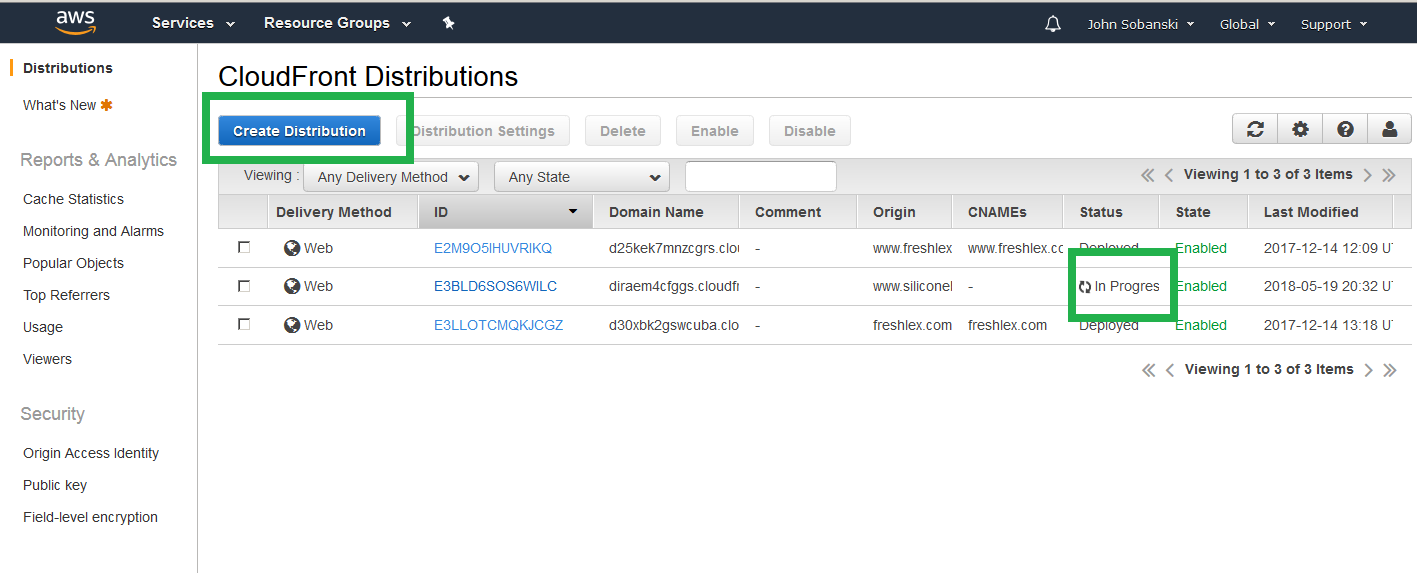
Once you click through all the confirmation menues, you will get back to the CloudFront console. You will see the progress of the www CloudFront distribution deployment. Now, create a distribution for the naked domain. Click "Create Domain."
Again, select the naked S3 bucket under 'Origin Domain Name.' Once more, ignore the auto-complete option of the S3 bucket URL (In my case, siliconebeltway.com.s3.amazonaws.com) and instead type in the S3 bucket website URL. I, for example, type in siliconebeltway.com.s3-website-us-east-1.amazonaws.com . CloudFront will pre-populate "Origin-ID" with S3-Website-siliconebeltway.com.s3-website-us-east-1.amazonaws.com (if it does not, type it in by hand). Under 'Default Cache Behavior Setting --> Viewer Protocol Policy' select 'HTTP and HTTPS.' If you look at the Architecture diagram at the beginning of this post, you will see we execute HTTP to HTTPS protocol redirection at the naked S3 bucket. For that reason, we do not need to redirect here, since that would result in an unecessary redirection.
Once more, set the CNAME (i.e. siliconebeltway.com) and select the SSL/TLS certificate for your naked domain name.
Now enable logging, and point to your log bucket.

Click through all the 'Save' menus and you will be taken back to the main CloudFront console. Wait until the deployment completes. Once it does, you will see the following success screen.
Point DNS (Route 53) to CloudFront distribution
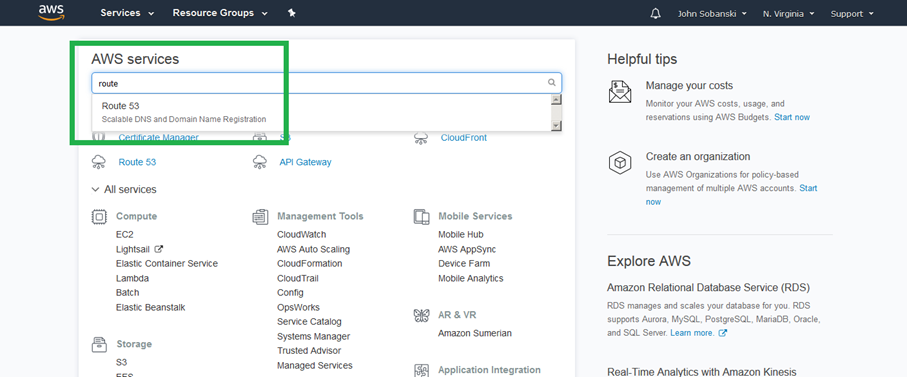
From the main AWS console, open Route 53.
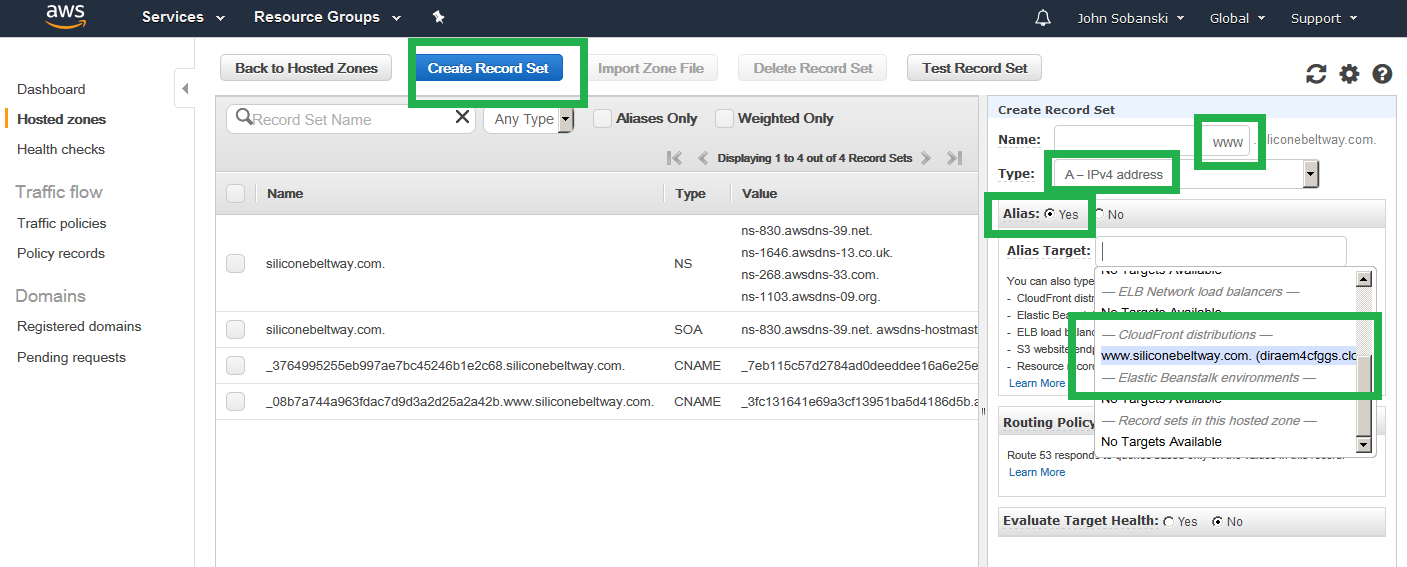
Click on your hosted zone and then click "Create Record Set."
For "Name" enter www. Select "A - IPv4" address under Type. Select "Yes" for Alias, and then select your www CloudFront distribution. I select www.siliconebeltway.com.
Route 53 may bark. If you waited for the distribution deployment to complete, then you can ignore the warning and click save.
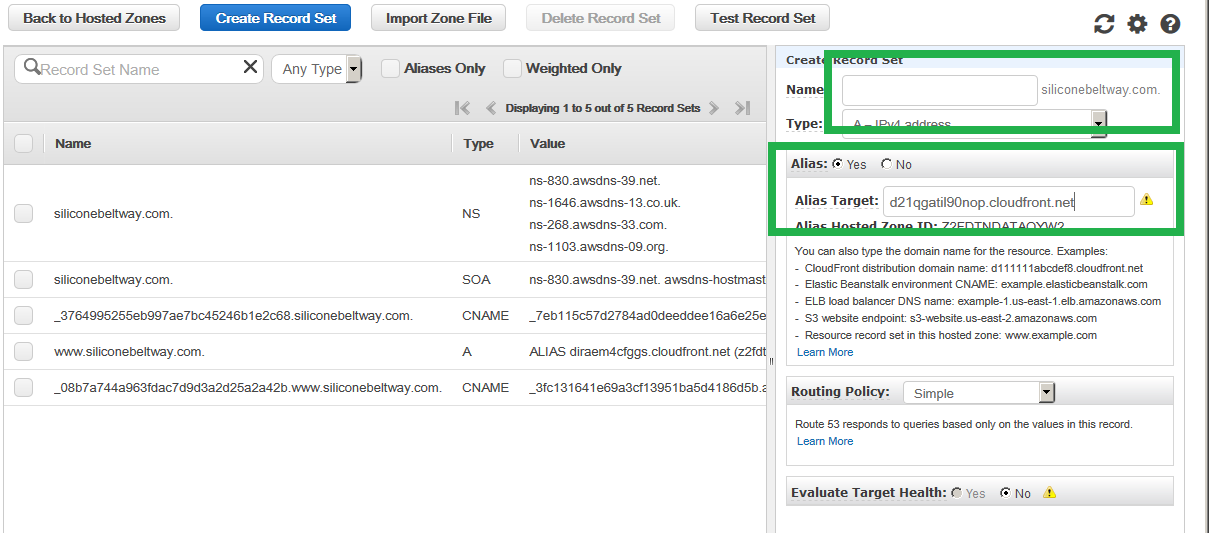
Be sure to repeat the process and create a record for your naked domain (just leave the 'Name' field blank) and be sure to point the Alias to your naked CloudFront distribution.
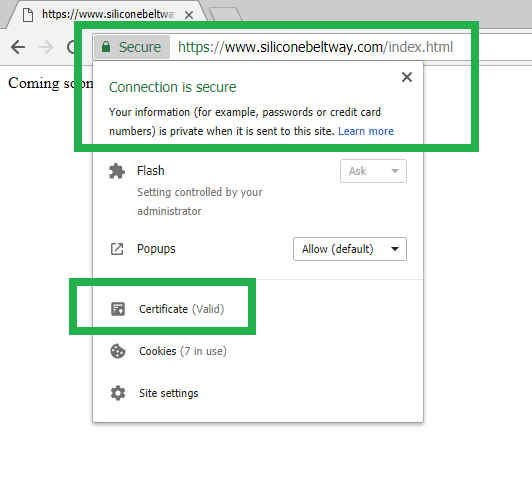
Once Route 53 finishes the updates (five minutes or so), you can go to your website. If you go to any combination of naked or www domain with or without HTTPS the system will redirect to the www domain with HTTPS.
If you click the secure icon (which goes away in July 2018), you will see that Google trusts the site!
Please leave a comment below, and check out some of my other AWS tips and tricks. You may also want to view the access logs of your website.