This HOWTO demonstrates how to secure your Simple Storage Service (S3) hosted website via Hypertext Transfer Protocol Secure (HTTPS). While the S3 Representational State Transfer (REST) enpoint supports native HTTPS, an S3 bucket configured to serve web pages does not. In addition to demonstrating how to enable HTTPS, this blog demonstrates how to configure both protocol and naked domain redirection. Protocol redirection ensures security, and naked domain redirection (e.g. yoursite.com to www.yoursite.com) improves Search Engine Optimization.
Why use HTTPS?
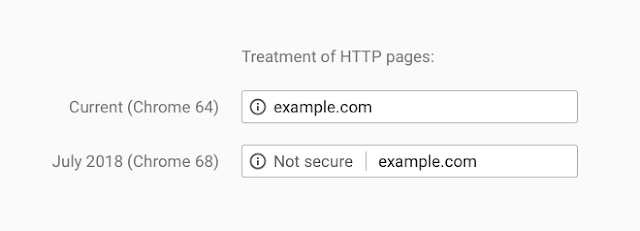
Starting July 2018, Google will mark all vanilla HTTP sites as "not secure." If you do not enable HTTPS, visitors will see a garish "Not Secure" to the left of your website name. That scarlet letter could possibly cause potential readers or customers to immediately close their tab (bounce).
In addition, most sites rely on Google to drive traffic. Google includes the presence of HTTPS in their secret algorithm that calculates your site's page rank. In other words, enabling HTTPS will boost your score, and as a result will drive more readers and customers to your site.
Outline
In part one (this post) of this tutorial, we will execute the following:
- Configure DNS (Route 53)
- Create Log, WWW and Naked Domain S3 Buckets
- Configure S3 Bucket Naked Domain and Protocol Redirection
- Request a Certificate
In part two of this tutorial, we will:
- Upload a web page
- Create CloudFront distribution
- Point DNS (Route 53) to CloudFront distribution
To show the process in action, I demonstrate how to set up HTTPS with Redirection on S3 using a real world site, www.siliconebeltway.com. In this demonstration, you would simply replace siliconebeltway with your website's domain name.
At the end of this demonstration, your architecture will look like the following diagram:
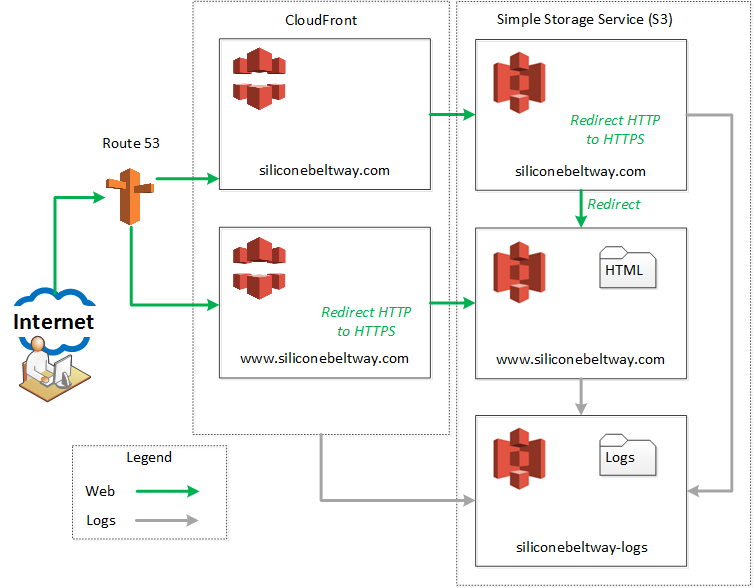
As shown in the diagram above, you will create a CloudFront distribution and S3 bucket pair for both your naked domain (e.g. siliconebeltway.com) and your www domain (e.g. www.siliconebeltway.com). Route 53 will point users to either the naked or www CloudFront distribution depending on which one they request. The naked CloudFront distribution sends the session to the naked S3 bucket, which immediately redirects the session to the authoritative www bucket. If the client uses the HTTP protocol, the naked S3 bucket redirects them to use the HTTPS protocol. Alternatively, if the user attempts to go to http://www.siliconebeltway.com (e.g. including www) via HTTP, the protocol redirection occurs at the www CloudFront distribution. It's a little confusing, but if you follow the green arrows on the diagram, you'll see all requests are redirected to www.siliconebeltway.com using HTTPS.
Configure DNS
In order to use HTTPS, you must have a Secure Socket Layer (SSL)/ Transport Layer Security (TLS) certificate installed on your website. In order for Chrome (and all browsers, for that matter) to trust your certificate, it must be signed by a trusted Certificate Authority. Normally, this process is very tedious and frustrating. If, however, you configure AWS to be the Start of Authority (SOA) (e.g. they manage DNS) for your website's domain name, life becomes very, very easy. If Route 53 manages your domain name, then you can use Certificate Manager to generate a certificate and install it on your website. I strongly recommend, therefore, that you use Route 53 to provide DNS for your website.
If you already use Route 53 for your domain name, you can skip this section. I registered siliconebeltway.com with GoDaddy, so I will now show you how to point GoDaddy to use Route 53.
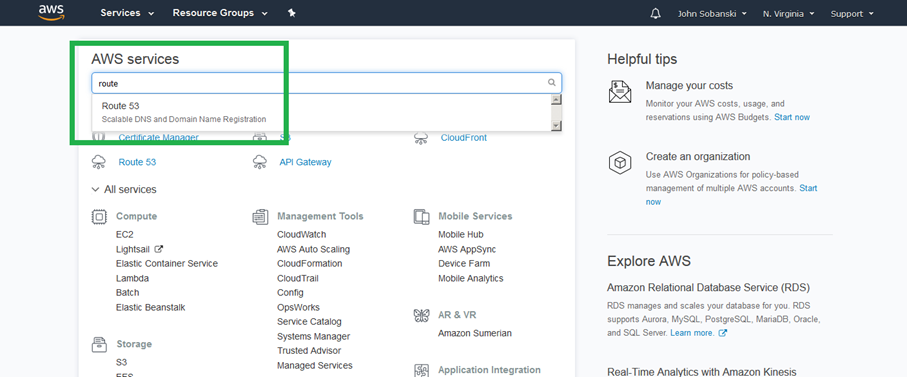
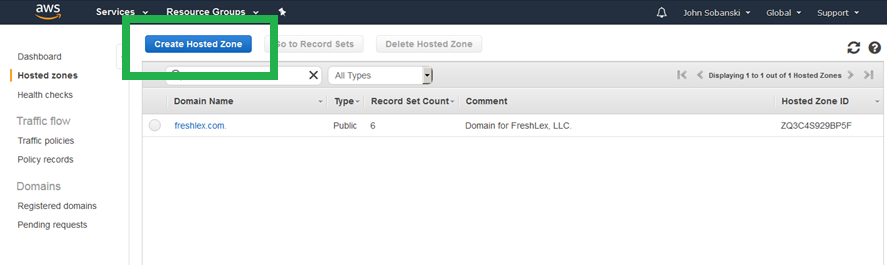
First, find and select the Route 53 Console.
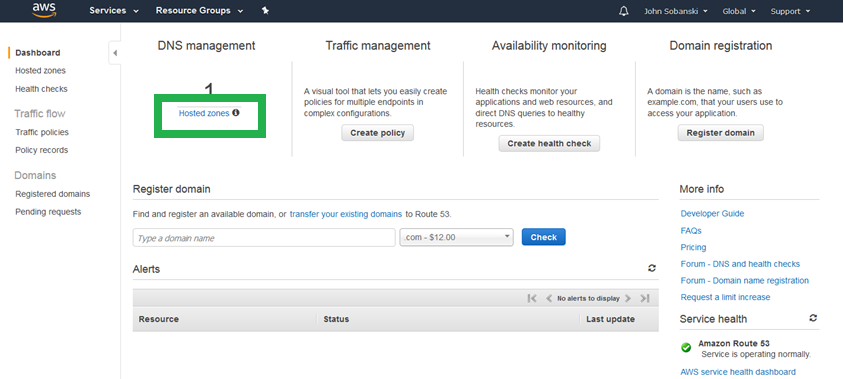
Click through the splash page and click "Hosted Zones."
Click "Create Hosted Zone."
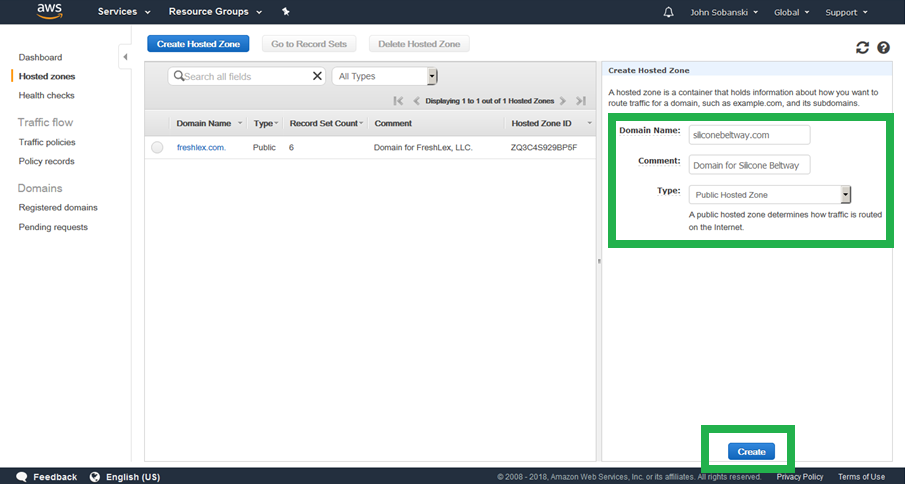
On the right hand box, enter your site's Domain Name and an optional comment. I entered "siliconebeltway.com" as the Domain Name. Be sure to select "Public Hosted Zone"
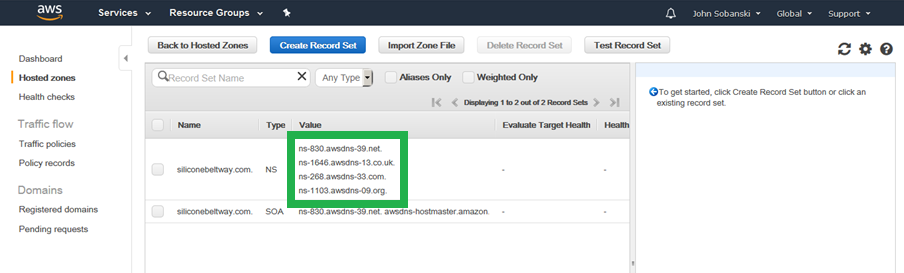
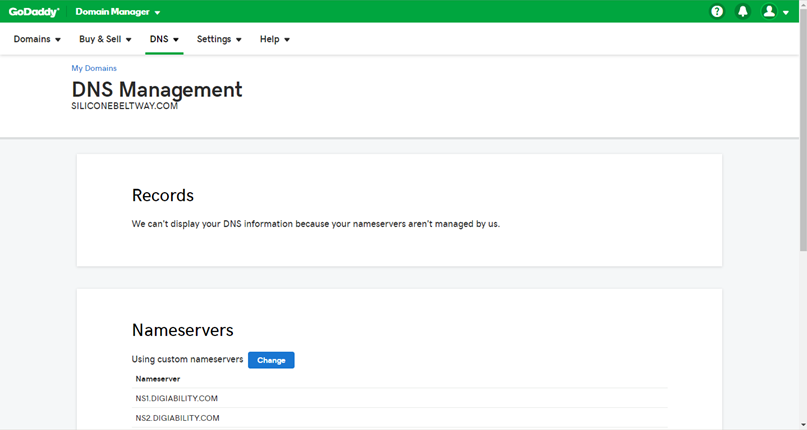
Find the AWS name servers associated with your domain. I outlined mine in green. Write down these name servers, since you will need to enter them in GoDaddy. My name servers may be different than yours.
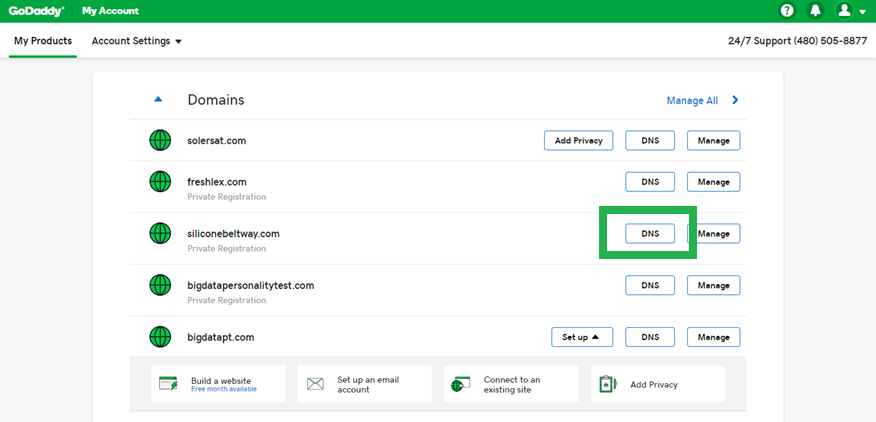
Now, log into GoDaddy, and select the DNS button for your domain. If you use a different registrar, then the process may be a little different. The idea is to point your domain to the AWS name servers you copied down in the step above.
Under the Nameservers box for your domain, you will see a button labeled "Change." Click that button.
Now enter the four name servers you copied from AWS.
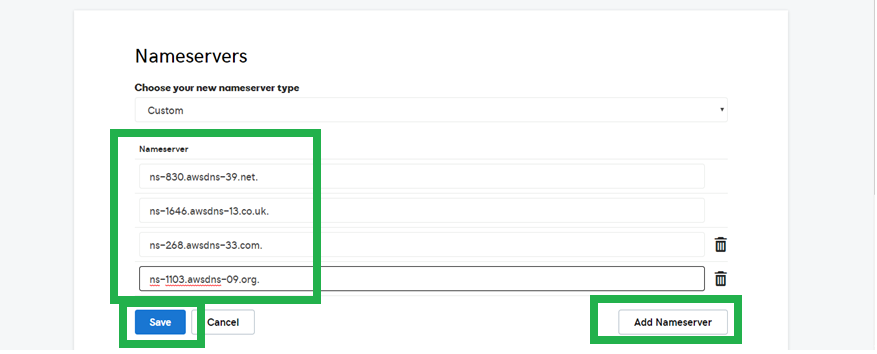
Oops! GoDaddy does not like the trailing "dot." Delete the Dots and click save.

It may take GoDaddy (or your provider) a few minutes to update your domain's name server.
Create Log, WWW and Naked Domain S3 Buckets
Create the Logs Bucket
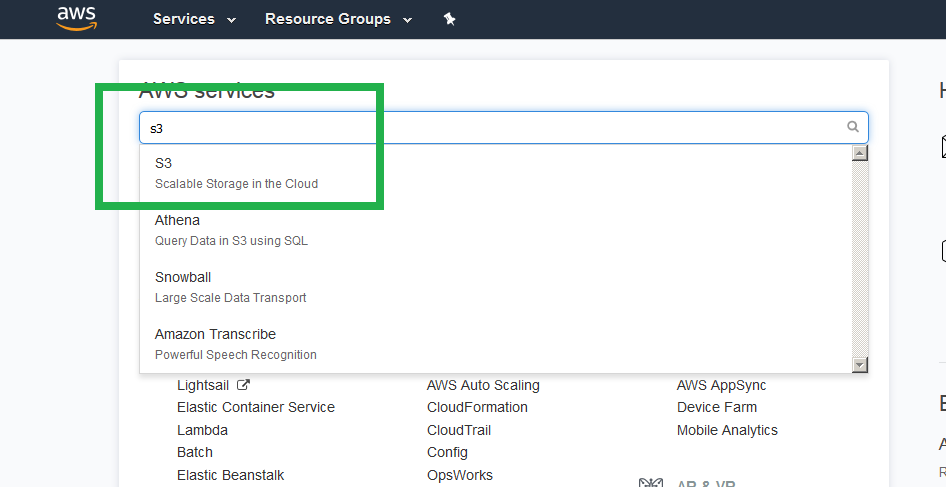
Find and select the S3 console.
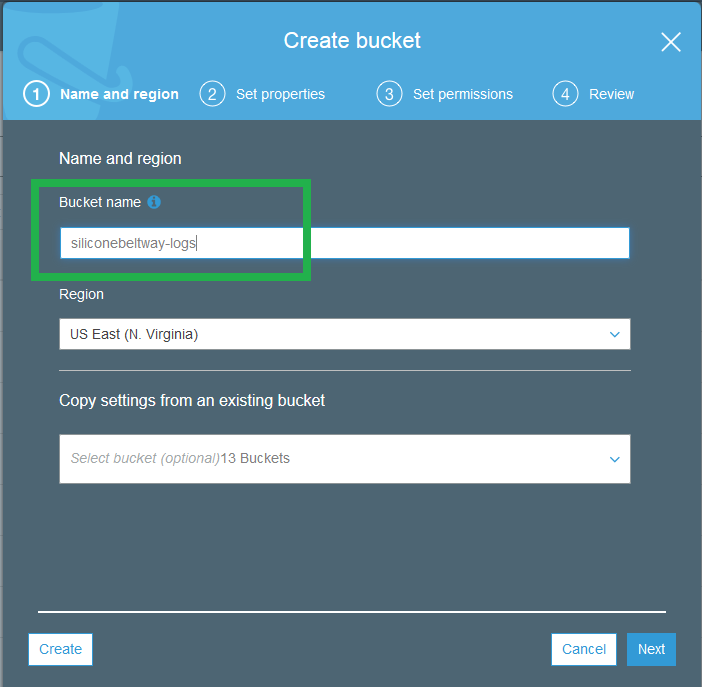
Click "+ Create Bucket"

We first create the logs bucket. With a logs bucket, you will be able to track who hits your website, to include their location, IP address, etc. I name my logs bucket "siliconebeltway-logs."
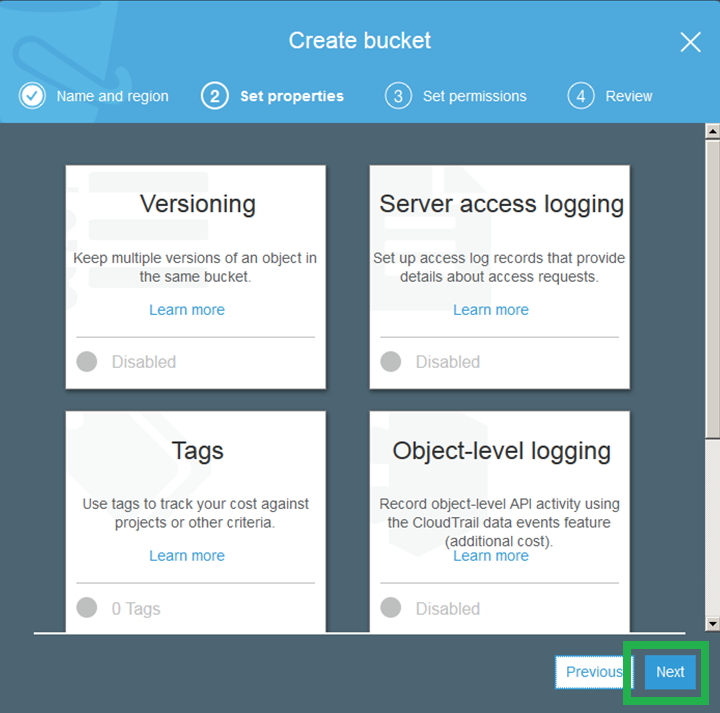
Click next to skip the "Versioning/ Tags/ Server access logging" screen.
Since this is your logs bucket, you will give S3 permission to use it.

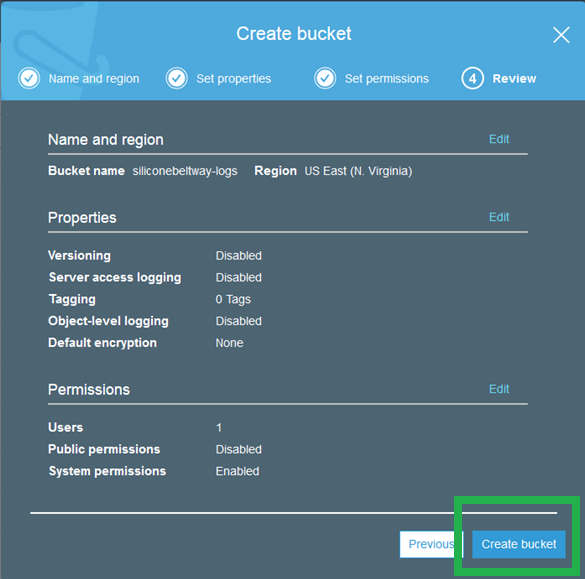
Review and click "Create Bucket."
Create the WWW bucket
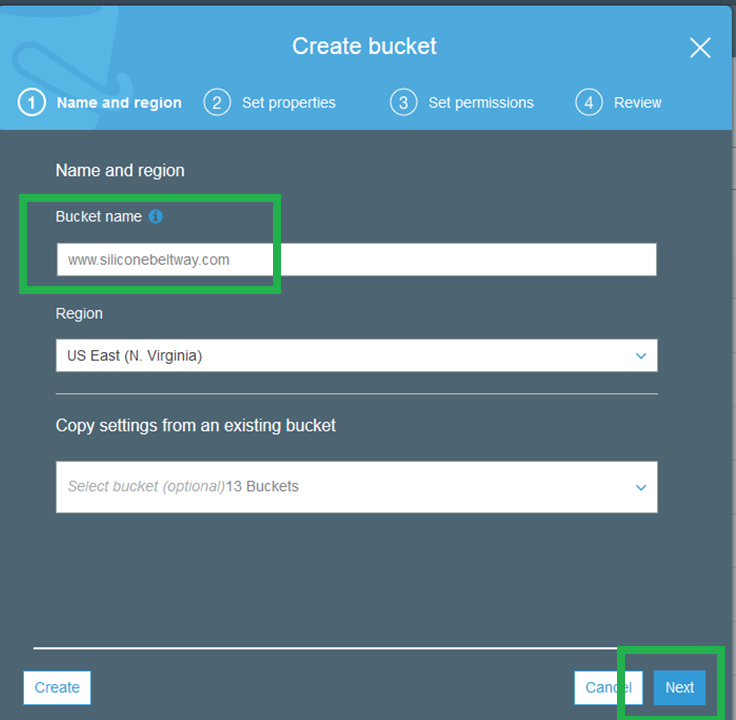
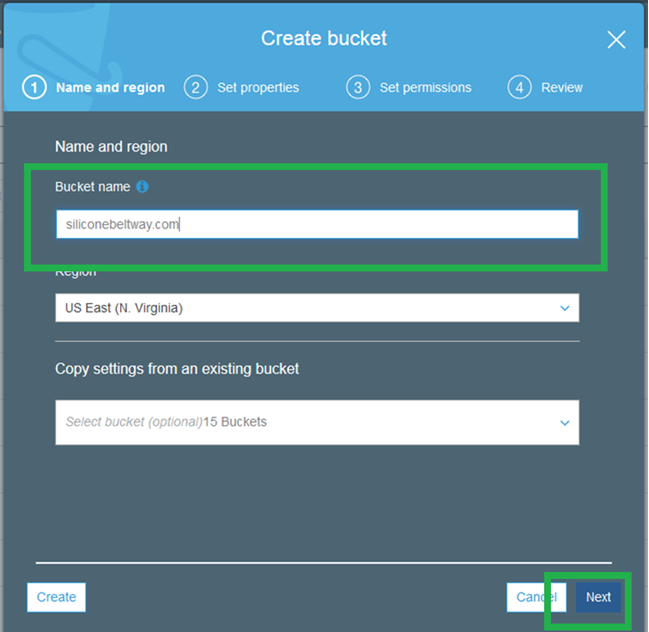
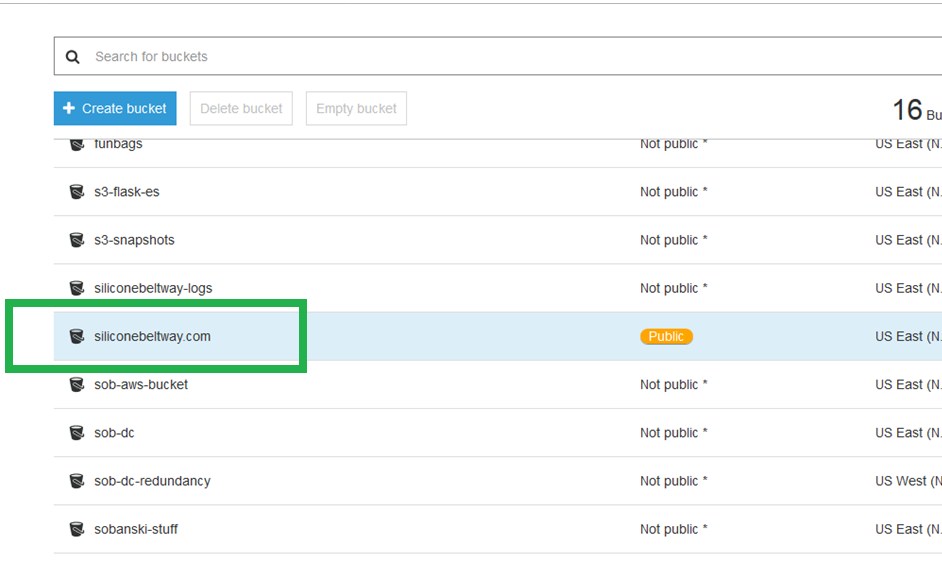
Go back to the S3 console and click "+ Create" bucket once more. On the first screen, enter your domain name as the bucket name. Be sure to include www. I name my bucket www.siliconebeltway.com. Click "Next."
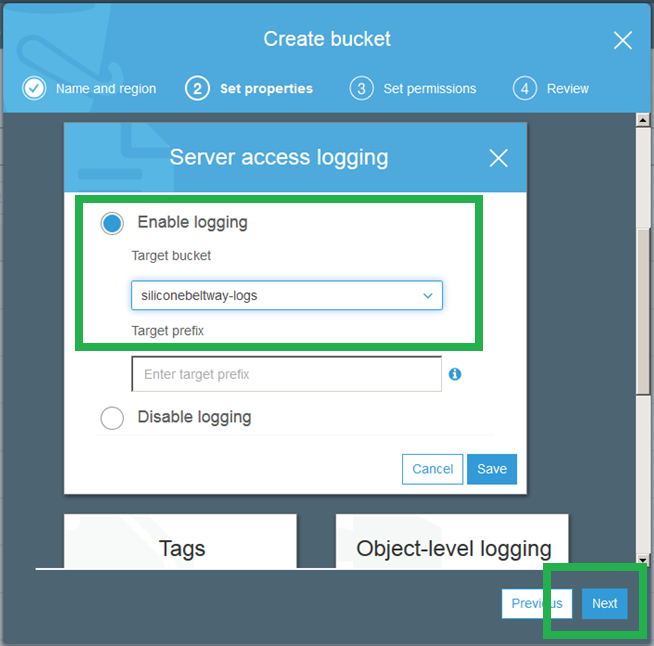
On the second screen, click "Server Access Logging."
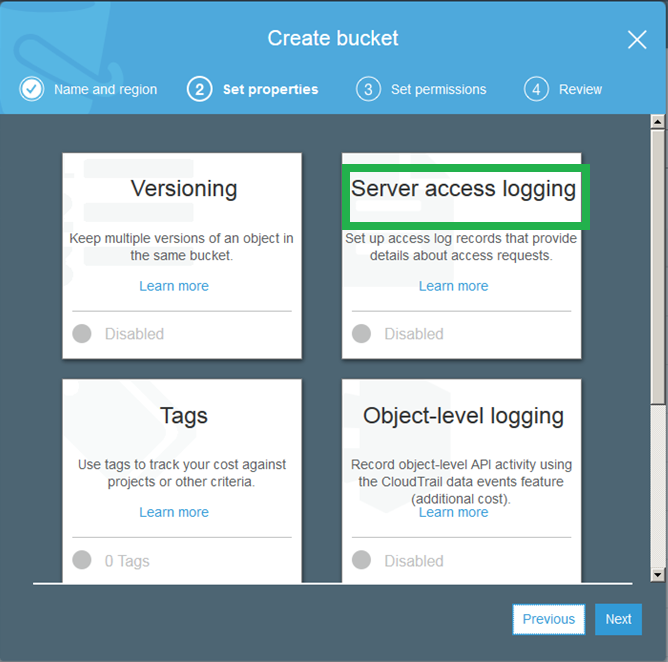
Click "Enable Logging" and enter the name of the logs bucket you just created. I named my logs bucket "siliconebeltway-logs." Save and move to step three.
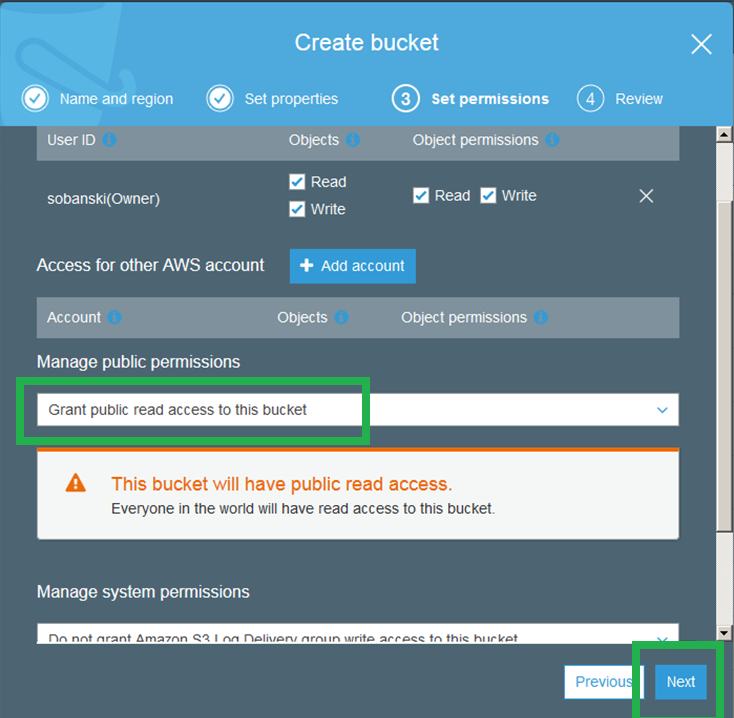
Grant public read access to this bucket (since it is for a public website).
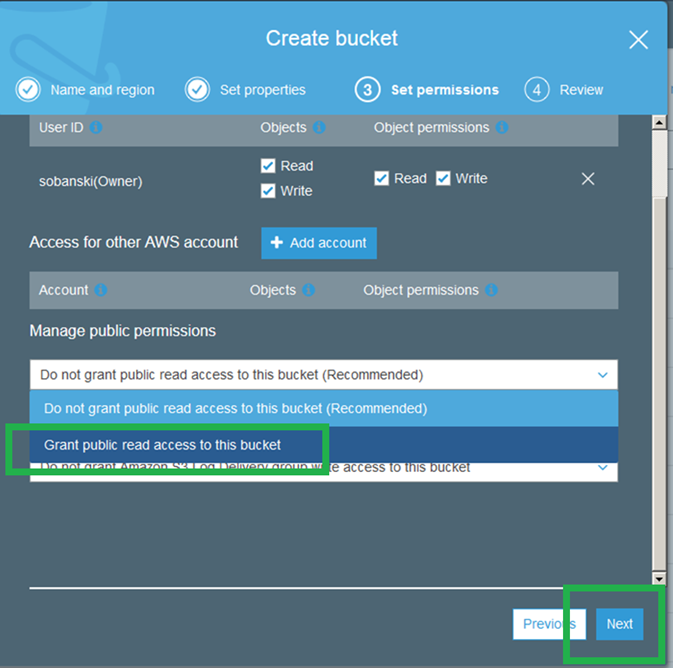
Click through to the Review tab and then create the bucket.
Create Naked Domain Bucket.
On the S3 console, click "+ Create Bucket" once more.
Enter the name of your naked domain (without the www). I name my bucket "siliconebeltway.com." Click next.
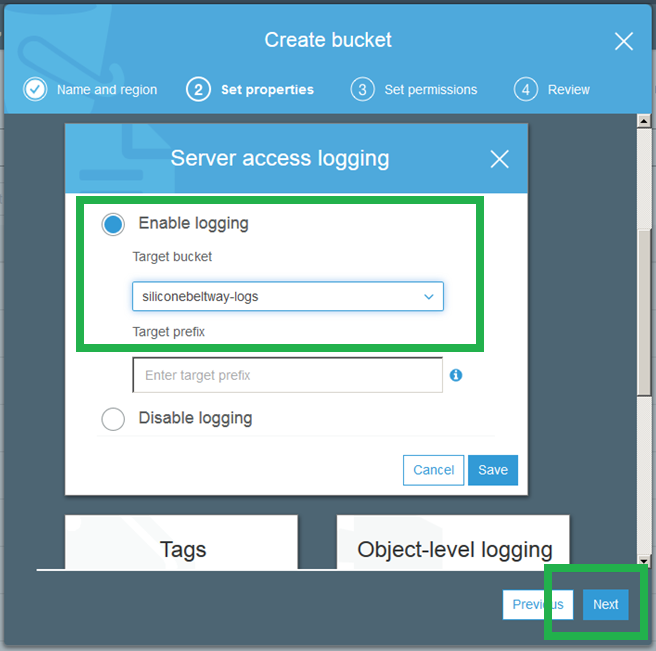
On step two, click "Server Access Logging," enable logging, and then enter the name of your log bucket. Save and move to step 3.
Grant the public read access to the bucket.
Click through to step four and create the bucket.
Configure S3 Bucket Naked Domain and Protocol Redirection
Configure your WWW bucket to host a website
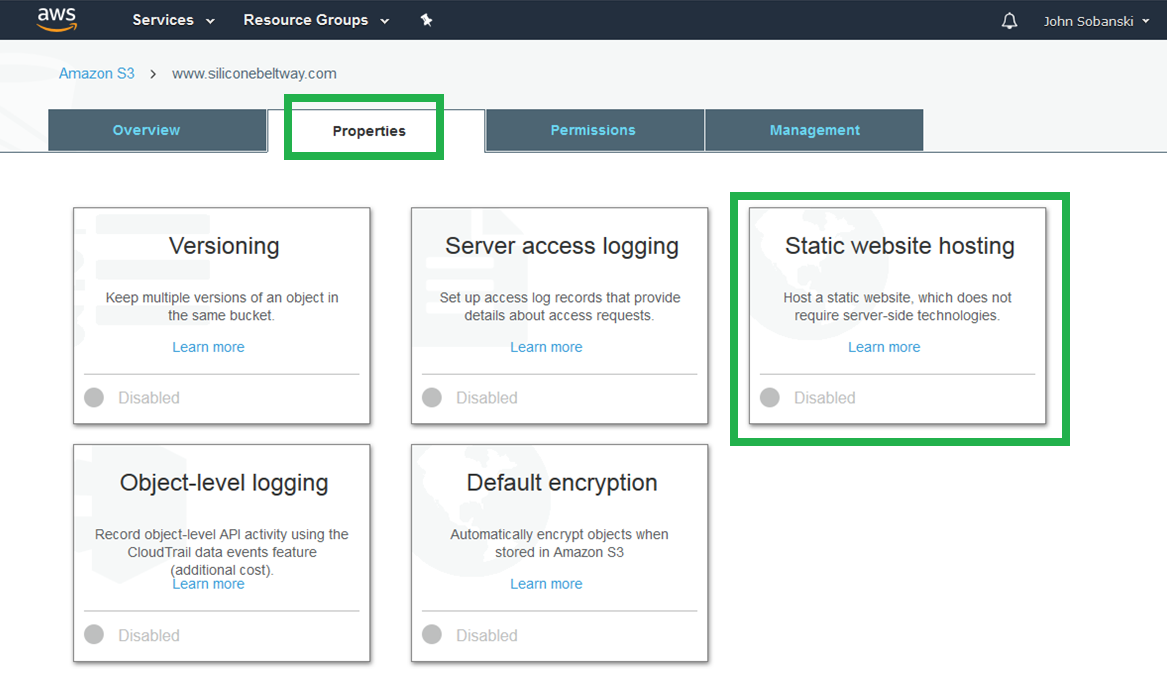
At the S3 console, select your www bucket.
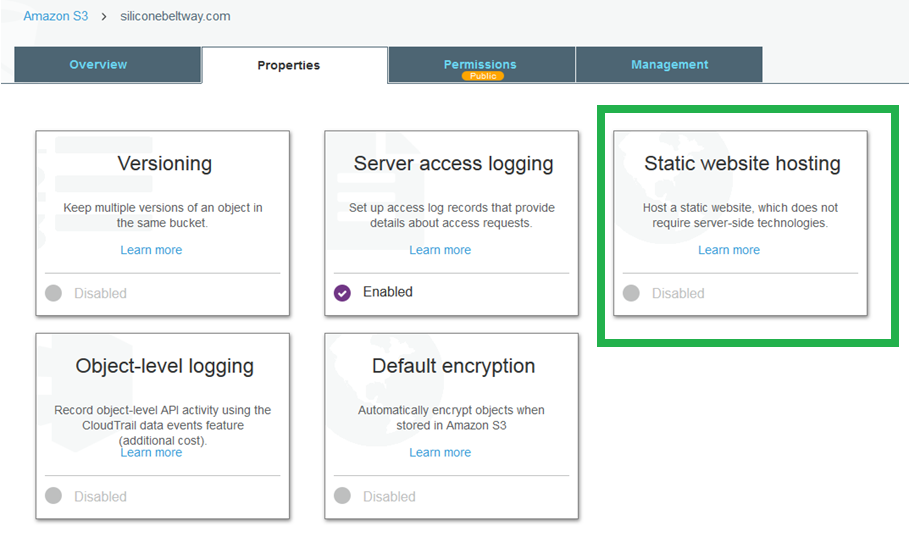
Click the "Properties" tab, and then "Static website hosting."
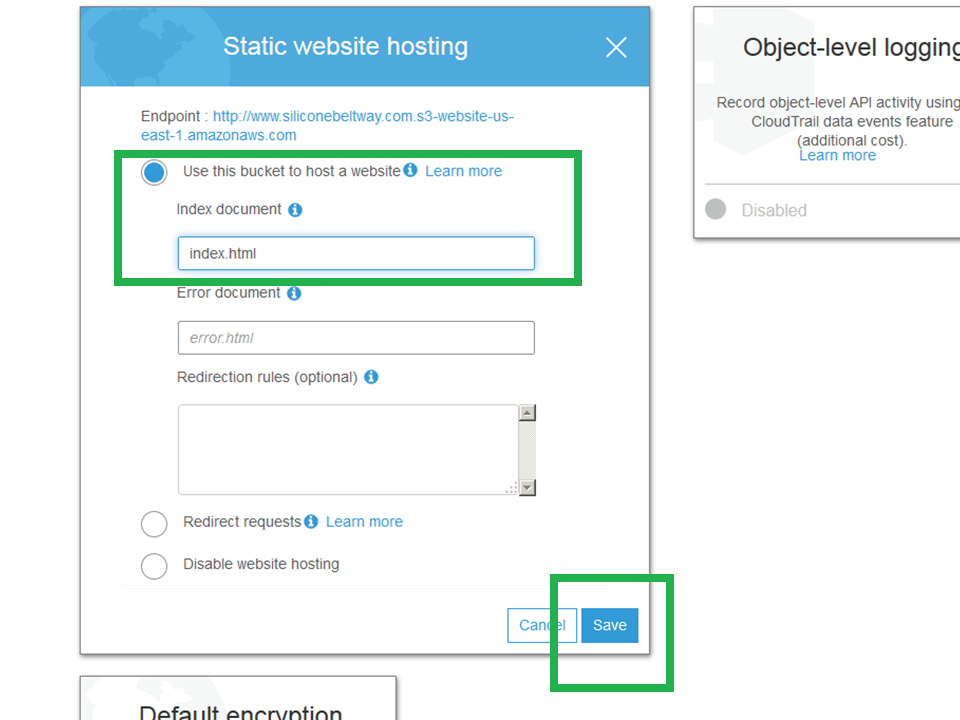
The "Static website hosting" box expands. Click "Use this bucket to host a website" and then enter the name of your website's home page. If you are unsure, just enter index.html for now. Click "Save."
Now click the "Permissions" tab. You will see the bucket policy editor.
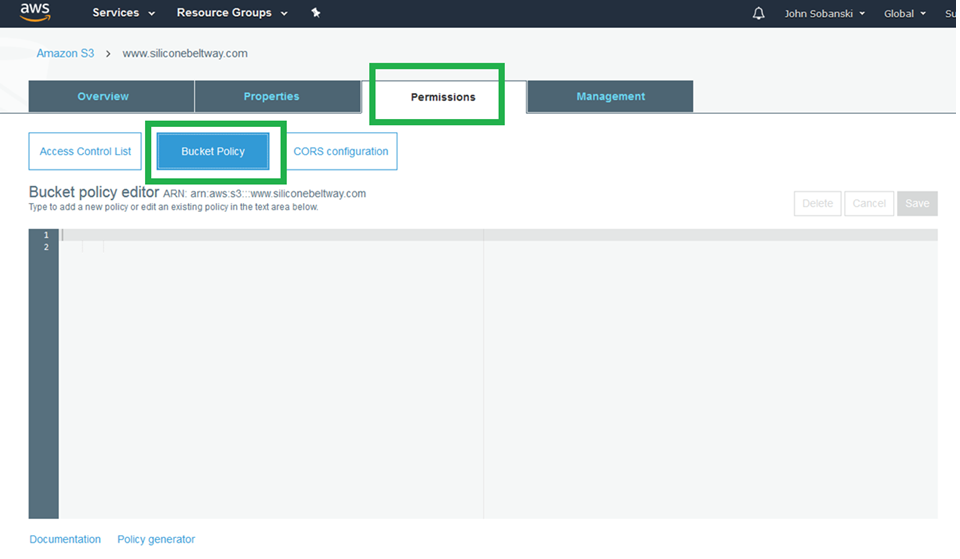
Enter the following policy into the editor. Be sure to change www.siliconebeltway.com to the name of your website. Include the www!
{
    "Version": "2012-10-17",
    "Statement": [
        {
            "Sid": "PublicReadGetObject",
            "Effect": "Allow",
            "Principal": "*",
            "Action": "s3:GetObject",
            "Resource": "arn:aws:s3:::www.siliconebeltway.com/*"
        }
    ]
}
Click "Save."
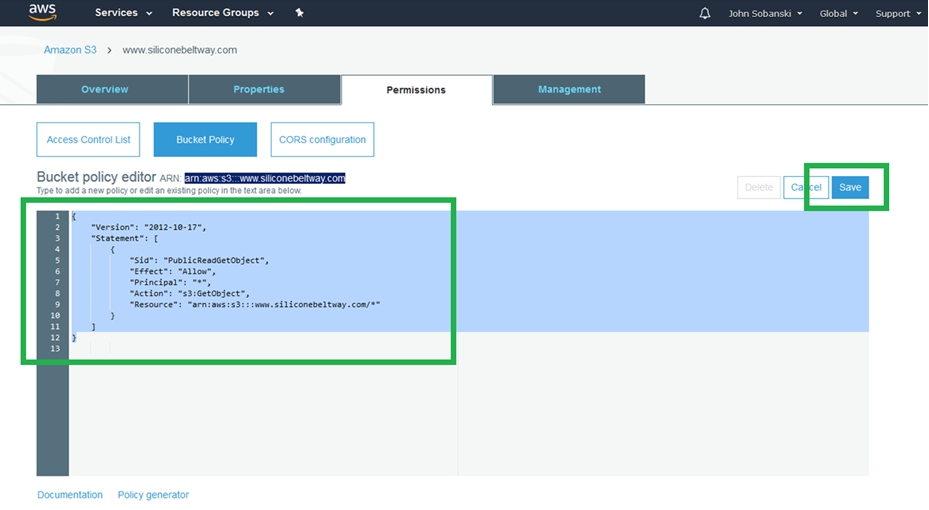
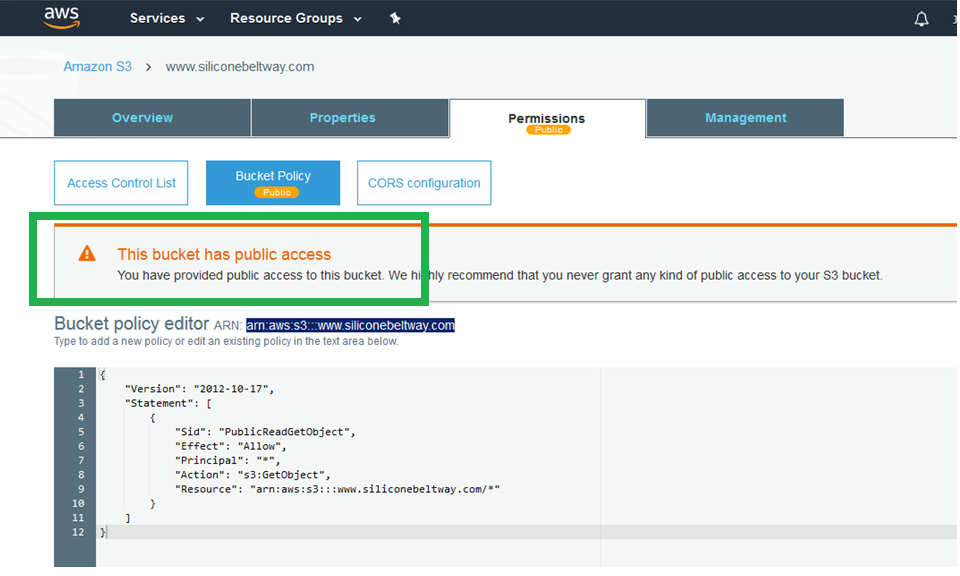
S3 barks. You can ignore it. You want the public to GetObject, i.e. see your website.
Save your changes.
Configure your naked domain bucket to redirect
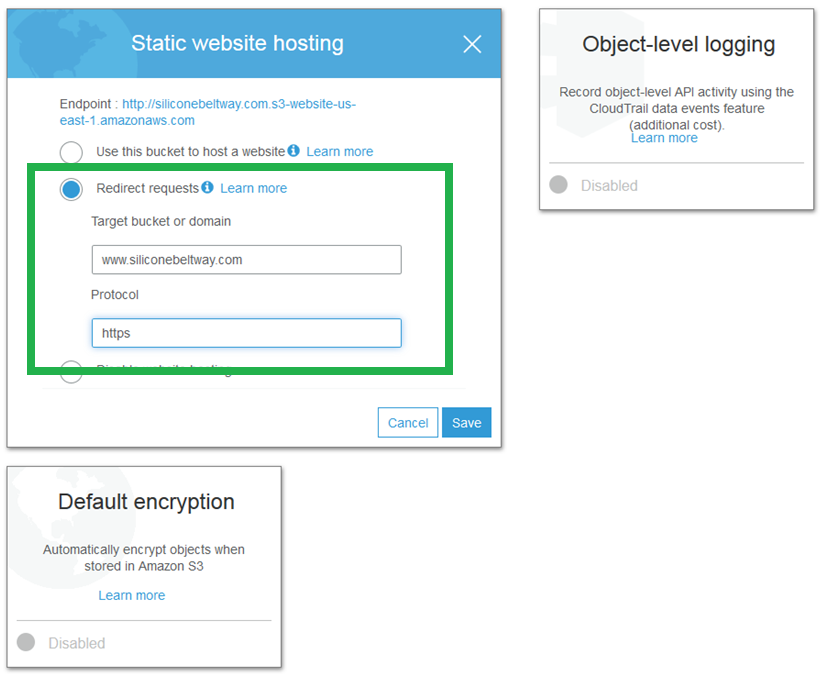
At the S3 console, select your naked domain bucket, the one without the www.
Click "Properties" and then "Static website hosting."
This bucket exists for two reasons: (1) redirect naked domain requests to the www bucket and (2) redirect HTTP to HTTPS. This bucket will not host any web pages. Click "Redirect requests" and enter the target bucket (www.siliconebeltway.com) and under protocol, type https.
Save all of your changes.
Request a Certificate
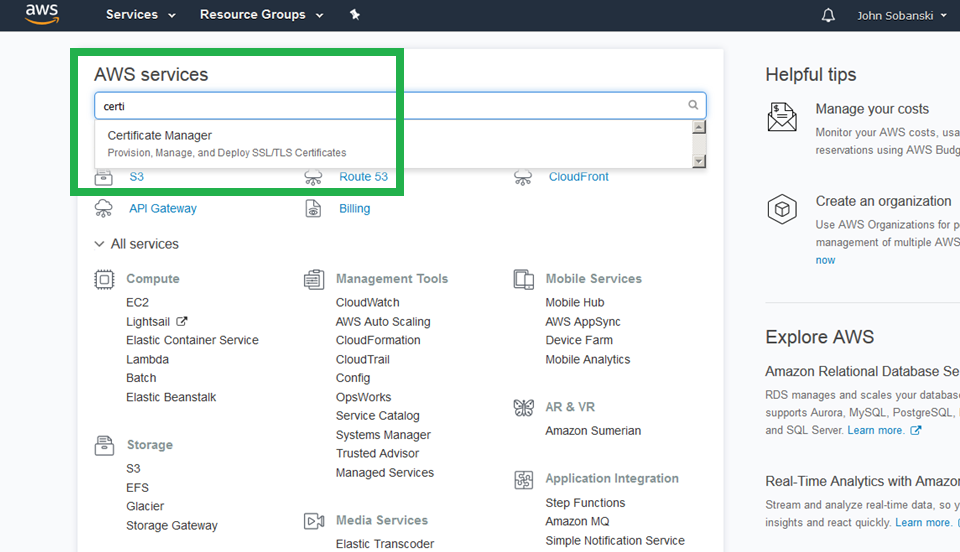
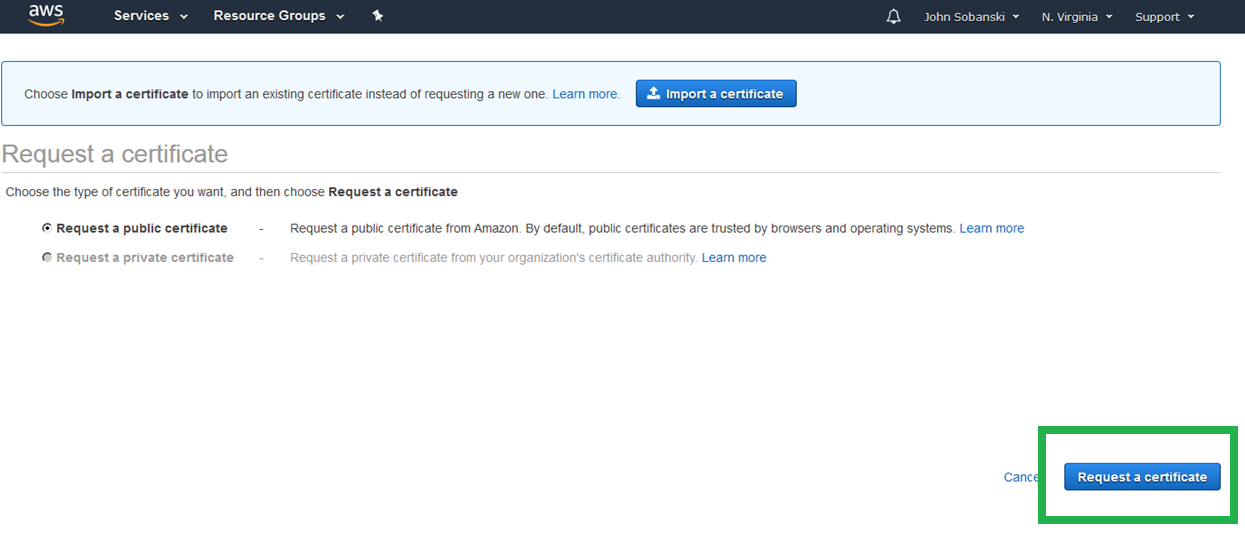
At the main AWS console screen, search for and select "Certificate Manager."
Click through the splash screen and select "Request a Certificate."
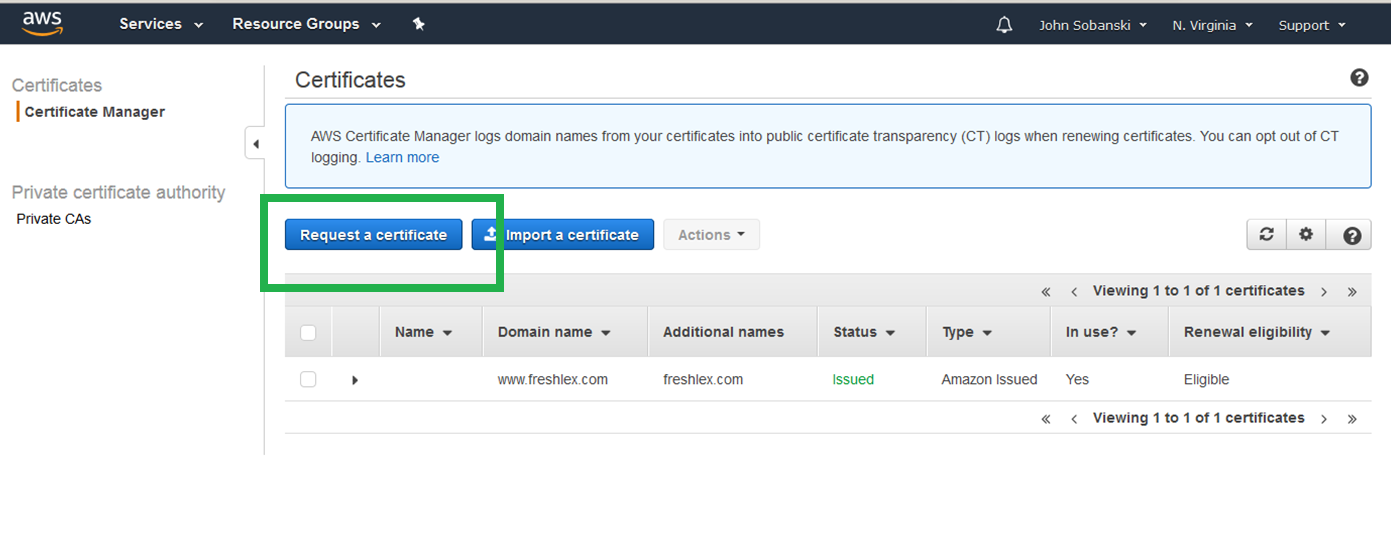
Select "Request Public Certificate" and click "Request a certificate" once more.
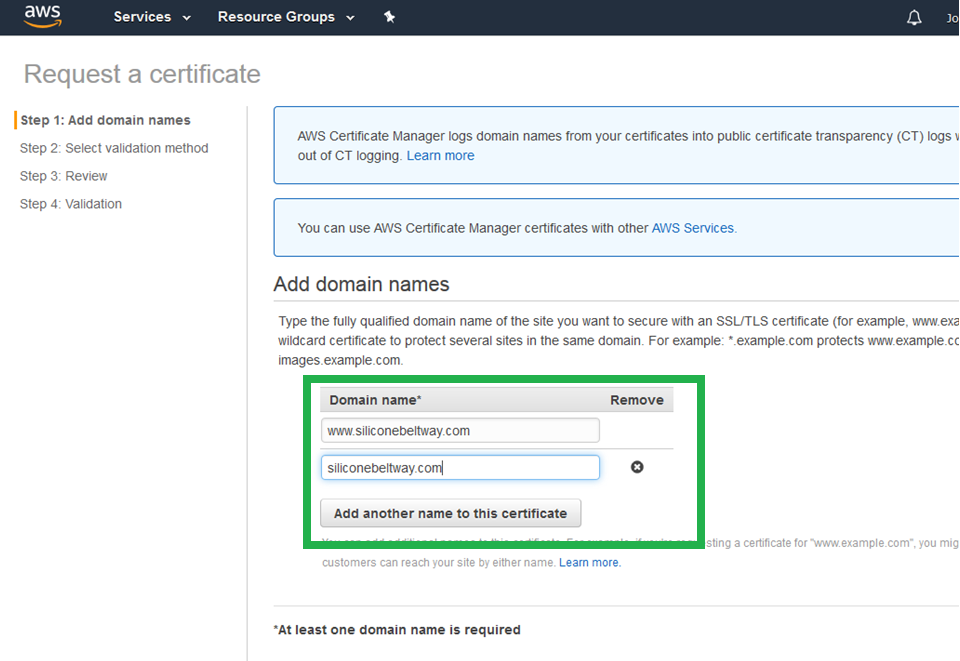
In step one you must enter both the naked and www domain names. This ensures that both CloudFront distributions (which you will set up in part two of this tutorial) can use the certificate.
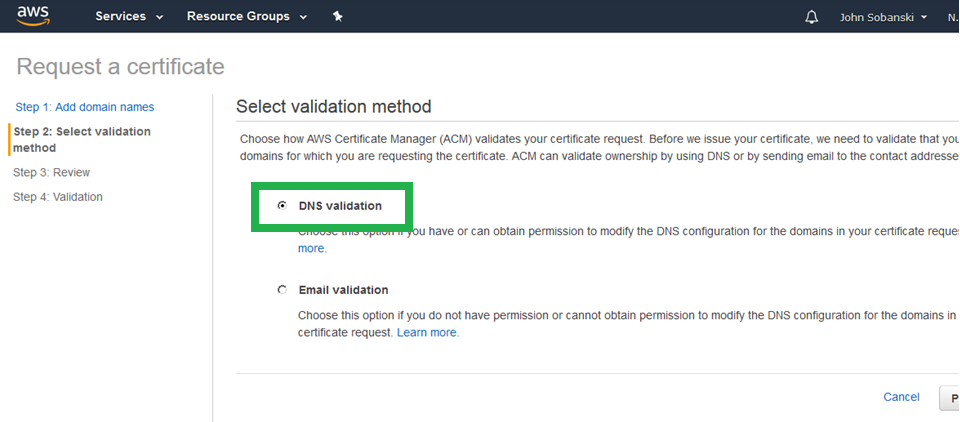
Step 2, select "DNS validation" and then "Review."
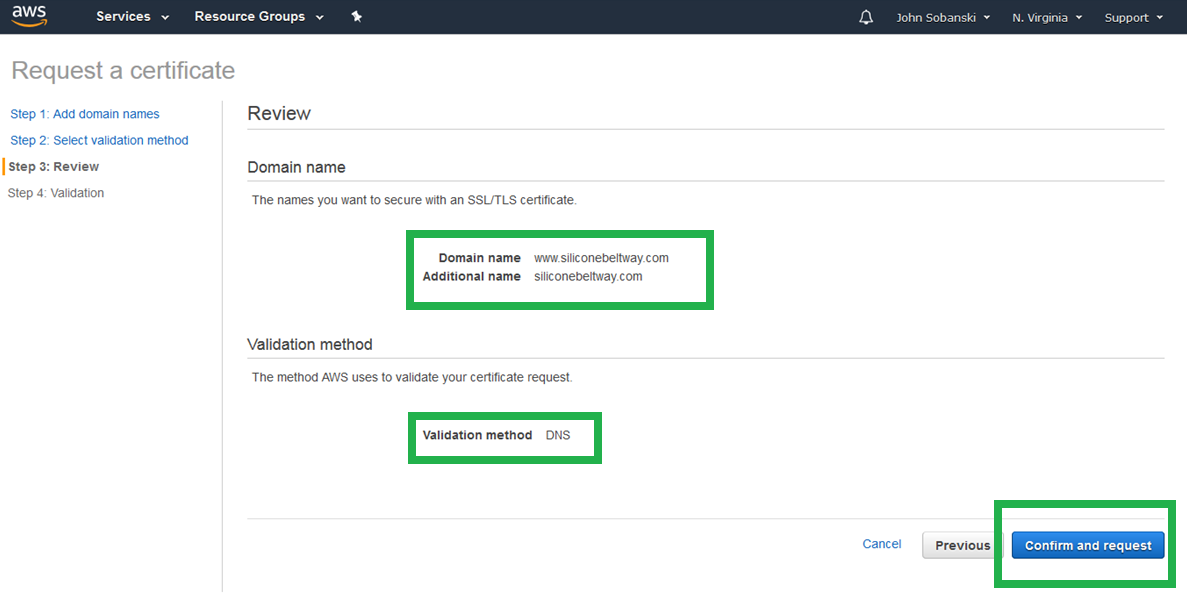
Confirm that the "Domain name" section includes both the naked and www names, and that you will validate using DNS. Click confirm and request.
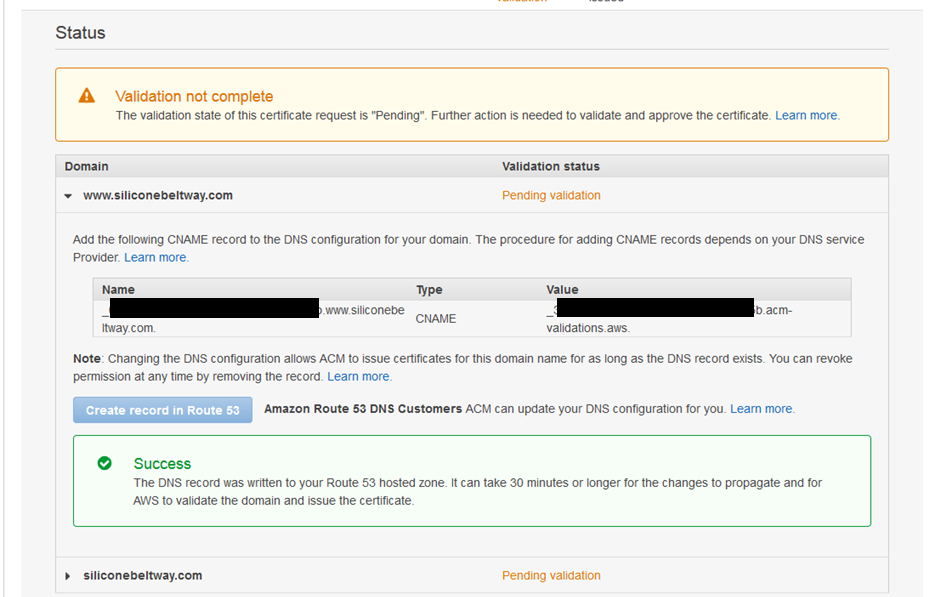
The screen reads "pending validation" but nothing will happen unless you perform the next few steps. First, click "Continue."
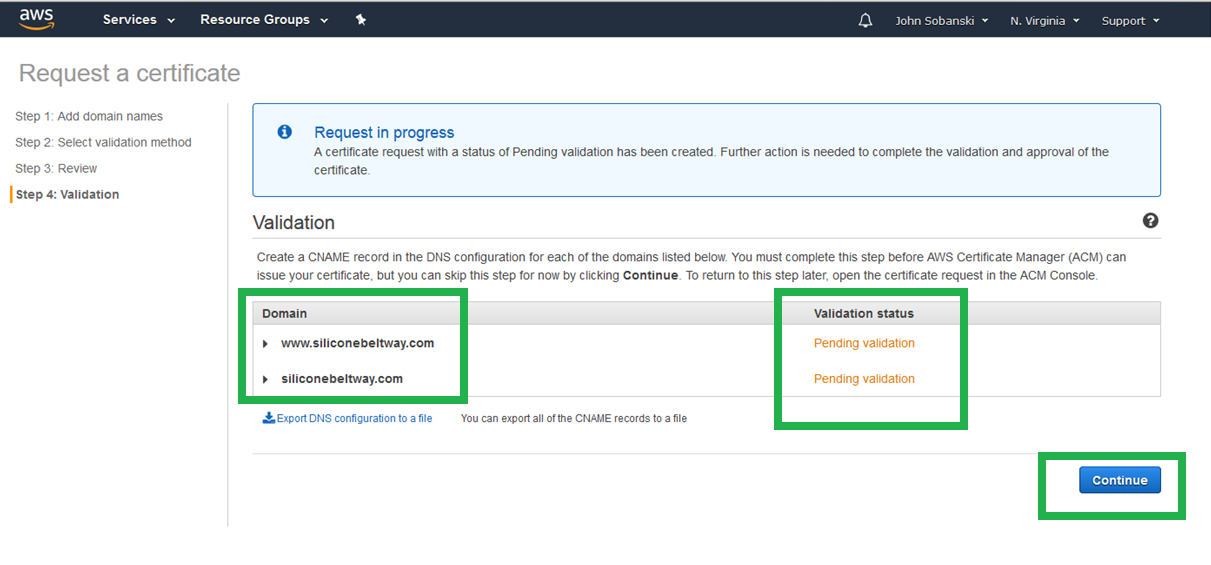
Now, expand the triangle for your domain name.
For each of the domain names (naked and www) you must click "Create record in Route 53." This proves to the AWS Certificate Manager that you do, in fact, own the domain name and are therefore entitled to a certificate for that domain name.
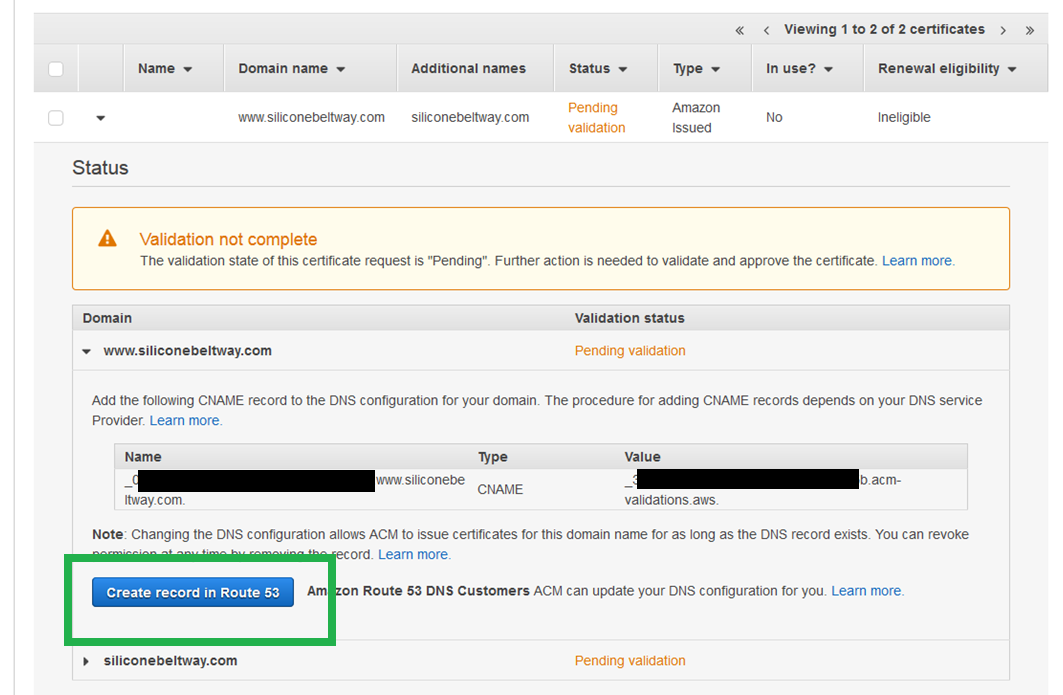
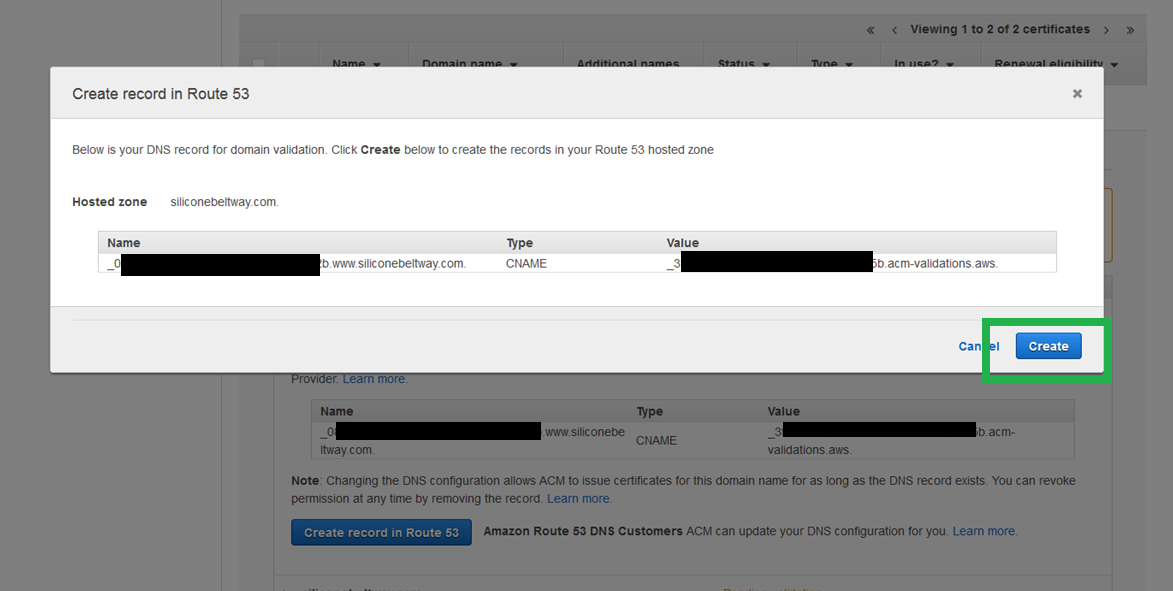
You will see a DNS record to prove that you own your site name. It will look like a bunch of gibberish. Click create.
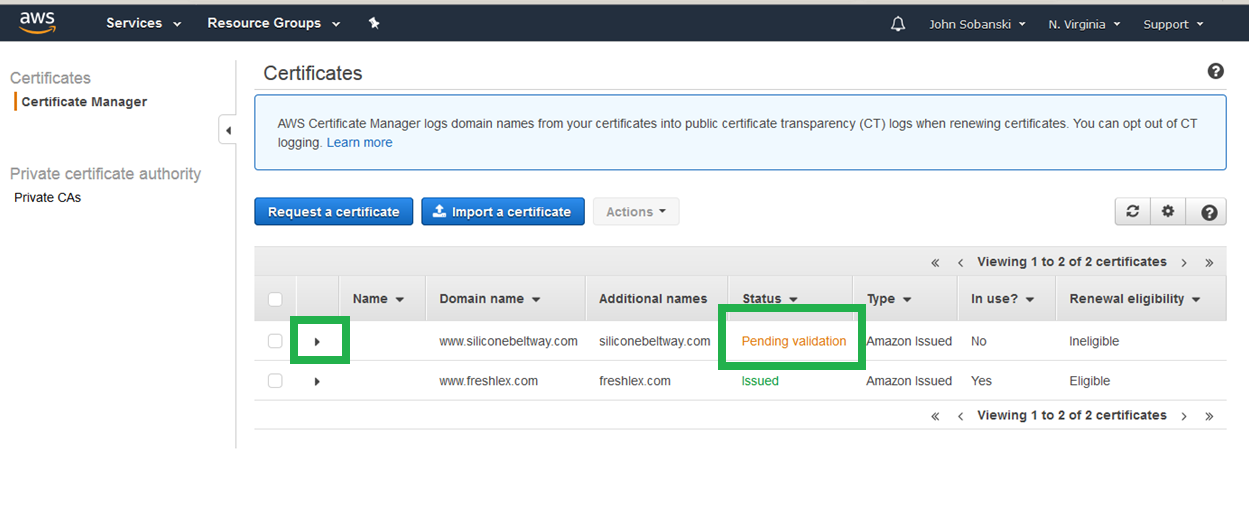
ACM will show a green "Success" box. Once you see this, repeat the process for the naked domain (expand the triangle right under the success box). It will take at least thirty (30) minutes to complete. Now would be a good time to teak a break.
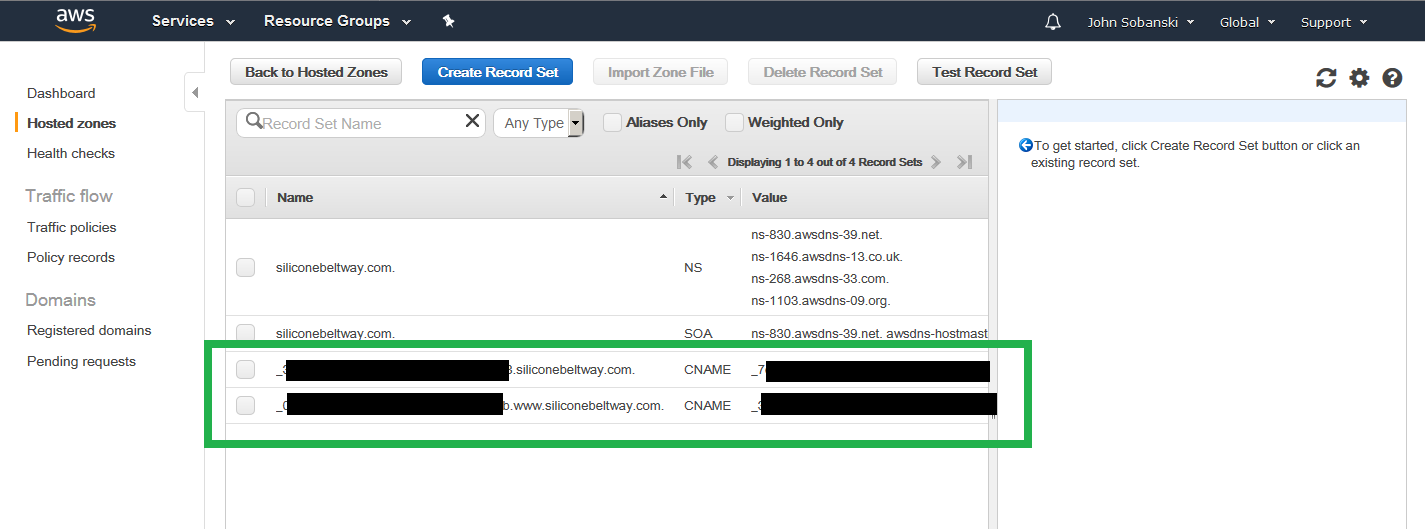
If you're curious, you can look at Route 53, where you will see the two validation records that ACM configured.
Again, you will need to wait at least a half of an hour before you can use your certificates. In the meantime, head over to part two of this tutorial, where we will:
- Upload a web page
- Create CloudFront distribution
- Point DNS (Route 53) to CloudFront distribution