In this HOWTO, I will demonstrate a very quick and dirty method to transcribe customer service voicemails to text and emit the text to an Elasticsearch NoSQL document store. Once in Elasticsearch, you can search the voicemails for Keywords and visualize Keyword frequency/ metadata via the GUI. You can programmatically send Keyword alerts via emails by using the Elasitcsearch API.
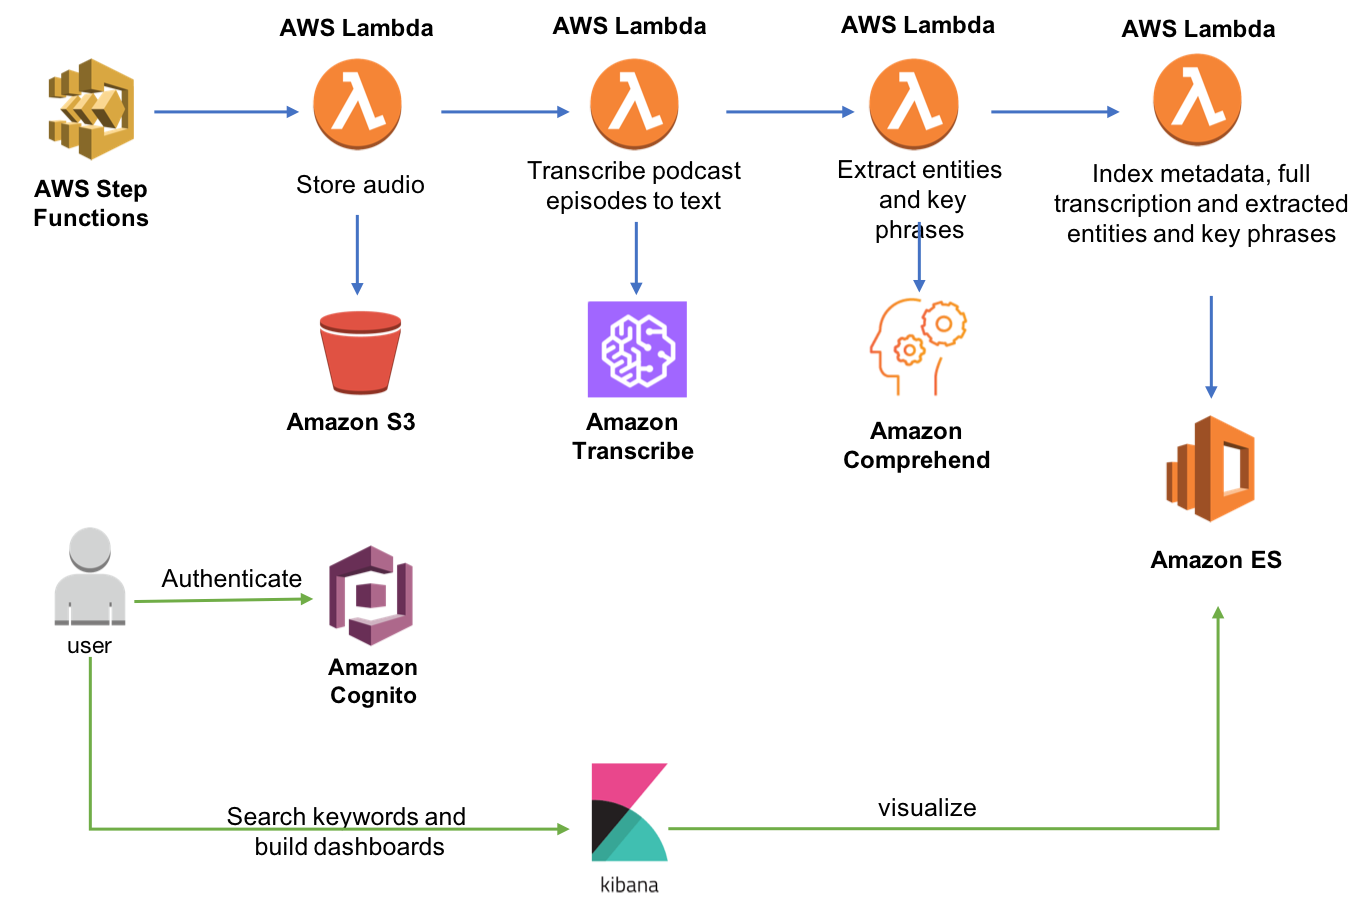
The following graphic depicts the AWS Architecture (courtesy of Angela Wang). Do not be intimidated by the complexity, you will literally only need to click a single button to deploy it!
Deploy the Architecture
To deploy the architecture, sign into your AWS console and then click the following button.(Note that you will deploy to US-East-1):

Follow these instructions to deploy the stack:
- Click Create Change Set to create the change set for this transform
- Stack Name: Provide a unique stack name for this account.
- AudioOffset: The number of seconds before the keyword to link to on the audio file. The default is 1 second.
- kibanaUser: The username of the user that is used to log into kibana, Defaults to kibana.
- Acknowledge the stack may create IAM resources by checking these boxed:
- I acknowledge that AWS CloudFormation might create IAM resources.
- I acknowledge that AWS CloudFormation might create IAM resources with custom names.
- Click Create Change Set to create the change set for this transform
Wait for CloudFormation stack to complete creation. It takes about 15-20 minutes to create the stack, mostly due to the time required to create and configure an Amazon Elasticsearch cluster.
Identify your RSS feed
The deployed system watches an RSS feed and ingests new Podcasts as they arrive. You can point to any RSS feed on the Internet to see this demo in action. In operations, you would deploy your own RSS feed for customer service audio and protect it such that only the transcribe process can access it.
The simplest way to achieve this would be to put a proxy in front of your S3 bucket that password protects access.
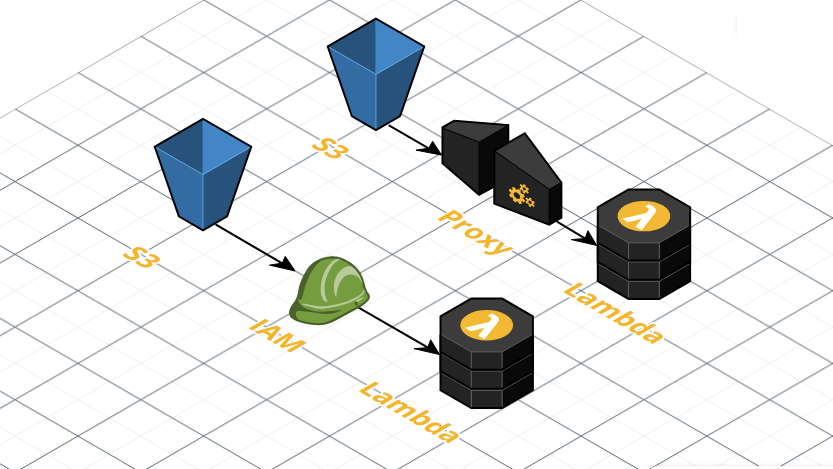
Alternatively you could use AWS IAM roles, IAM policies and bucket polices to ensure that only the Lambda function can access the customer service voicemails.
Either approach requires you to update the processPodcastRSS and processTranscriptFullText Lambda functions to fetch the RSS feed and customer service voicemails via an either an authenticated urlopen or via an S3 Get.
These two approaches warrant blog posts unto themselves. If you are interested in seeing how to do this, leave a comment below and I will write one for my next post.
For this blog post, I would like to focus on the transcribe and alert features of the pipeline.
For that reason, I recommend you simply use an existing RSS feed that includes audio files.
You can use my RSS feed, which includes audio files that I pulled from YouTube videos dealing with the mid-term elections.
Point the Pipeline to your RSS feed
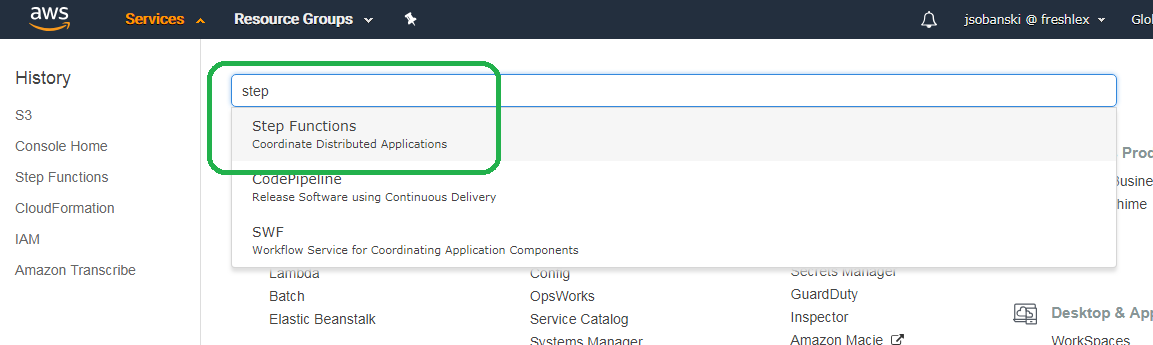
In the AWS search bar, type in "Step Functions" and click the Step Functions console.
Click the RSSStateMachine step function name and then click the orange start execution button. In the New Execution window, type in the following JSON. This example points to my RSS feed. If you set up your own RSS feed, replace my RSS feed with yours.
{
  "PodcastName": "My Podcast",
  "rss": "http://transcribe-input-test.s3-website-us-east-1.amazonaws.com/feed.rss",
  "maxEpisodesToProcess": 10,
  "dryrun": "FALSE"
}
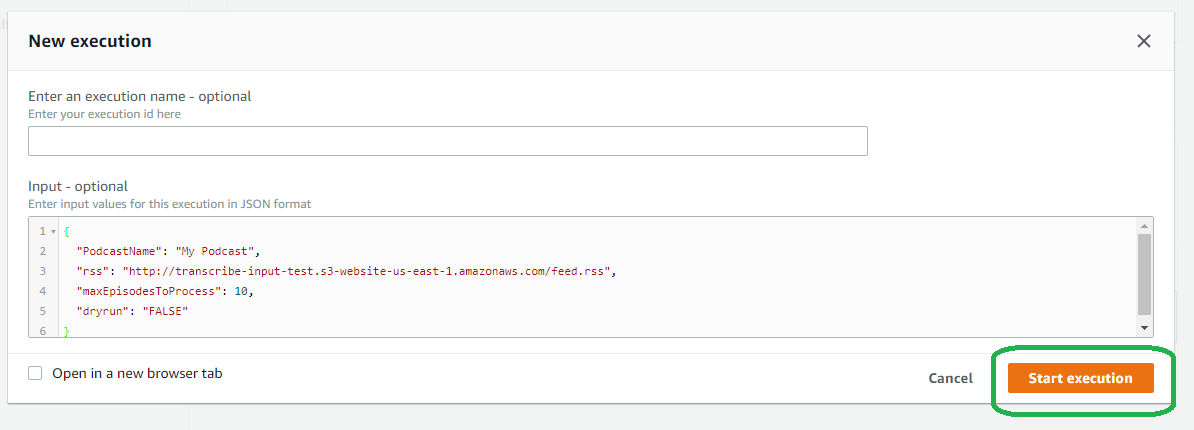
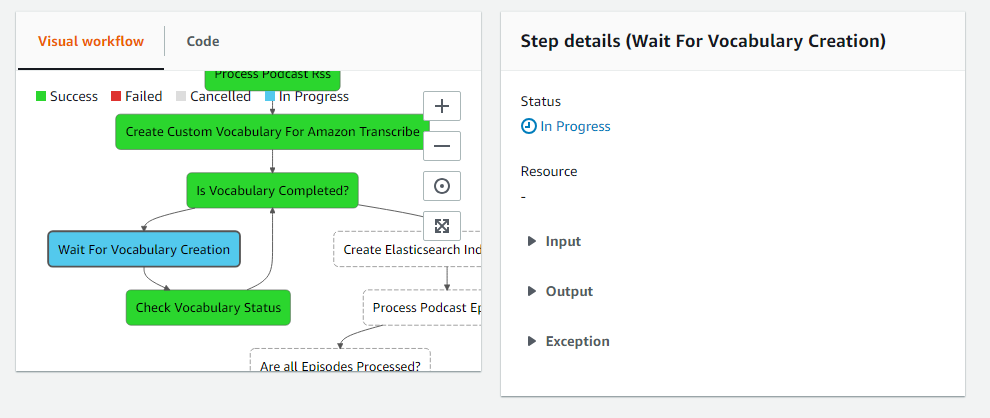
Click start and the pipeline begins!
You can click any of the pipeline boxes to see status.
Explore the Data in Kibana
Find the Console URL
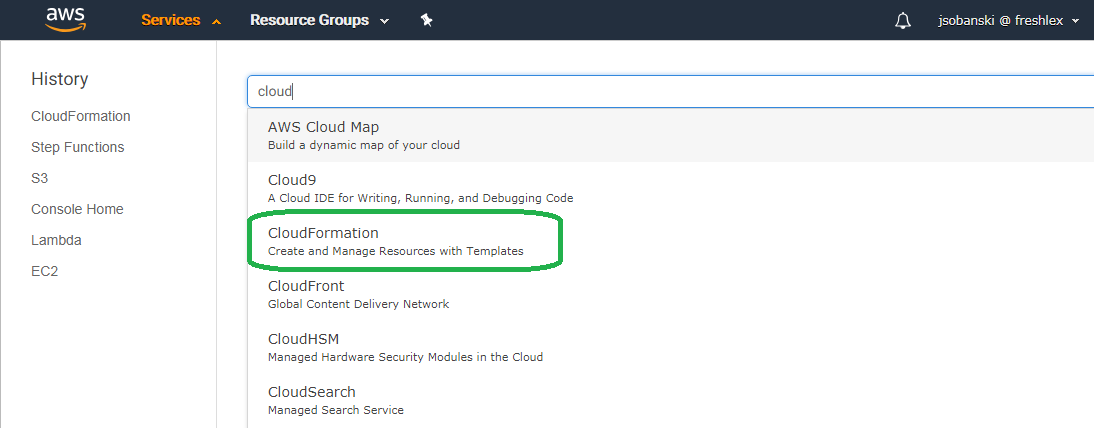
First, open the CloudFormation console.
Click your stack, and then expand the Output triangle. You will see a Kibana username, password and URL.
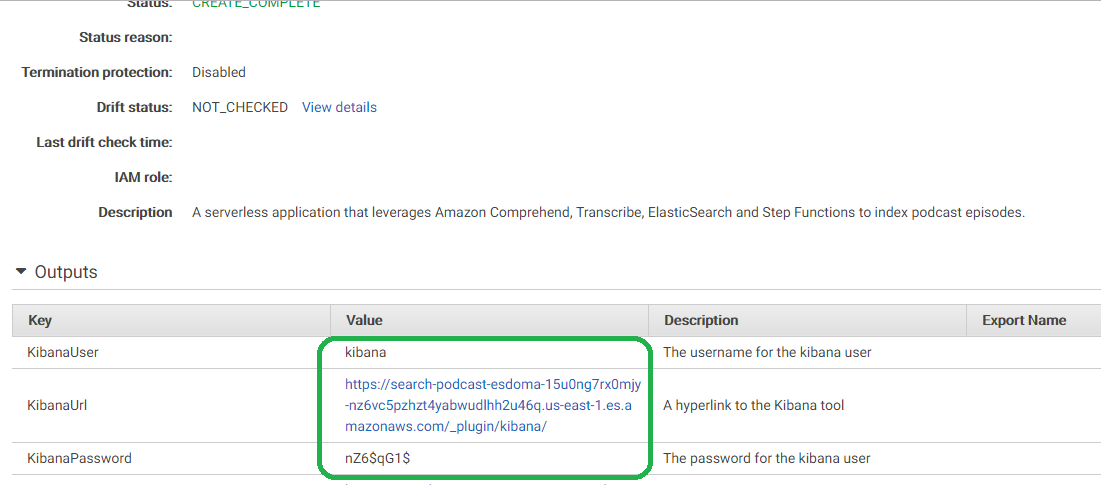
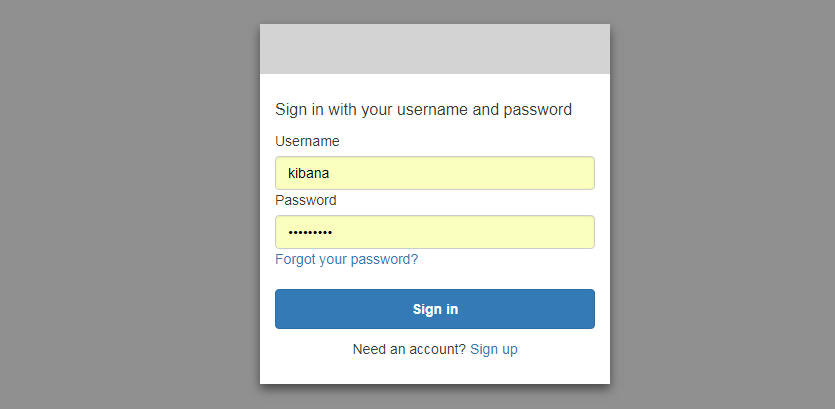
Click the URL and then enter the username and password that the output file indicates. You will need to change this username and password.
Providing an identity/ authentication layer to Kibana is actually a tricky problem. The CloudFormation template, however, created one for us automatically!!!
Configure Kibana to Serve Your Documents
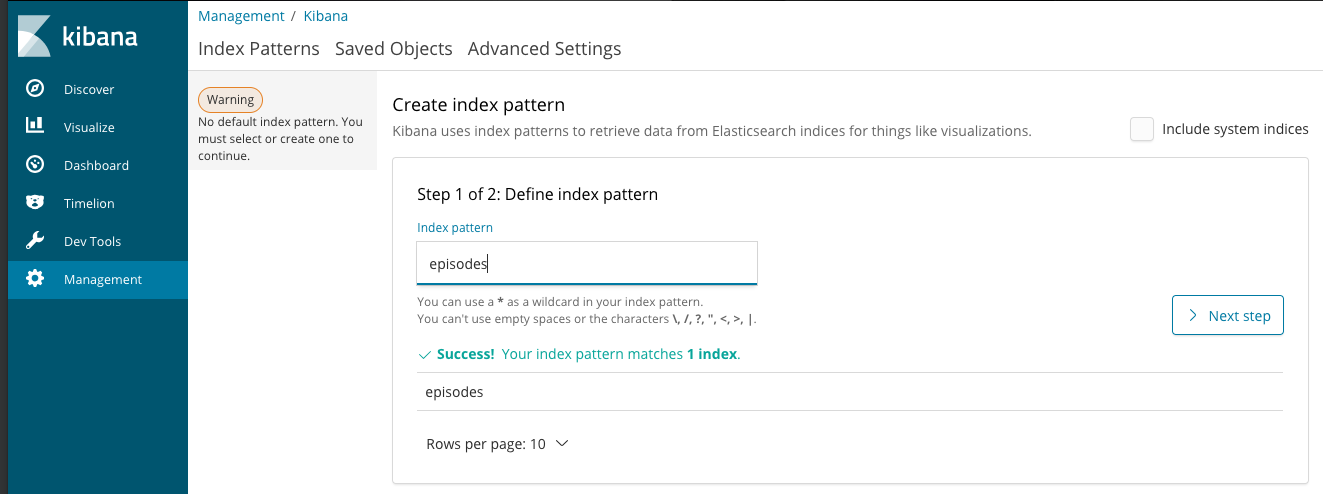
Once in Kibana, set up index patterns for the episodes and paragraphs indices. Click the 'Create Index' button.
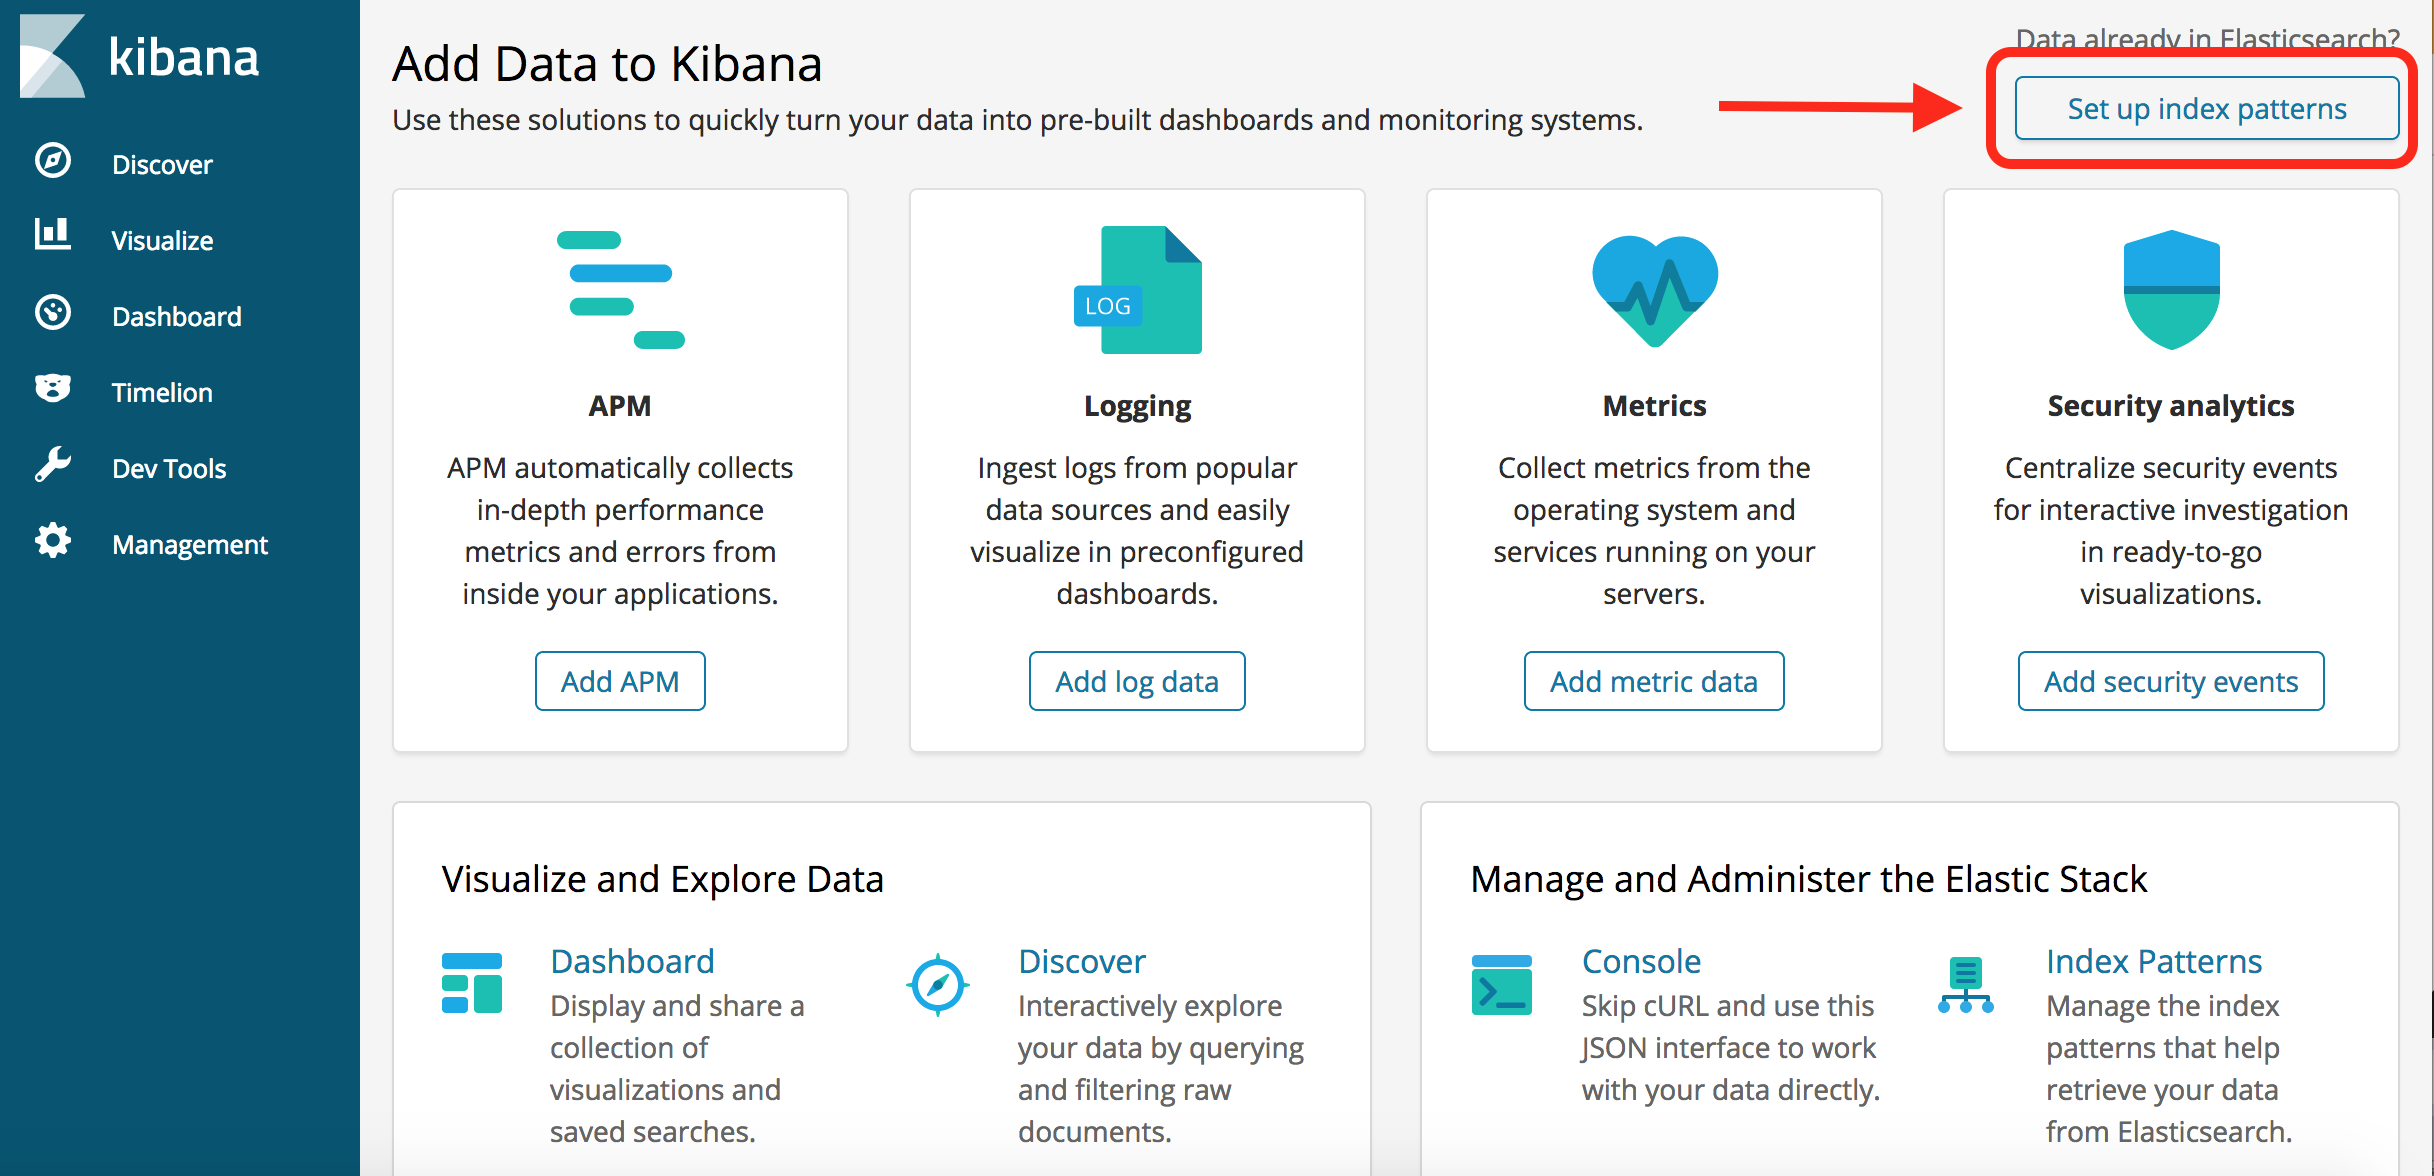
Now type in 'Episodes.'
If you are asked to pick a Time Filter Field, choose 'I don’t want to use the Time Filter', then choose Create Index Pattern.
Repeat the process for 'paragraphs.'
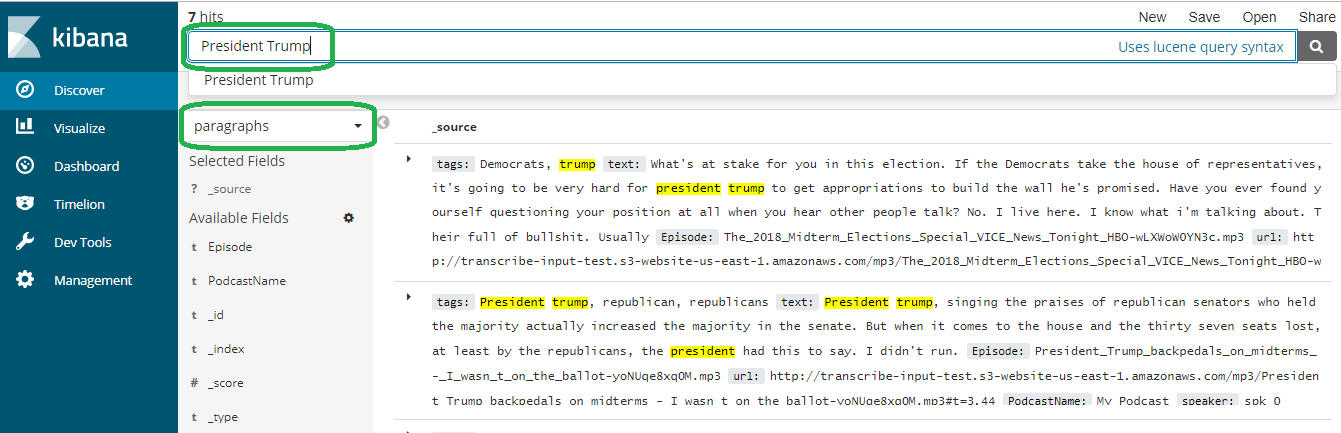
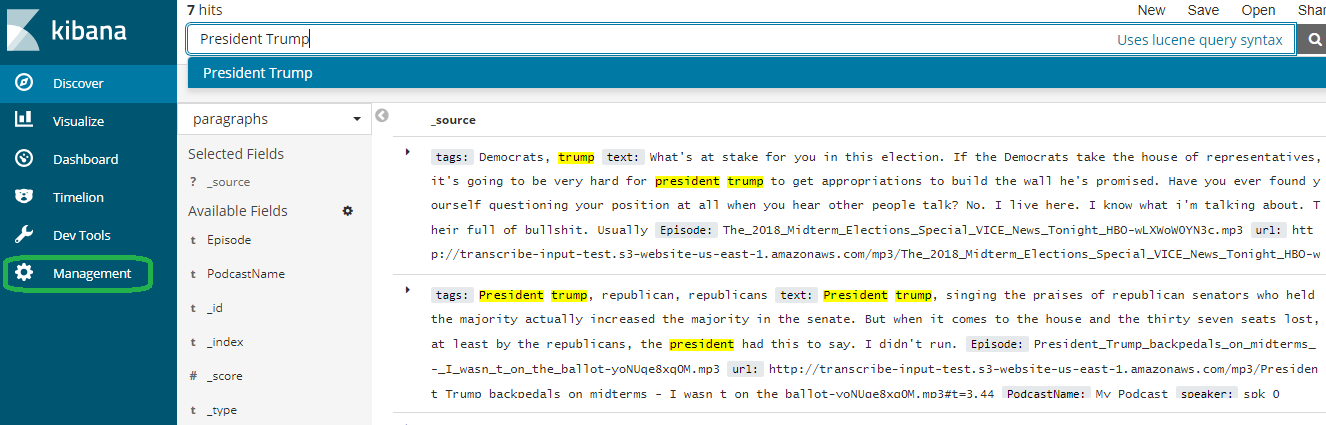
Explore the data
Now you have a fully searchable index! Click discover, select 'paragraphs' and type in a term. Since my feed addresses the midterm elections, you can type in a political term, such as President Trump. The search engine returns and highlights all of the hits.
Programmatically Access your Documents
In this section, we will write a script to search for terms so that we can automatically monitor and send an email when a certain keyword arrives.
Set up your development environment
This section assumes you are on a Linux distribution (CentOS). If you use windows, you may need to alter it slightly. First, install python-virtualenv, which allows you to have separate, sandboxed versions of Python libraries running on a single machine.
[centos@ip-172-31-1-82 ~]$ sudo yum -y install python-virtualenv
Now, create a working virtual environment.
[centos@ip-172-31-1-82 ~]$ virtualenv sandbox
New python executable in sandbox/bin/python
Installing Setuptools..............................................................................................................................................................................................................................done.
Installing Pip.....................................................................................................................................................................................................................................................................................................................................done.
Now, enter the directory, activate the environment, update PIP and install the required libraries.
[centos@ip-172-31-1-82 ~]$ cd sandbox/
[centos@ip-172-31-1-82 sandbox]$ source ./bin/activate
(sandbox)[centos@ip-172-31-1-82 sandbox]$ pip install -U pip
(sandbox)[centos@ip-172-31-1-82 sandbox]$ pip install awscli boto elasticsearch-dsl requests
Configure your environment with your AWS credentials. This allows you to hit the Elasticsearch index via a script.
(sandbox)[centos@ip-172-31-1-82 ~]$ aws configure
AWS Access Key ID [****************YUTZ]:
AWS Secret Access Key [****************ilBB]:
Default region name [us-east-1]:
Default output format [None]:
(sandbox)[centos@ip-172-31-1-82 ~]$
Note - for best practice AWS recommends you use IAM roles instead of security keys. If you would like to see how to set up IAM roles to enable programmatic access to an Elasticsearch endpoint, please read this blog post.
Create the Search Script
I wrote the following script that queries an Elasticsearch endpoint, searches for a term and then outputs the result to standard out. The intention is to use this for alerts. Therefore, if it finds a hit, it updates the document with a field named Warning_Sent.
# search_es.py
import json
from boto.connection import AWSAuthConnection
from chalicelib.config import DOCTYPE_NAME, ELASTIC_INDEX_NAME, ELASTICSEARCH_ENDPOINT, SEARCH_TERMS
from elasticsearch_dsl import Search, Q

class ESConnection(AWSAuthConnection):

    def __init__(self, region, **kwargs):
        super(ESConnection, self).__init__(**kwargs)
        self._set_auth_region_name(region)
        self._set_auth_service_name("es")

    def _required_auth_capability(self):
        return ['hmac-v4']

client = ESConnection(region='us-east-1', host=ELASTICSEARCH_ENDPOINT, is_secure=False)

ELASTICSEARCH_PATH = "/".join( (ELASTIC_INDEX_NAME, '_search') )

s = Search()

q = Q( 'match_phrase',  text = SEARCH_TERMS.pop(0).lower())

for TERM in SEARCH_TERMS:
    q = q | Q( 'match_phrase', text = TERM.lower() )

q = q & ~Q( 'exists', field = 'Warning_Sent')

s = s.query(q)

s = s[1]

resp = client.make_request(method='GET', headers={'Content-Type': 'application/json'}, path='/' + ELASTICSEARCH_PATH, data=json.dumps(s.to_dict()))

for hit in json.loads(resp.read())['hits']['hits']:
    print 'Start time: {}\nMessage: {}\n'.format(hit['_source']['startTime'],hit['_source']['text'])
    DOC_ID = hit['_id']

WARN_SENT_JSON = { "doc" : { "Warning_Sent" : True } }
UPDATE_PATH = '/{}/_doc/{}/_update'.format(ELASTIC_INDEX_NAME,DOC_ID)

update_resp = client.make_request(method='POST', headers={'Content-Type': 'application/json'}, path=UPDATE_PATH, data=json.dumps(WARN_SENT_JSON))
The query includes the following line, which reads as 'Only return documents where we did not yet send a warning.' This ensures we will not get spammed with repeated warnings.
q = q & ~Q( 'exists', field = 'Warning_Sent')
The script uses the robust and useful Elasticsearch Domain Specific Language (DSL) Python library. The library allows us to craft native Elasticsearch Application Programming Interface (API) JSON queries via Pythonic expressions. The code forms a Search() object named s via a series of Python expressions. The to_dict() method displays the resultant JSON query object.
>>> print json.dumps(s.to_dict(), indent = 2)
{
  "query": {
    "bool": {
      "minimum_should_match": 1,
      "must_not": [
        {
          "exists": {
            "field": "Warning_Sent"
          }
        }
      ],
      "should": [
        {
          "match_phrase": {
            "text": "trump"
          }
        },
        {
          "match_phrase": {
            "text": "democrat"
          }
        },
        {
          "match_phrase": {
            "text": "republican"
          }
        }
      ]
    }
  },
  "from": 1,
  "size": 1
}
Create your Config Module
We auto-populate the should array of the bool stanza via a config file.
In your working directory, make a directory named chalicelib.
(sandbox)[centos@ip-172-31-1-82 sandbox]$ mkdir chalicelib
Enter the directory and create an empty file named init.py.
(sandbox)[centos@ip-172-31-1-82 sandbox]$ cd chalicelib/
(sandbox)[centos@ip-172-31-1-82 chalicelib]$ touch __init__.py
Now, create a configuration file named config.py and edit the contents.
ELASTICSEARCH_ENDPOINT = #Put your endpoint here
ELASTIC_INDEX_NAME = 'paragraphs'
DOCTYPE_NAME = '_doc'
SEARCH_TERMS = ['Trump','Democrat', 'Republican']
Leave the ELASTIC_INDEX_NAME and DOCTYPE_NAME as is. You can add, edit or remove items in the SEARCH_TERMS list. As for ELASTICSEARCH_ENDPOINT, you will need to put the URL for your endpoint here.
Find Your Elasticsearch Endpoint
Open up the Elasticsearch console.
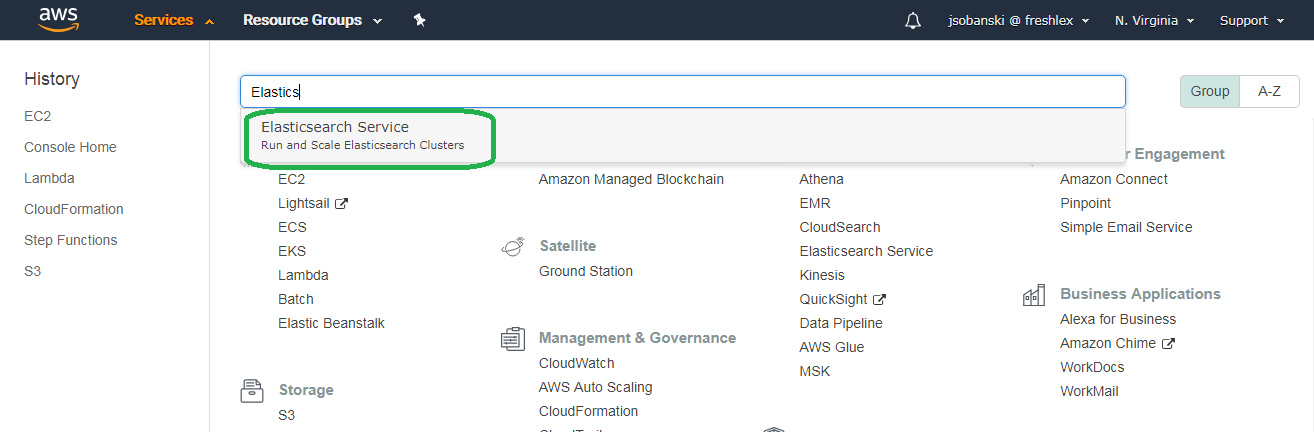
Click your Domain.
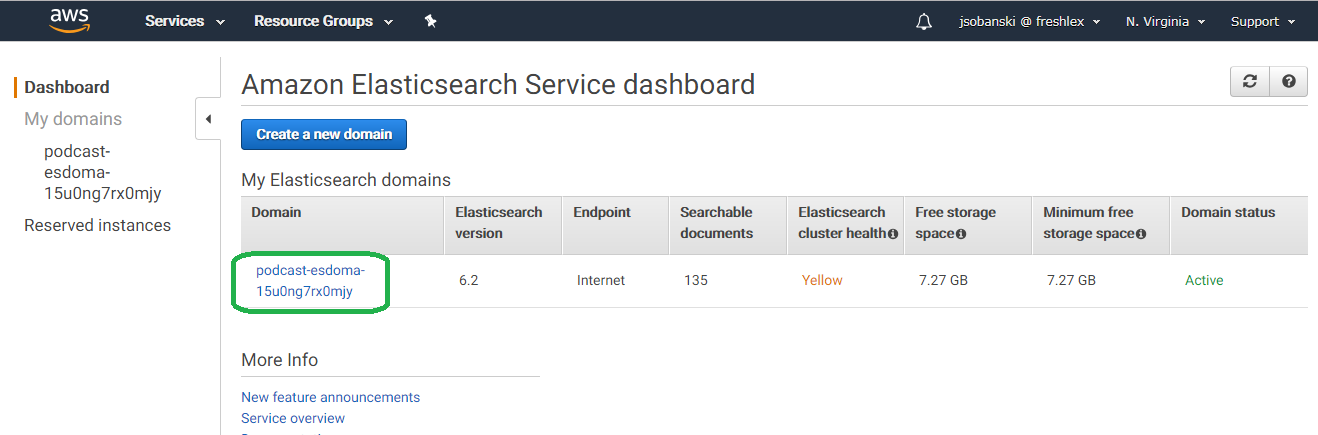
You will see your Domain URL. Copy this link.
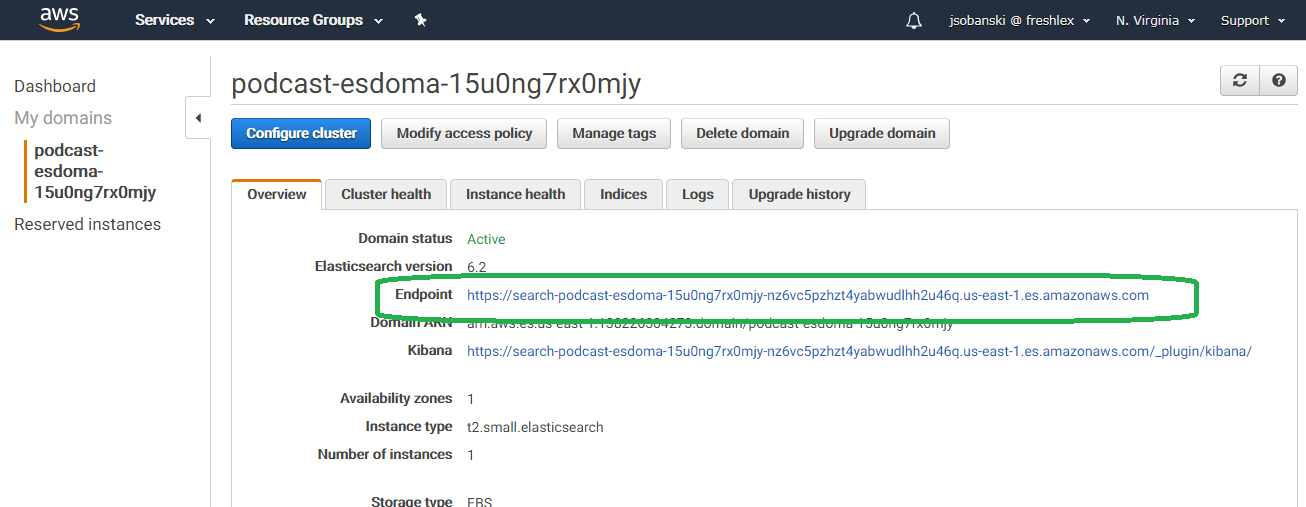
Now, update your config.py file. Be sure to remove the https:// from your entry.
ELASTICSEARCH_ENDPOINT = 'search-podcast-esdoma-15u0ng7rx0mjy-nz6vc5pzhzt4yabwudlhh2u46q.us-east-1.es.amazonaws.com'
ELASTIC_INDEX_NAME = 'paragraphs'
DOCTYPE_NAME = '_doc'
SEARCH_TERMS = ['Trump','Democrat', 'Republican']
Test Run the Script
Once everything is configured, go back up to your sandbox directory.
(sandbox)[centos@ip-172-31-1-82 chalicelib]$ cd ..
(sandbox)[centos@ip-172-31-1-82 sandbox]$
Now run the script.
(sandbox)[centos@ip-172-31-1-82 sandbox]$ python search_es.py
Start time: 513.552
Message: hopes for did not have a victory celebration tuesday night. Despite a last minute push celebrity pushed by oprah winfrey. Democrat stacey abrams has not yet secured the governor's mansion in georgia. That race may end up in a recount, and in florida, democrat andrew gillum got last minute help on the campaign trail from former president barack obama. But republican ron to santa's, a congressman appears to have won by a razor thin margin. But that race, of course, could also be contested in the coming weeks. And in texas, as i...
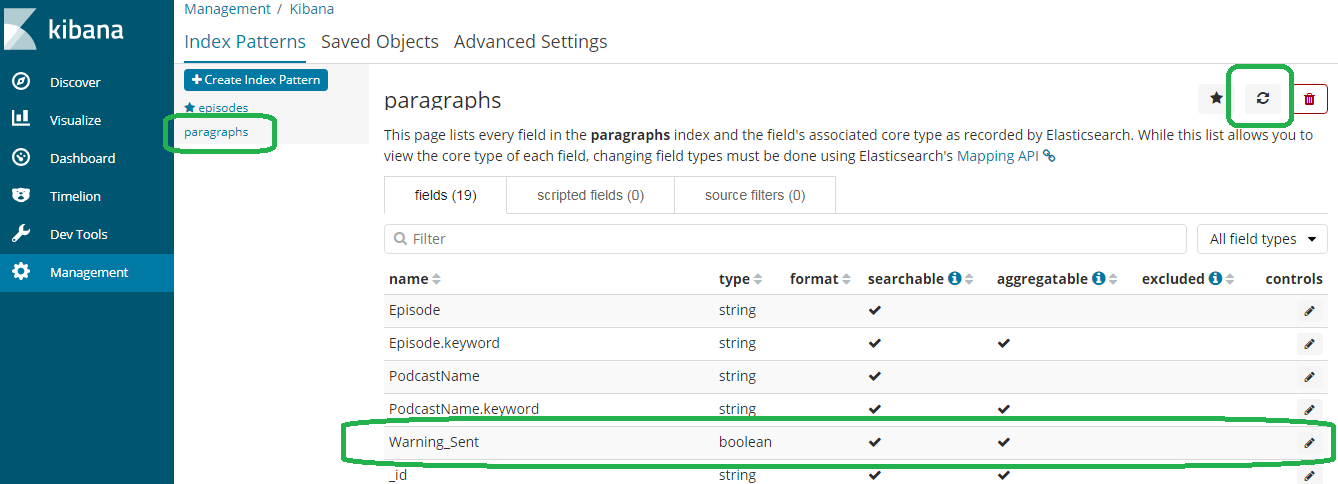
Update Kibana
Since you added a new field Update_Sent, you need to refresh the Kibana index.
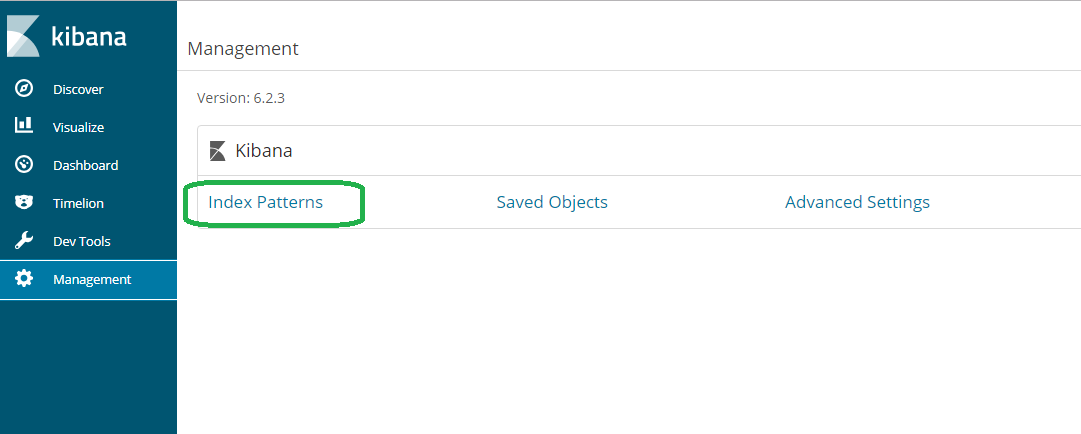
On the Kibana console, click 'Management.'
Now click Index Pattens
Click paragraphs and then refresh. Warning_Sent now appears.
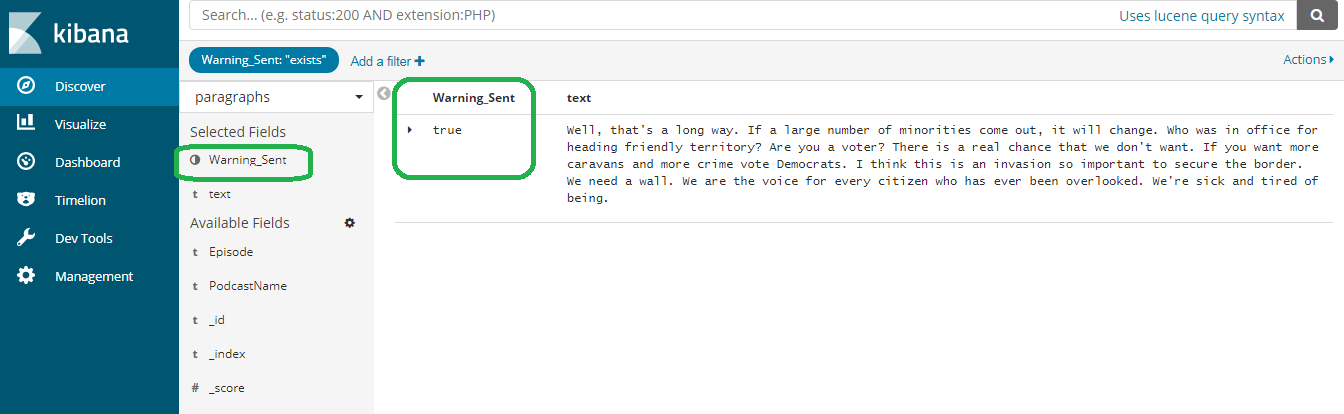
If you go to discover, you will see documents with Warning_Sent.
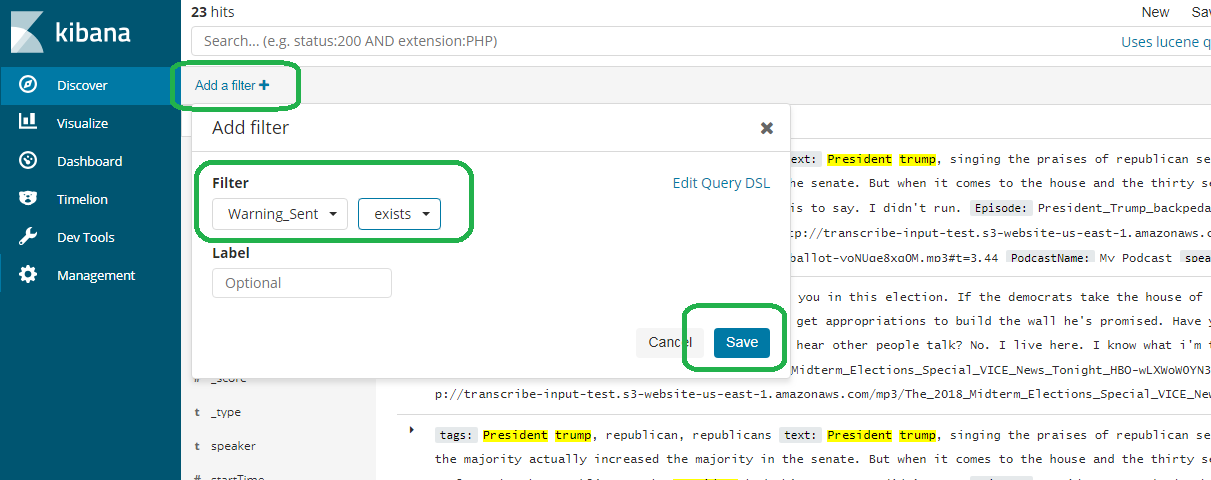 .
.
Click save and you will see your document.
Configure Simple Email Service
We now need to configure SES to send emails. You first
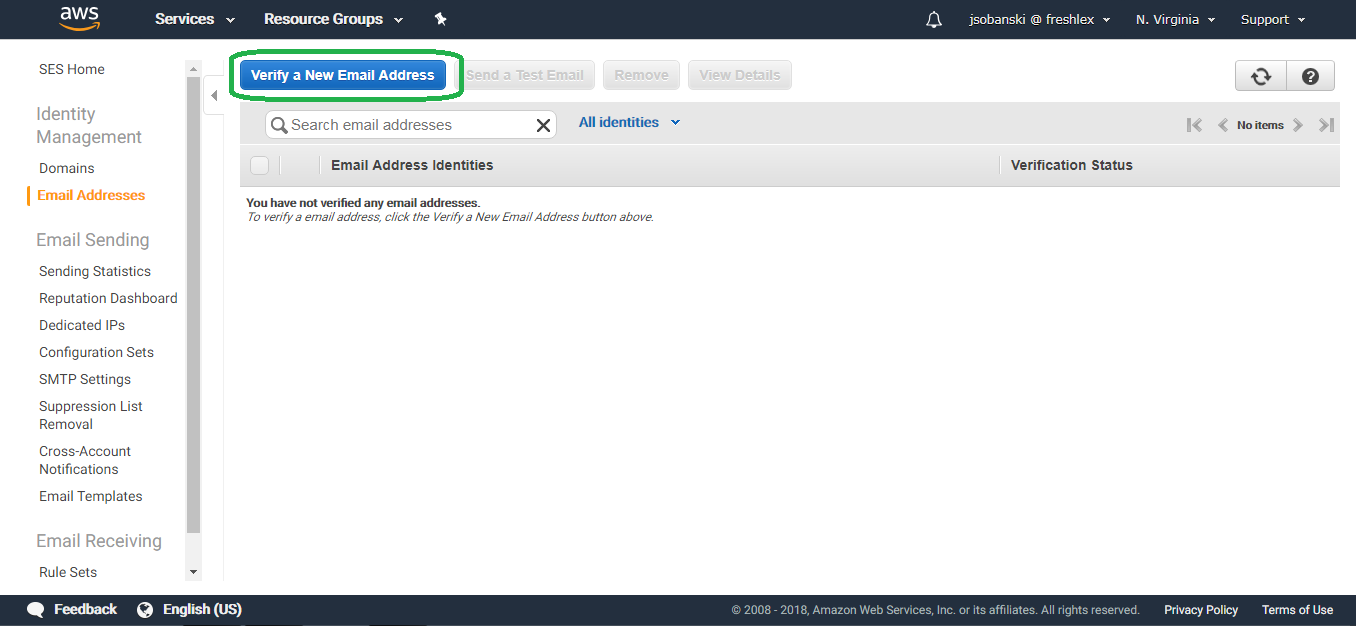
Open the SES console and click Email Addresses.
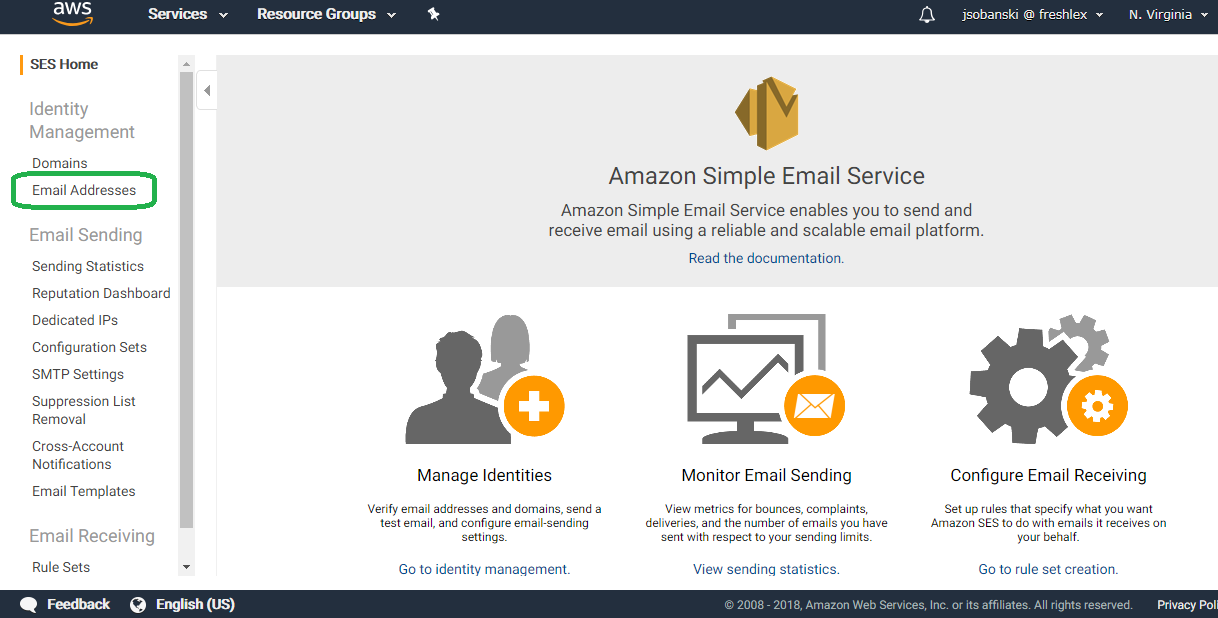
Click verify a new email.
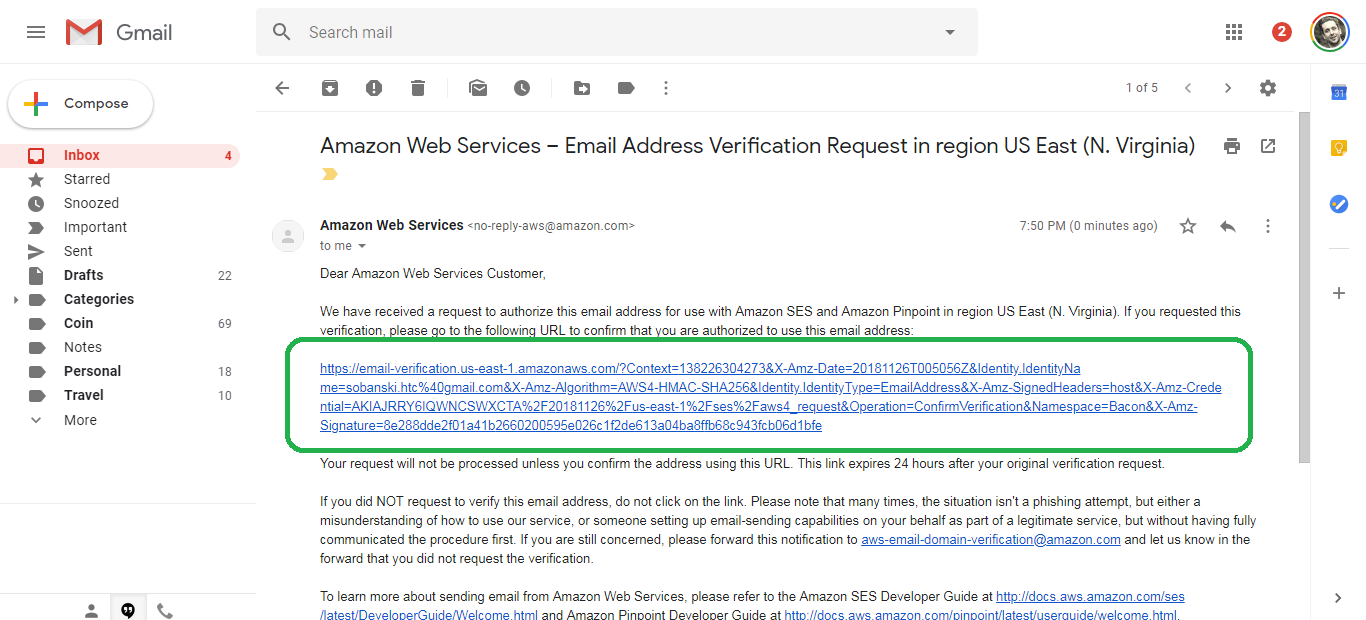
Enter your email address and then go to your inbox. Click the verify link.
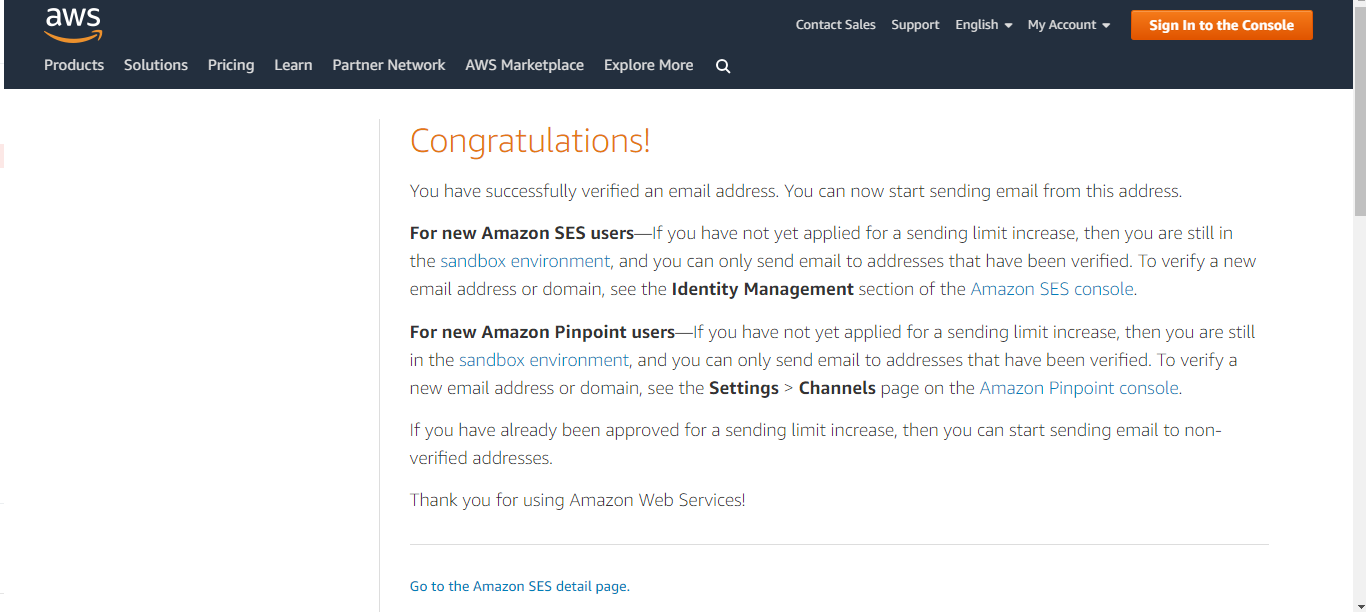
You will see verification success.
Send alert via email
We will now have our search script emit an email. First, update config.py with the following.
ELASTICSEARCH_ENDPOINT = 'search-podcast-esdoma-15u0ng7rx0mjy-nz6vc5pzhzt4yabwudlhh2u46q.us-east-1.es.amazonaws.com'
ELASTIC_INDEX_NAME = 'paragraphs'
DOCTYPE_NAME = '_doc'
SEARCH_TERMS = ['Trump','Democrat', 'Republican']
SENDER = "John Sobanski <MyEmailAddress@gmail.com>" #Be sure to enter your email address
RECIPIENT = "myemailaddress@gmail.com" #Be sure to enter your email address
Now, update the seach_es.py script as follows.
# search_es.py
import json, boto3
from boto.connection import AWSAuthConnection
from botocore.exceptions import ClientError
from chalicelib.config import DOCTYPE_NAME, ELASTIC_INDEX_NAME, ELASTICSEARCH_ENDPOINT, SEARCH_TERMS, SENDER, RECIPIENT
from elasticsearch_dsl import Search, Q

class ESConnection(AWSAuthConnection):

    def __init__(self, region, **kwargs):
        super(ESConnection, self).__init__(**kwargs)
        self._set_auth_region_name(region)
        self._set_auth_service_name("es")

    def _required_auth_capability(self):
        return ['hmac-v4']

client = ESConnection(region='us-east-1', host=ELASTICSEARCH_ENDPOINT, is_secure=False)

ELASTICSEARCH_PATH = "/".join( (ELASTIC_INDEX_NAME, '_search') )
BODY_TEXT = '{}'.format(SEARCH_TERMS)

s = Search()

q = Q( 'match_phrase',  text = SEARCH_TERMS.pop(0).lower())

for TERM in SEARCH_TERMS:
    q = q | Q( 'match_phrase', text = TERM.lower() )

q = q & ~Q( 'exists', field = 'Warning_Sent')

s = s.query(q)

s = s[1]

resp = client.make_request(method='GET', headers={'Content-Type': 'application/json'}, path='/' + ELASTICSEARCH_PATH, data=json.dumps(s.to_dict()))

for hit in json.loads(resp.read())['hits']['hits']:
    START_TIME = '{}'.format(hit['_source']['startTime'])
    TEXT_MSG = '{}'.format(hit['_source']['text'])
    DOC_ID = hit['_id']

WARN_SENT_JSON = { "doc" : { "Warning_Sent" : True } }
UPDATE_PATH = '/{}/_doc/{}/_update'.format(ELASTIC_INDEX_NAME,DOC_ID)

update_resp = client.make_request(method='POST', headers={'Content-Type': 'application/json'}, path=UPDATE_PATH, data=json.dumps(WARN_SENT_JSON))

AWS_REGION = "us-east-1"
SUBJECT = "A Hit"

BODY_HTML = '<html><head></head><body><h1>Keyword Hit!</h1><p>Start Time:{}</p><p>{}</p></body></html>'.format(START_TIME,TEXT_MSG)

CHARSET = "UTF-8"

ses_client = boto3.client('ses',region_name=AWS_REGION)

try:
    response = ses_client.send_email(
        Destination={
            'ToAddresses': [
                RECIPIENT,
            ],
        },
        Message={
            'Body': {
                'Html': {
                    'Charset': CHARSET,
                    'Data': BODY_HTML,
                },
                'Text': {
                    'Charset': CHARSET,
                    'Data': BODY_TEXT,
                },
            },
            'Subject': {
                'Charset': CHARSET,
                'Data': SUBJECT,
            },
        },
        Source=SENDER,
    )

except ClientError as e:
    print(e.response['Error']['Message'])
else:
    print("Email sent! Message ID:"),
    print(response['MessageId'])
Execute the script. You should see success!
(sandbox)[centos@ip-172-31-1-82 sandbox]$ python search_es.py
Email sent! Message ID: 010001676647ee89-d14d7dec-ad45-458c-81d8-617b3edb90bf-000000
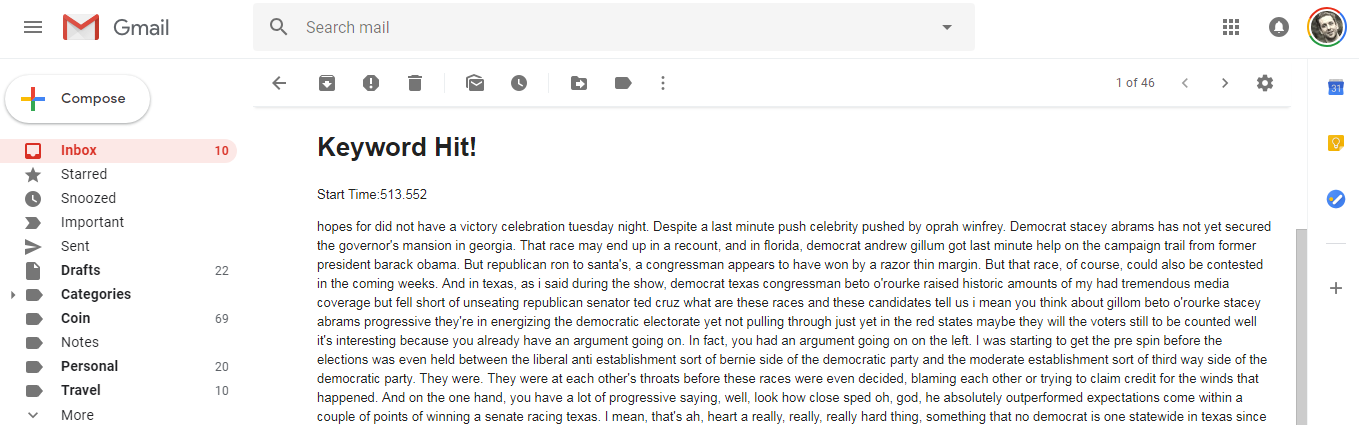
If you go to your inbox, you will see an email that contains the start time of the paragraph along with the text that matches one of your keywords.
Install in Cron
If you would like to periodically watch the index for new audio files that trap on a keyword, simply execute the following commands.
Edit the crontab.
[~]$ crontab -e
The following example runs it every fifteen minutes. Be sure to use the correct absolute path to your virtual environment.
*/15 * * * * cd /home/centos/sandbox && /home/centos/sandbox/bin/python /home/centos/sandbox/search_es.py
Verify the edit.
[~]$ crontab -l
*/15 * * * * cd /home/centos/sandbox && /home/centos/sandbox/bin/python /home/centos/sandbox/search_es.py
If you would prefer a serverless approach, you can use Lambda to schedule the check. See this blog post on how to integrate Lambda and Elasitcsearch.
Conclusion
This blog post demonstrates a quick and dirty method of alerting on voicemail keywords using a combination of RSS feeds, Transcribe, Comprehend, Step Functions, Lambda, Elasticsearch and Python.