Operational document stores require backups for disaster recovery and data migration. Elasticsearch uses the term snapshot for their backups. Amazon Web Services (AWS) provides a fully managed Elasticsearch service that includes both automatic and manual snapshots. The AWS Elasticsearch documentation presents the difference between automatic and manual snapshots:
Automated snapshots are only for cluster recovery. You can use them to restore your domain in the event of red cluster status or other data loss.
Manual snapshots are for cluster recovery or moving data from one cluster to another. As the name suggests, you have to initiate manual snapshots.
In summary, if you want to be able to use the snapshots (e.g. move the data between clusters) then you must execute manual snapshots. Amazon keeps the automatic snapshots for their own internal housekeeping in order to ensure proper disaster recovery.
Amazon provides a reference document on how to execute a manual snapshot. When I first began my AWS journey back in 2015, I found the documentation to be overwhelming and highly technical. I created this visual HOWTO to make life easier for everyone.
Workflow
To take a manual snapshot we must first give the Elasticsearch service permission to use a Simple Storage Service (S3) bucket. Once the Elasticsearch service can use S3, we can command Elasticsearch to snapshot to our bucket using the Elasticsearch REST API.
The following list captures the steps in the workflow.
- Create an S3 bucket for Elasticsearch snapshots
- Ensure that our local Python client can command Elasticsearch
- Create an IAM Policy that allows S3 access
- Attach this Policy to an IAM Role
- Pass the role to Elasticsearch via our local Python client
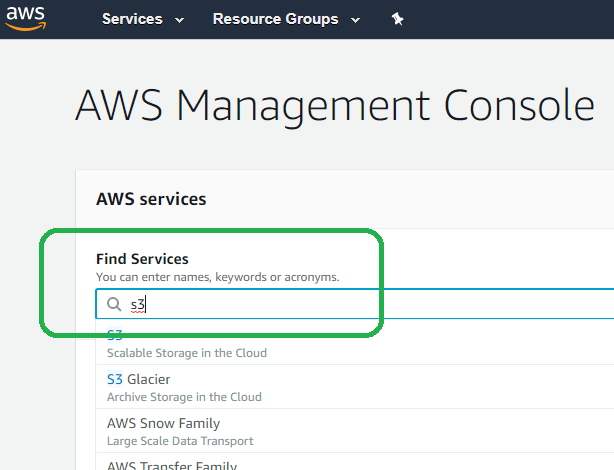
Step 1: Create a bucket
In order to tell Elasticsearch to write a snapshot to a bucket, you must create a bucket.
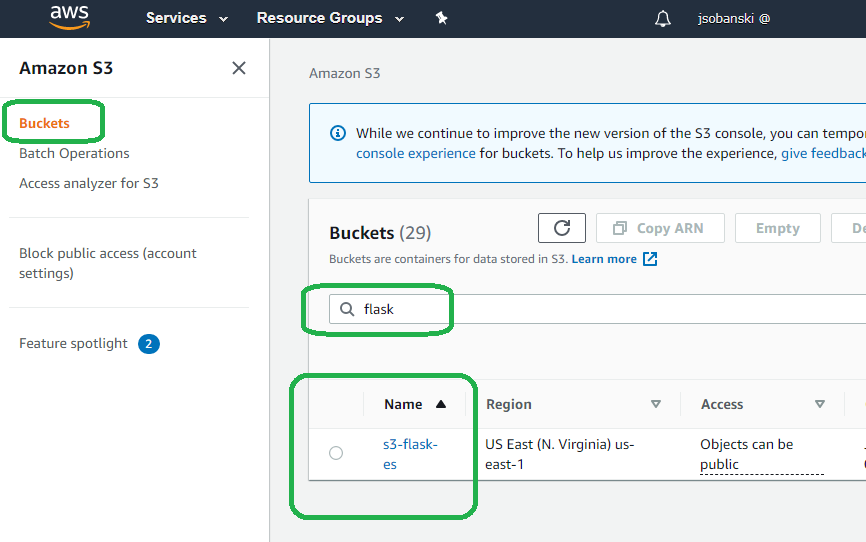
Type S3 into the search bar in order to locate service in AWS.
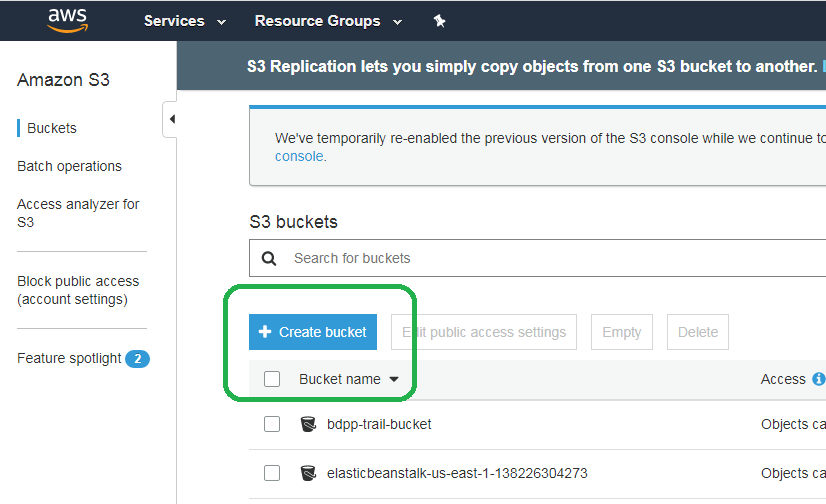
Click Create Bucket.
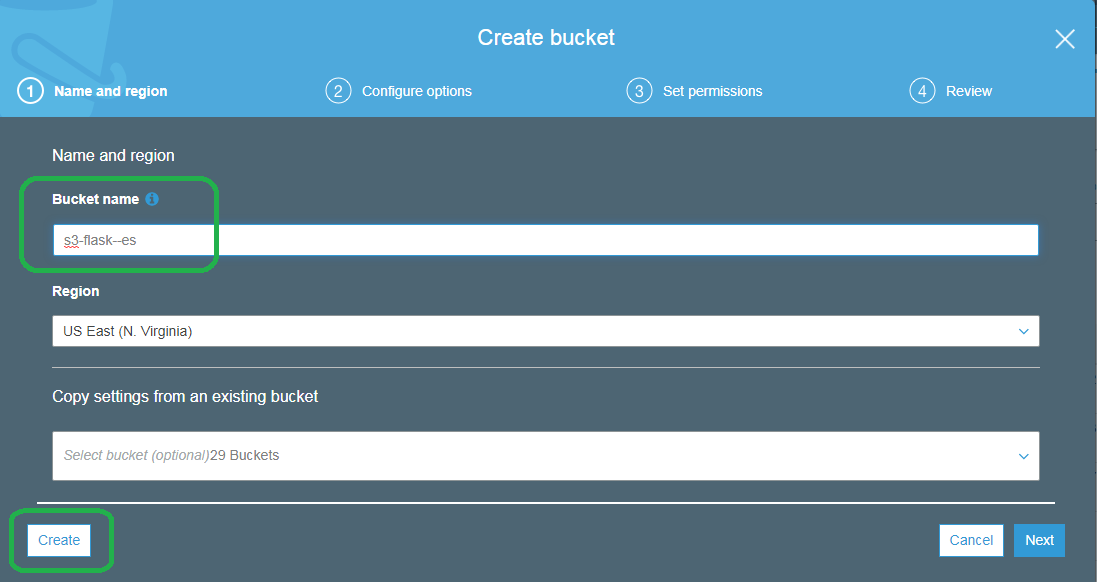
Name the bucket something unique and then click Create.
Step 2: Connect Python to Elasticsearch
The AWS provided manual snapshot procedure reads:
You can't use curl to perform this operation because it doesn't support AWS request signing. Instead, use the sample Python client to register your snapshot directory.
We use the Python Boto3 client to sign our requests. Boto3 uses the EC2 instance's baked-in credentials to sign requests to our Elasticsearch service.
Please refer to my blog post Use Boto3 to Connect an EC2 Instance to the Amazon Elasticsearch Service on how to connect the local Python client to the Elasticsearch service via Boto3. This blog post describes how to create and use a Python 3 virtual environment, how to create an IAM Role and how to use Boto3 to connect to the Elasticsearch service. The blog also provides a simple Python 3 script that validates the connection to an AWS provided Elasticsearch service.
#!/usr/bin/env python3
# connect_to_es.py
from elasticsearch import Elasticsearch, RequestsHttpConnection
from requests_aws4auth import AWS4Auth
import boto3
import json

# Remove the https:// and trailing slash from your ES endpoint
# https://search-testdomain-wpk2kadnkwzoqzid2msl4es2km.us-east-1.es.amazonaws.com/

host = 'search-testdomain-wpk2kadnkwzoqzid2msl4es2km.us-east-1.es.amazonaws.com'
region = 'us-east-1'

service = 'es'
credentials = boto3.Session().get_credentials()
awsauth = AWS4Auth(credentials.access_key,
                   credentials.secret_key,
                   region, service,
                   session_token=credentials.token)

es = Elasticsearch(
    hosts = [{'host': host, 'port': 443}],
    http_auth = awsauth,
    use_ssl = True,
    verify_certs = True,
    connection_class = RequestsHttpConnection
)

print(json.dumps(es.info(), indent=4, sort_keys=True))
Open the post in another tab and read through it to ensure all pieces are in place.
Then, activate your virtual environment and use the connect_es.py script to check the connection to Elasticsearch:
ubuntu@ip-172-31-52-51:~$ source ./connect_to_es/bin/activate
(connect_to_es) ubuntu@ip-172-31-52-51:~$ cd connect_to_es/
(connect_to_es) ubuntu@ip-172-31-52-51:~/connect_to_es$ python connect_to_es.py
{
    "cluster_name": "138226304273:testdomain",
    "cluster_uuid": "o1SEfaJ1S3a8vh0dteUb5Q",
    "name": "83c8456065492d5f3fa7247b926ca6fd",
    "tagline": "You Know, for Search",
    "version": {
        "build_date": "2020-05-05T04:47:06.936807Z",
        "build_flavor": "oss",
        "build_hash": "unknown",
        "build_snapshot": false,
        "build_type": "tar",
        "lucene_version": "8.2.0",
        "minimum_index_compatibility_version": "6.0.0-beta1",
        "minimum_wire_compatibility_version": "6.8.0",
        "number": "7.4.2"
    }
}
If you receive the error...
{"Message":"User: anonymous is not
authorized to perform: es:ESHttpGet"}
...then you did not properly set up your environment to sign URL requests to the Elasticsearch service. In order to fix this issue, create an IAM Policy that can read and write to Elasticsearch, attach this policy to an IAM role, and then attach this role to your EC2 instance.
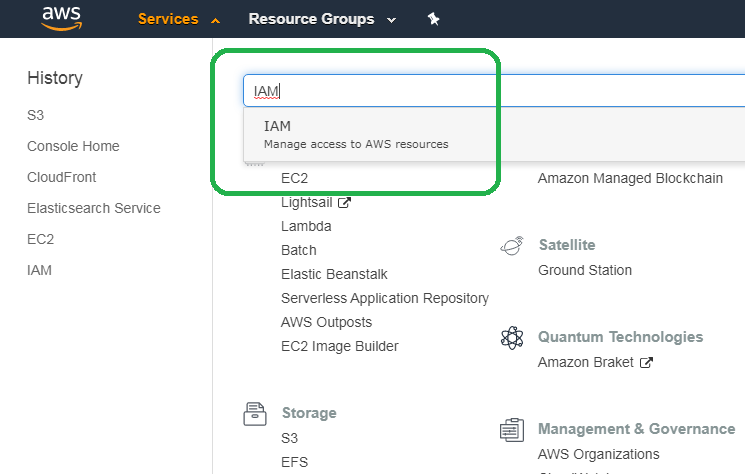
Step 3: Create an S3 CRUD policy
In an earlier blog post I describe how to create an IAM policy that allows us to Create Retrieve Update and Delete (CRUD) Elasticsearch documents. We then attached this policy to an IAM role named EC2_Can_Use_Services, and then attached this role to our EC2 instance. We will now create a new policy that lets Elasticsearch CRUD the contents of S3 buckets and attach that to our pre-existing role.
From the home screen, type IAM into the search bar and click IAM.
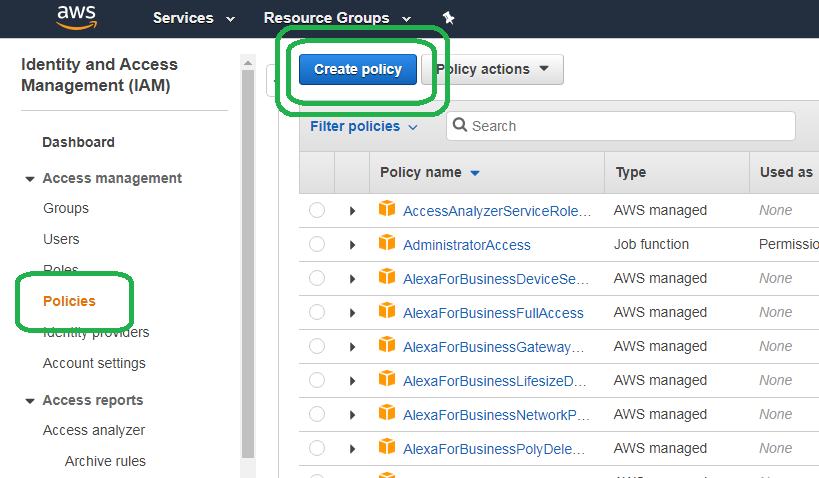
On the left hand side of the bar, click Policies and then click Create policy.
After the Create policy screen loads, select the JSON (JavaScript Object Notation) tab, and then paste in the JSON that follows the image below.
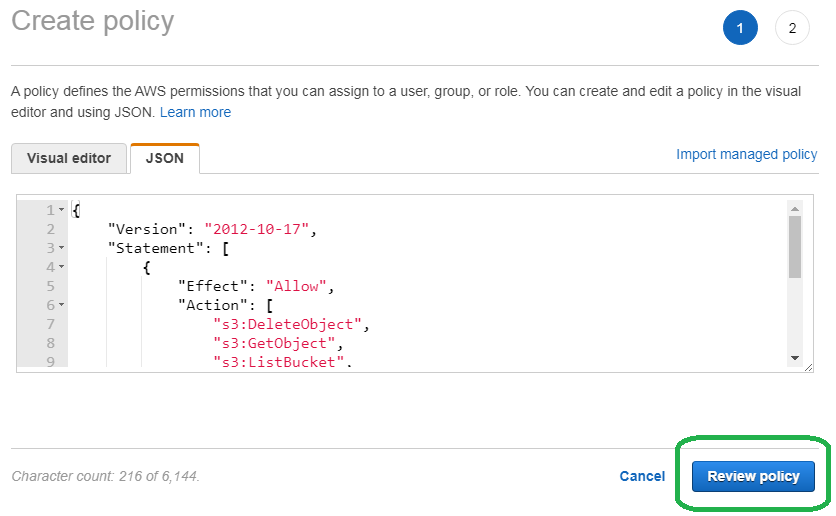
Copy and paste this object into the text box.
{
    "Version": "2012-10-17",
    "Statement": [
        {
            "Effect": "Allow",
            "Action": [
                "s3:DeleteObject",
                "s3:GetObject",
                "s3:ListBucket",
                "s3:PutObject",
                "iam:PassRole"
            ],
            "Resource": [
                "arn:aws:s3:::s3-flask-es",
                "arn:aws:s3:::s3-flask-es/*"
            ]
        }
    ]
}
Click Review policy, name your policy and then click Create policy.

NOTE: The last line of our Action stanza (above) reads iam:PassRole. This line allows our Python client to give Elasticsearch the right to CRUD S3 buckets.
Step 4: Attach our new policy to a Role
In the last blog we created a role that we attached to our EC2 instance. This role allowed Python clients on that instance to sign requests to Elasticsearch without the need for hard-coding AWS_SECRET_KEY or AWS_ACCESS_KEY. In that blog post we attached a Policy that enables Elasticsearch CRUD operations and now we will attach our new policy to allow S3 CRUD operations.
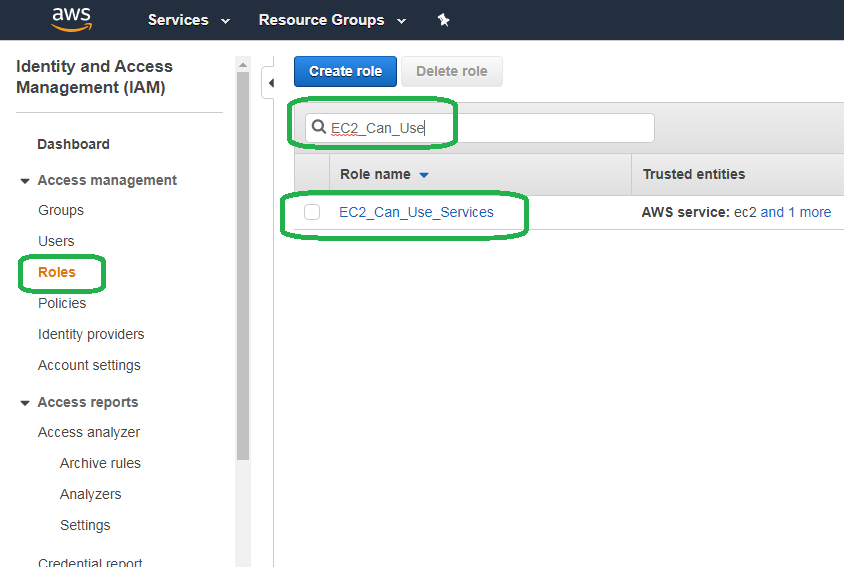
Bring up the IAM console:
Click Roles on the left hand pane. Type the name of the role we created in the previous blog post, named EC2_Can_Use_Services into the search bar and then click it in the results.
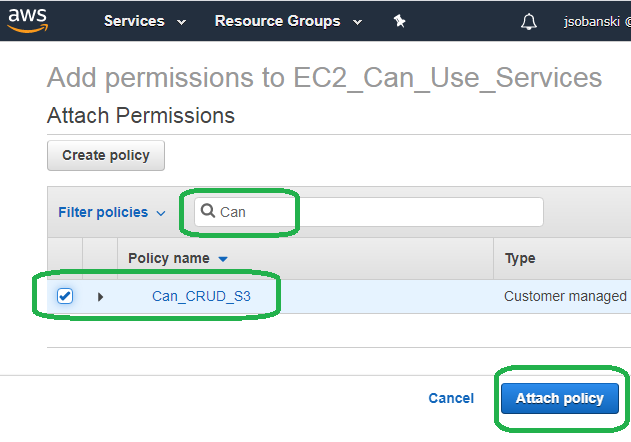
Click Attach polices.
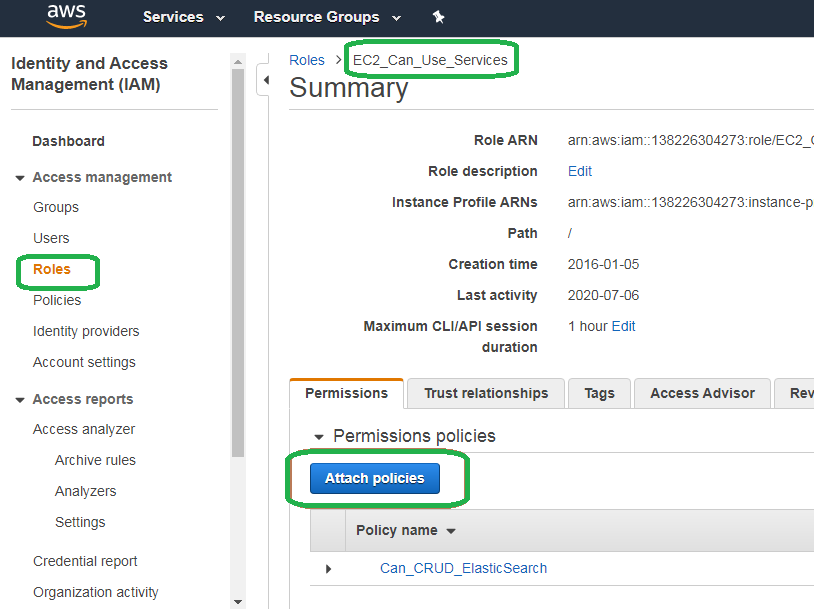
Type Can in the search bar, select Can_CRUD_S3 and then click Attach policy.
Trust Relationship
In order for the EC2_Can_Use_Services role to grant Elasticsearch permissions, the role must trust Elasticsearch. Command the role to trust Elasticsearch via a trust relationship.
We already configured EC2_Can_Use_Services to trust Elasticsearch in the first part of this tutorial. To see this, go to the IAM console.
Bring up the EC2_Can_Use_Services role.
Click the Trust relationship tab and verify that we trust es.amazonaws.com. The es stands for Elasticsearch.
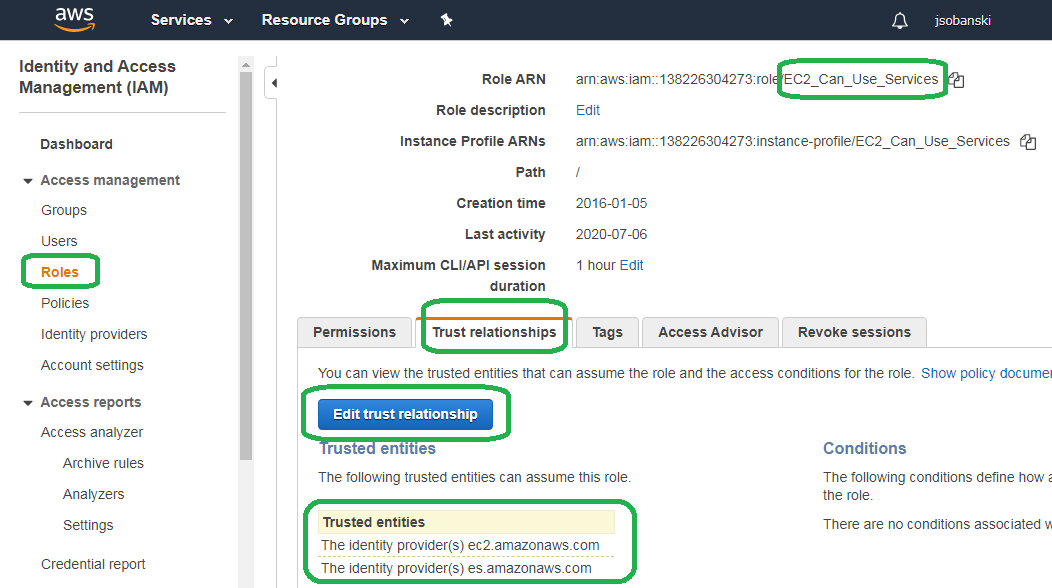
If you do not see es under trusted entities, then click Edit trust relationship.
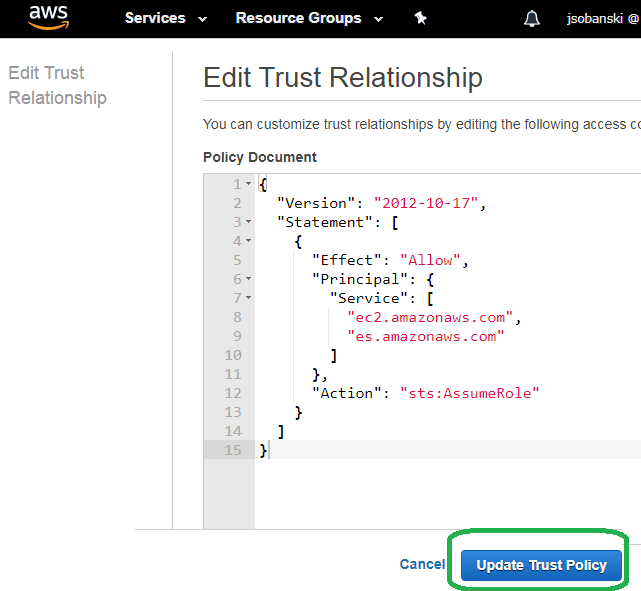
If it does not exist, then paste in the following:
{
  "Version": "2012-10-17",
  "Statement": [
    {
      "Effect": "Allow",
      "Principal": {
        "Service": [
          "ec2.amazonaws.com",
          "es.amazonaws.com"
        ]
      },
      "Action": "sts:AssumeRole"
    }
  ]
}
The trust role allows our Python client to "delegate" the Can_CRUD_S3 policy to the Elasticsearch service via a role pass. In other words, we use a one-time command line script to tell our AWS Elasticsearch service to use S3.
Step 3: Pass the ability to CRUD S3 to Elasticsearch
Now we pass the role to Elasticsearch. The role includes a policy to CRUD S3 which means that, once-passed, Elasticsearch can CRUD S3.
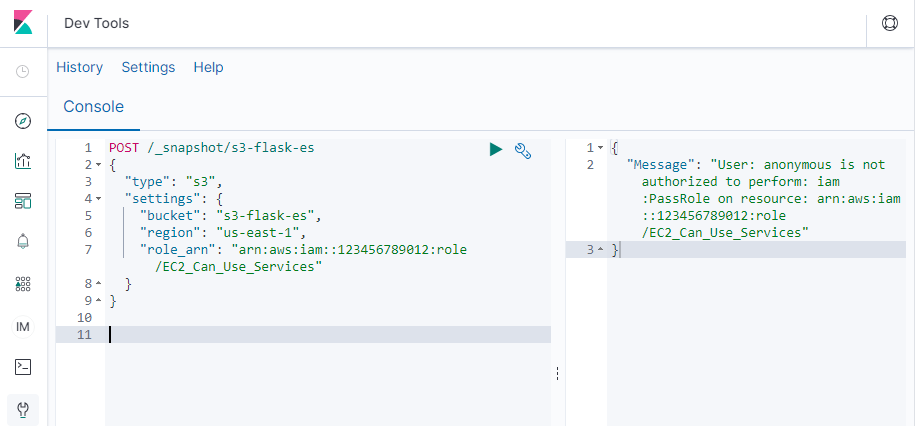
Unlike most services, we cannot use the console GUI to pass a role to Elasticsearch. Instead, we sign a request and send it directly to the Elasticsearch API.
We must use a script that signs the request (below). Kibana Dev Tools, for example, do not suffice.
The following script signs the request.
Before you run the script, configure the appropriate parameters at the script header:
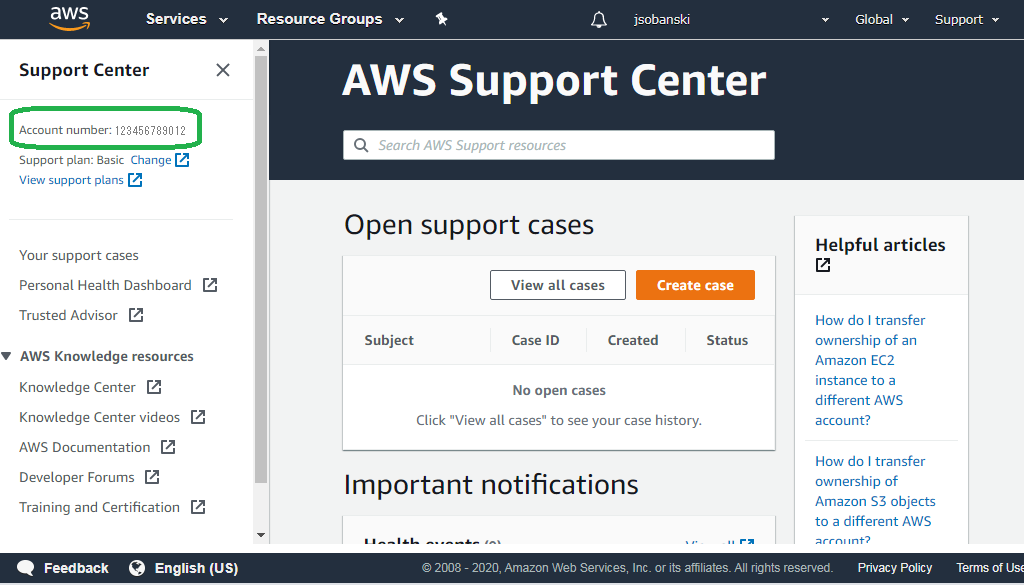
arn = '123456789012' # Look under support in AWS main console menu
api_repo_name = 's3-flask-es' # e.g. my-snapshot-repo-name
bucket = 's3-flask-es'
host = 'search-testdomain-wpk2kadnkwzoqzid2msl4es2km.us-east-1.es.amazonaws.com' # No https:// nor trailing /
region = 'us-east-1'
role_name = 'EC2_Can_Use_Services'
service = 'es'
To find your account ARN, simply click Support in the AWS console.
I record the entire script here:
#!/usr/bin/env/python
import boto3
import requests
from requests_aws4auth import AWS4Auth

arn = '123456789012' # Look under support in AWS main console menu
api_repo_name = 's3-flask-es' # e.g. my-snapshot-repo-name
bucket = 's3-flask-es'
host = 'search-testdomain-wpk2kadnkwzoqzid2msl4es2km.us-east-1.es.amazonaws.com' # No https:// nor trailing /
region = 'us-east-1'
role_name = 'EC2_Can_Use_Services'
service = 'es'

credentials = boto3.Session().get_credentials()
awsauth = AWS4Auth(credentials.access_key, credentials.secret_key, region, service, session_token=credentials.token)

# Register repository

path = '_snapshot/{}'.format(api_repo_name) # the Elasticsearch API endpoint
url = 'https://{}/{}'.format(host,path)
role_arn = 'arn:aws:iam::{}:role/{}'.format(arn,role_name)

payload = {
  "type": "s3",
  "settings": {
    "bucket": bucket,
    "endpoint": "s3.amazonaws.com", # for us-east-1
    #"region": region, # for all other regions, e.g. us-west-1
    "role_arn": role_arn
  }
}
The script enables Elasticsearch to store and retrieve snapshots to S3 buckets. After execution, the script returns success via an {"accepted":true} messge.
(flask_to_es)ubuntu@ip-172-31-34-189:~/flask_to_es$ python register_snapshot.py
{"accepted":true}
If the screen does not print {"accepted":true} check that your ES endpoint does not contain spaces, you have the correct ARN and you entered the name of the bucket you created in Step 1. Also, if you deployed a bucket in us-east-1 then use endpoint in the payload. For any other region, use region. Comment out the script appropriately for your region. For example, the payload for us-west-1 looks like:
payload = {
  "type": "s3",
  "settings": {
    "bucket": bucket,
    #"endpoint": "s3.amazonaws.com", # for us-east-1
    "region": region, # for all other regions, e.g. us-west-1
    "role_arn": role_arn
  }
}
Snapshot and Restore
Now that you passed the role to Elasticsearch, you can use Kibana Dev Tools to trigger backup and restore.
In Dev Tools, create a new index and document.
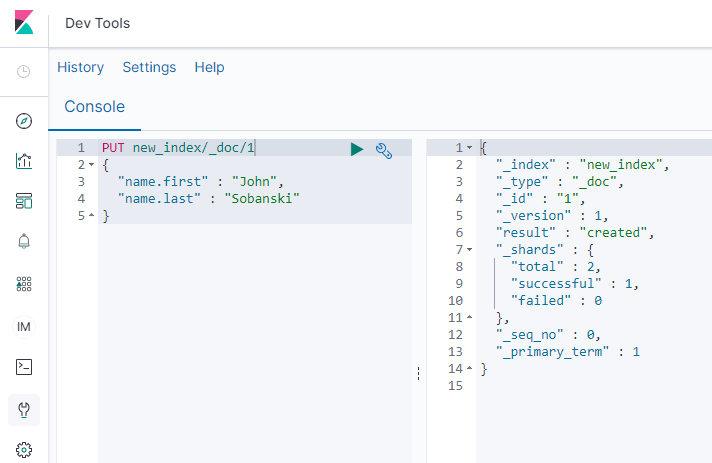
Paste in the following to Dev Tools:
PUT new_index/_doc/1
{
  "name.first" : "John",
  "name.last" : "Sobanski"
}
Now, paste in the following to create an snapshot of new_index. Be sure to change the endpoint name below (e.g. s3-flask-es) to the name of your endpoint. You set your endpoint name in the header of the register_snapshot.py script.
PUT /_snapshot/s3-flask-es/snapshot_1?wait_for_completion=true
{
  "indices": "new_index",
  "ignore_unavailable": true,
  "include_global_state": false
}

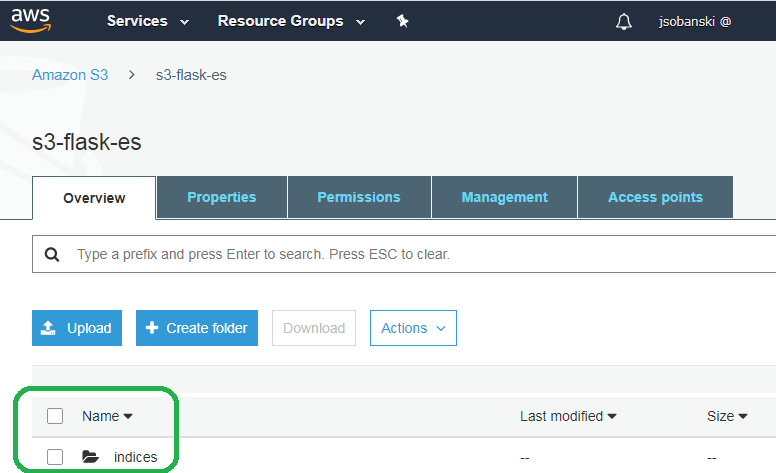
Go to your S3 bucket and take a look at the contents.
You will see a new sub-folder named indices.
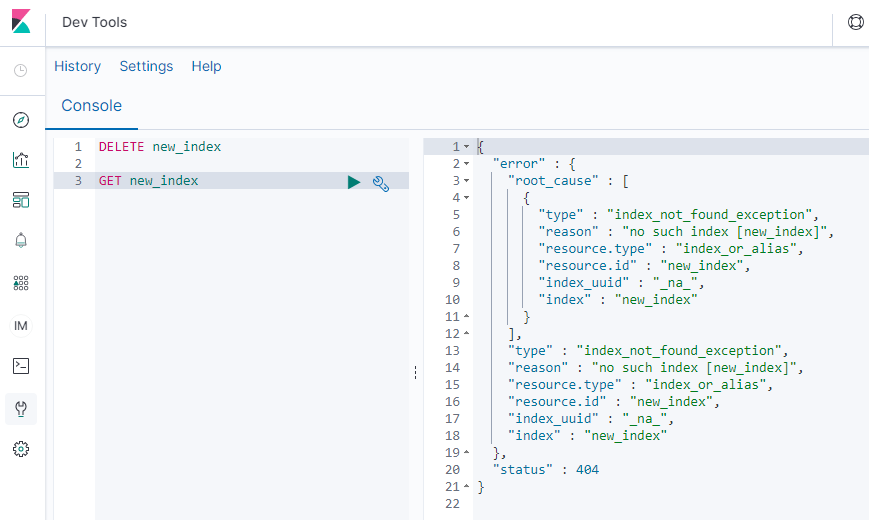
Delete new_index:
DELETE new_index

{
  "acknowledged" : true
}
Now try to retrieve the new_index and Elasticsearch barks. You deleted it!
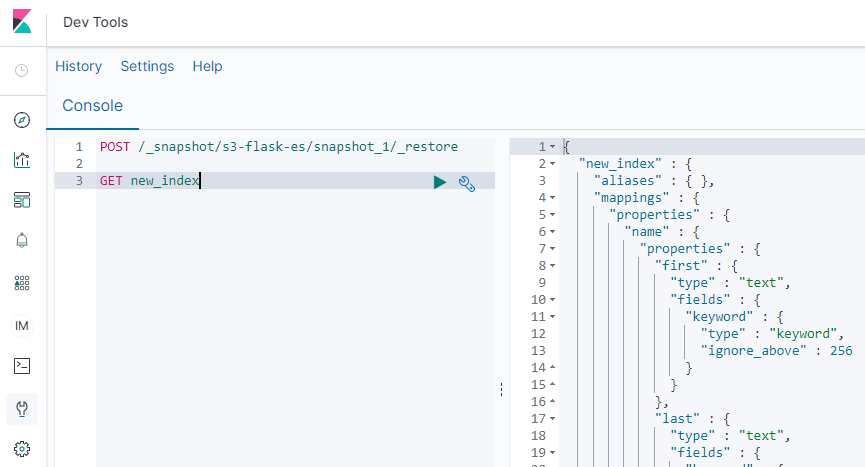
POST this restore command into Dev Tools. Once more, change s3-flask-es to the name of your endpoint:
POST /_snapshot/s3-flask-es/snapshot_1/_restore

{
  "accepted" : true
}
new_index returns from the dead!
Conclusion
Congratulations! You now deployed an Elasticsearch service, connected to it, created an index, backed up an index and restored an index - all within the AWS ecosystem.