In this HOWTO, I will describe the process to connect an Ubuntu EC2 instance to the Amazon Web Services (AWS) provided Elasticsearch Service via the boto3 Python library. This blog updates my incredibly popular original post on this topic which describes the process using boto2. In the spirit of my original post, I once more capture and present the easiest and most direct method to connect an EC2 instance to the AWS ES service.

As before, I present a caveat before we begin. You must trust me that the Identity and Access Management (IAM) based security approach that I present below will make your life easy. This approach yields greater flexibility, greater security, greater automation (vs. an IP whitelist approach) and AWS labels it a best practice. The IAM security approach provides a quick, pull off the band-aid method that will save you a ton of heartache and debugging down the road.
When I first played with AWS, I found that the IAM role method appeared both boring and complicated so my mind invented many reasons to avoid diving in. You may or may not have the same gut reaction when you read this blog post. I just ask twenty seconds of courage, to read my IAM instructions (which I spent hours simplifying), copy and paste some JSON and then soldier on!
You may be tempted to avoid the IAM role approach for access and instead (1) Copy and Paste your AWS credentials or (2) Use an IP Whitelisti. These approaches, however, do not provide the same level of security or flexibility. The IP whitelist approach, for example may appear to be simple, but outside of toy integrations it becomes furiously difficult to track and you will waste time.
In summary, you will:
- Discover your account ID
- Deploy the AWS Elasticsearch Service
- Create an IAM Role, IAM Policy and configure a Trust Relationship
- Connect an EC2 Instance via Boto3
Note: Please ensure that you know how to SSH into an EC2 instance.
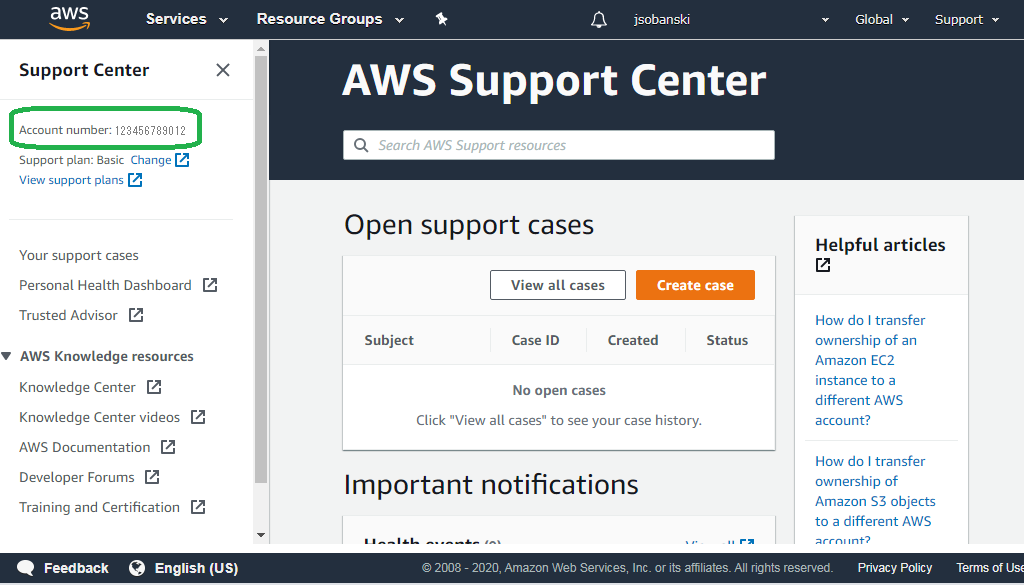
1. Find your Amazon Account ID
You will use your Account ID to configure security on the Elasticsearch Service. To find your account ID, simply click Support in the AWS console and then write down your Account ID, or copy and paste into a text document.
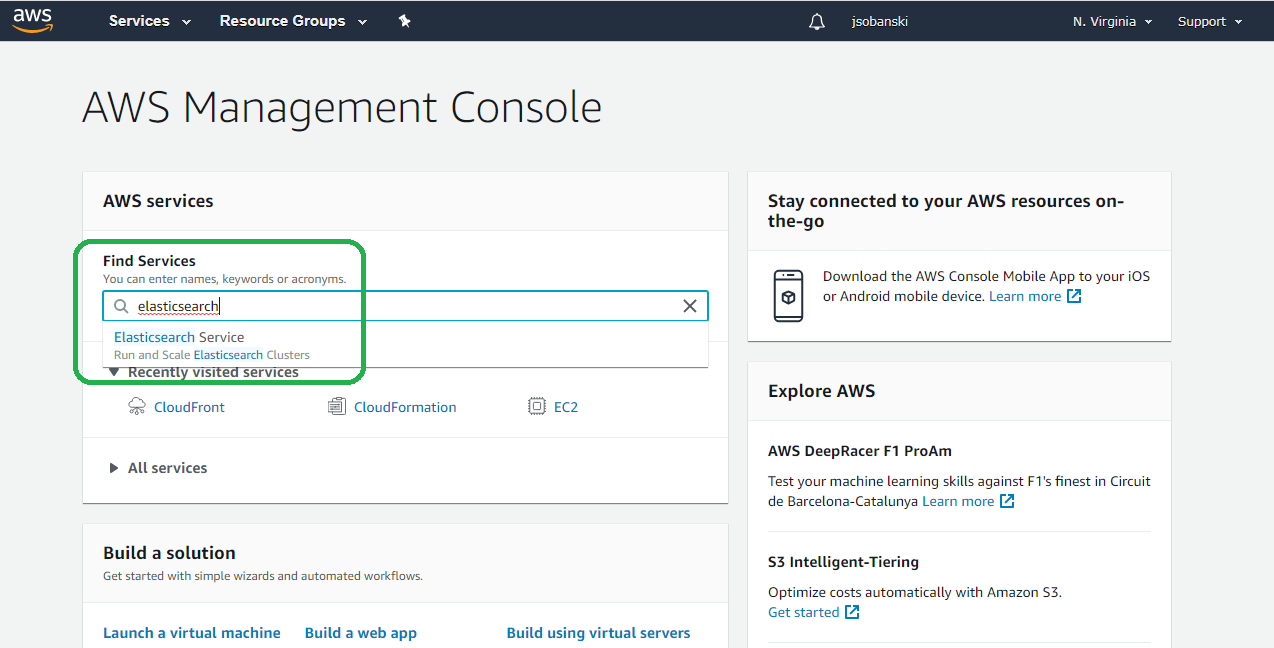
2. Deploy an AWS Elasticsearch Instance
Amazon makes Elasticsearch deployment a breeze. Type Elasticsearch into the AWS console search bar and then click it:
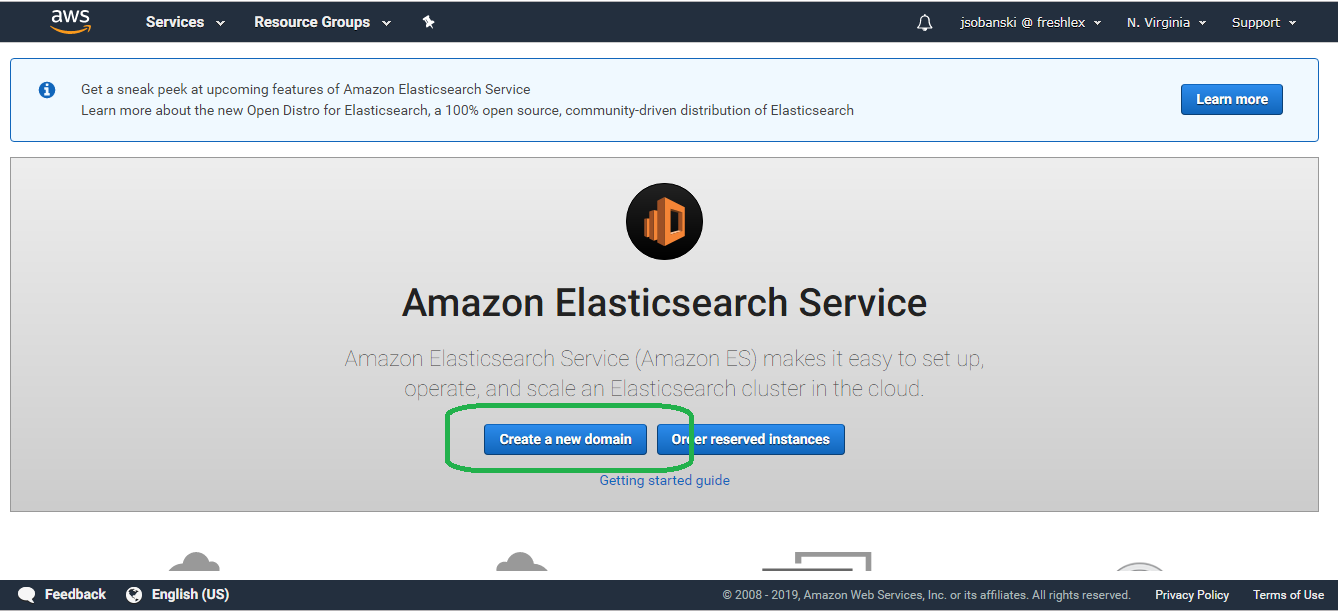
Then click Create a new domain.
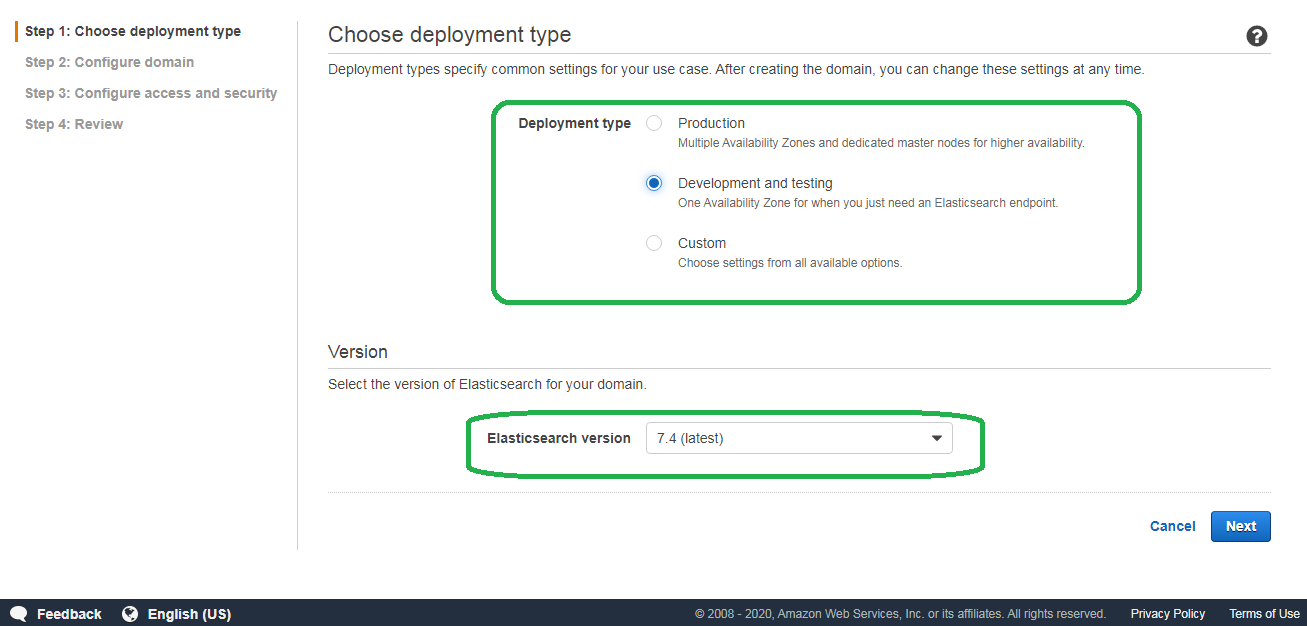
Select the desired deployment type and Elasticsearch version.
Name your domain something super-creative, like test-domain and select your instance type. I select the cheapest option here, so I can save my money and invest in WATA graded NES games.
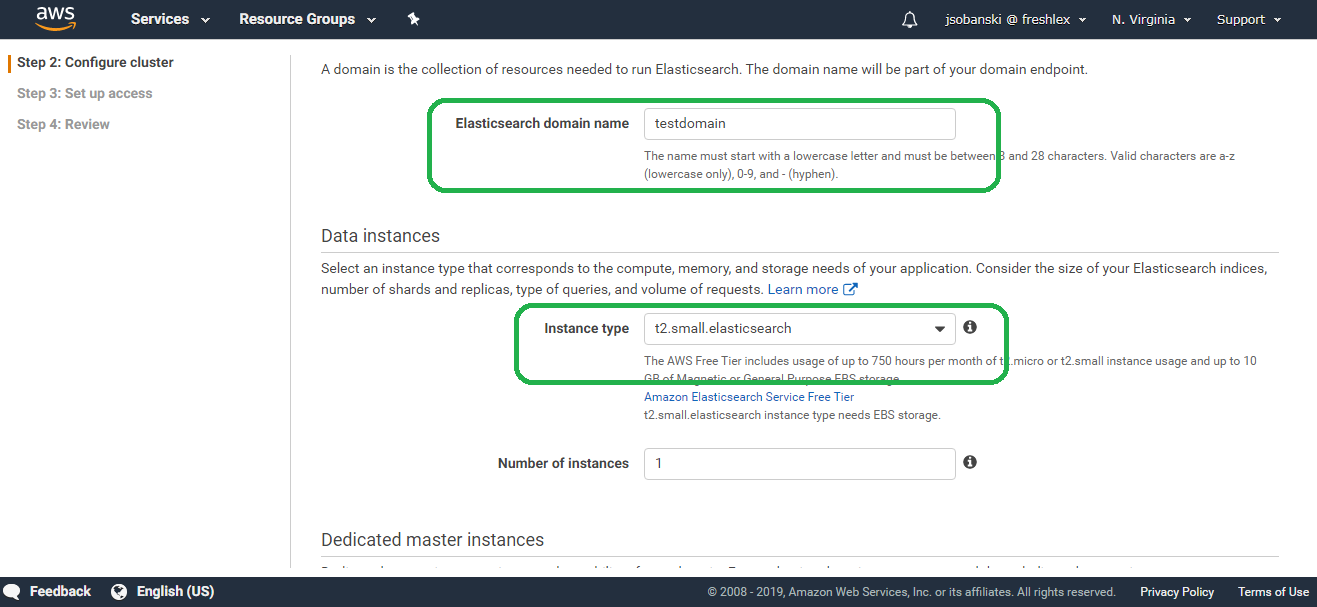
Click Next until you arrive at Step 3: Configure access and security.
You can choose, if you prefer, to deploy your service into a Virtual Private Cloud (VPC). Since we will require all access to use signed, encrypted requests, the public Internet will suffice. Bots and bad actors can hit our API, but they will not be able to proceed without the proper crpytographic credentials. If you plan to operationalize this service, then you may want to consider using a VPC. A VPC shuts down all external paths to your service. For now, we will rely on the security of enforcing signed requests.

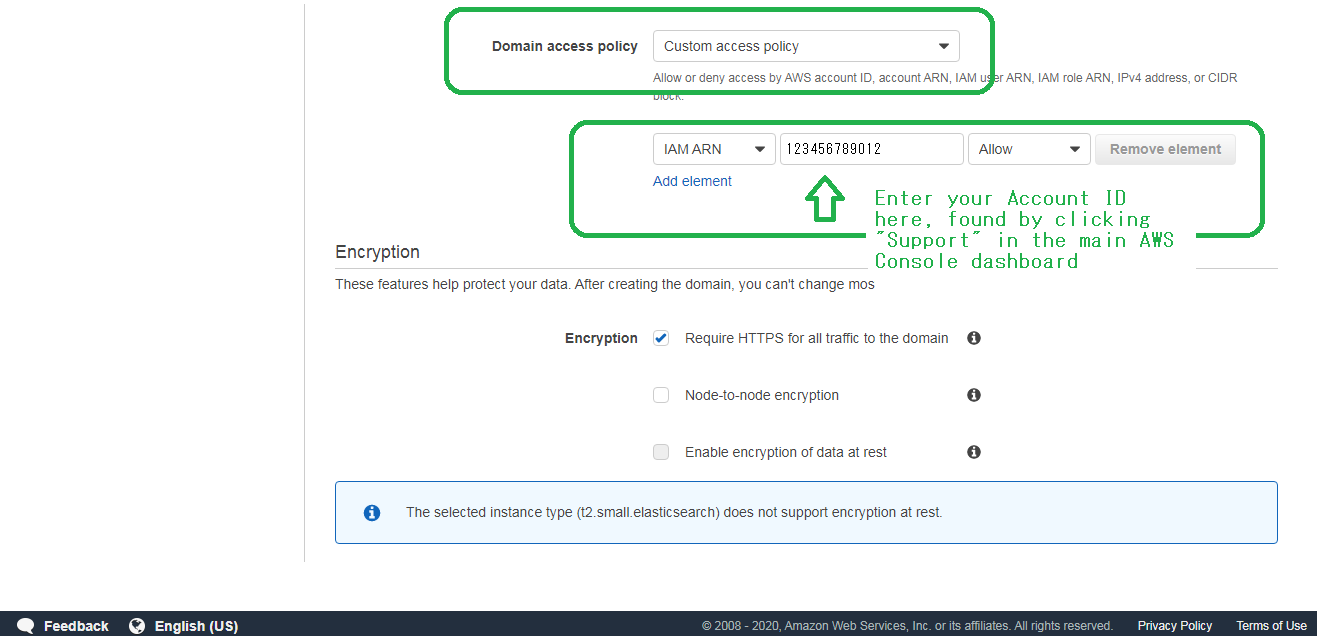
Scroll down to Domain access policy and select Custom access policy.
Do you remember your Account ID? Paste it into the middle box as shown. In the first box, select IAM ARN, in the second box, paste in your Account ID and then in the third box select Allow. Be sure to select Encryption.
Click next until you see the prompt to deploy the service and then deploy the service.
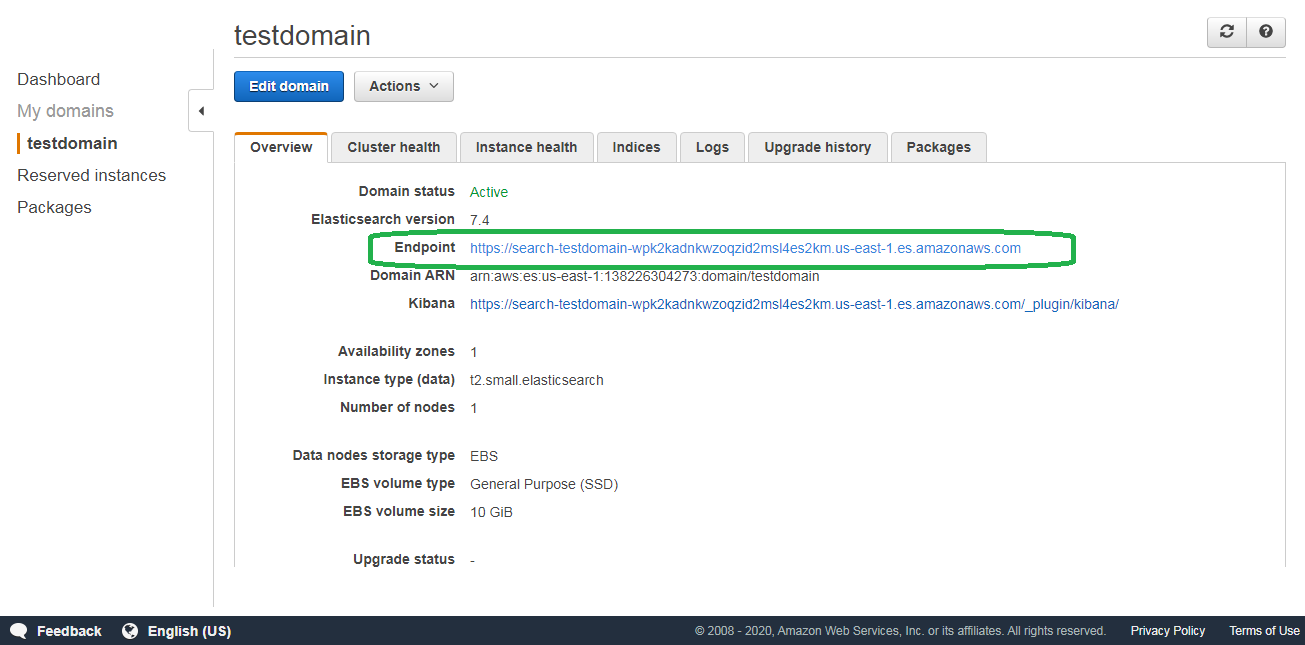
After about ten minutes you will see the Elasticsearch endpoint, ready for use.
If you click the endpoint, you will receive the following error:
{"Message":"User: anonymous is not authorized to perform: es:ESHttpGet"}
If you want to use the service, you must sign and encrypt the GET request. I present the easiest and most direct way to do that below.
3. Create an IAM Role, Policy and Trust Relationship
3.1 Create an IAM Policy
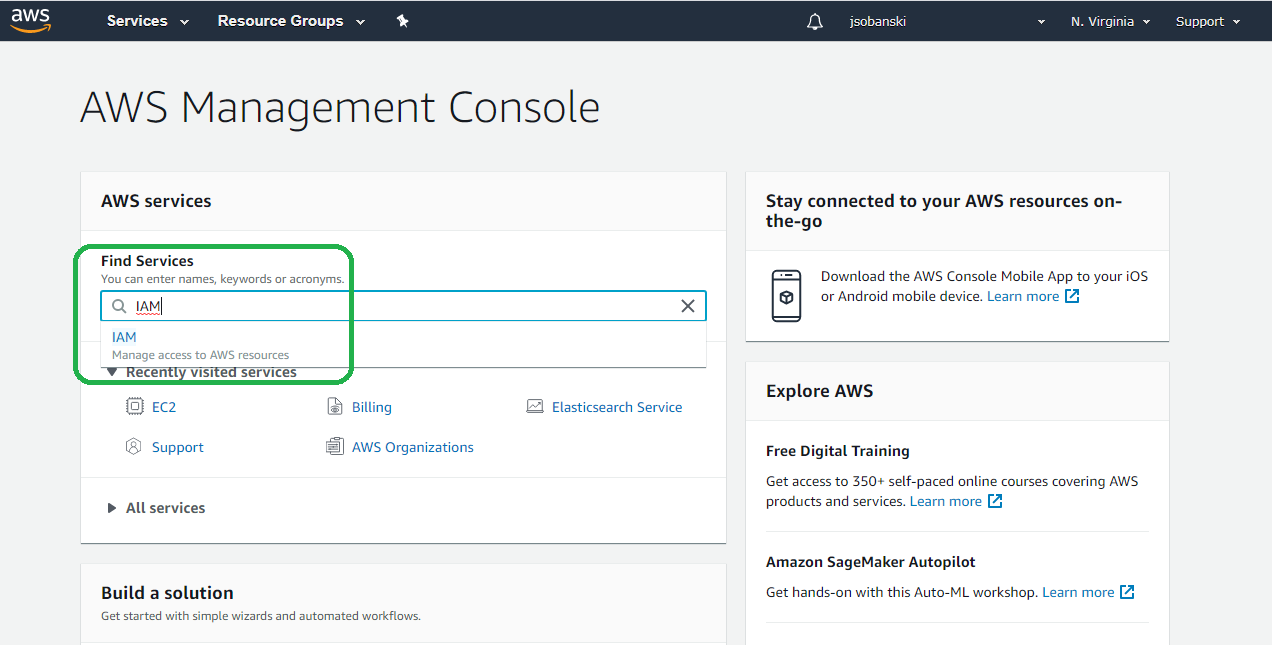
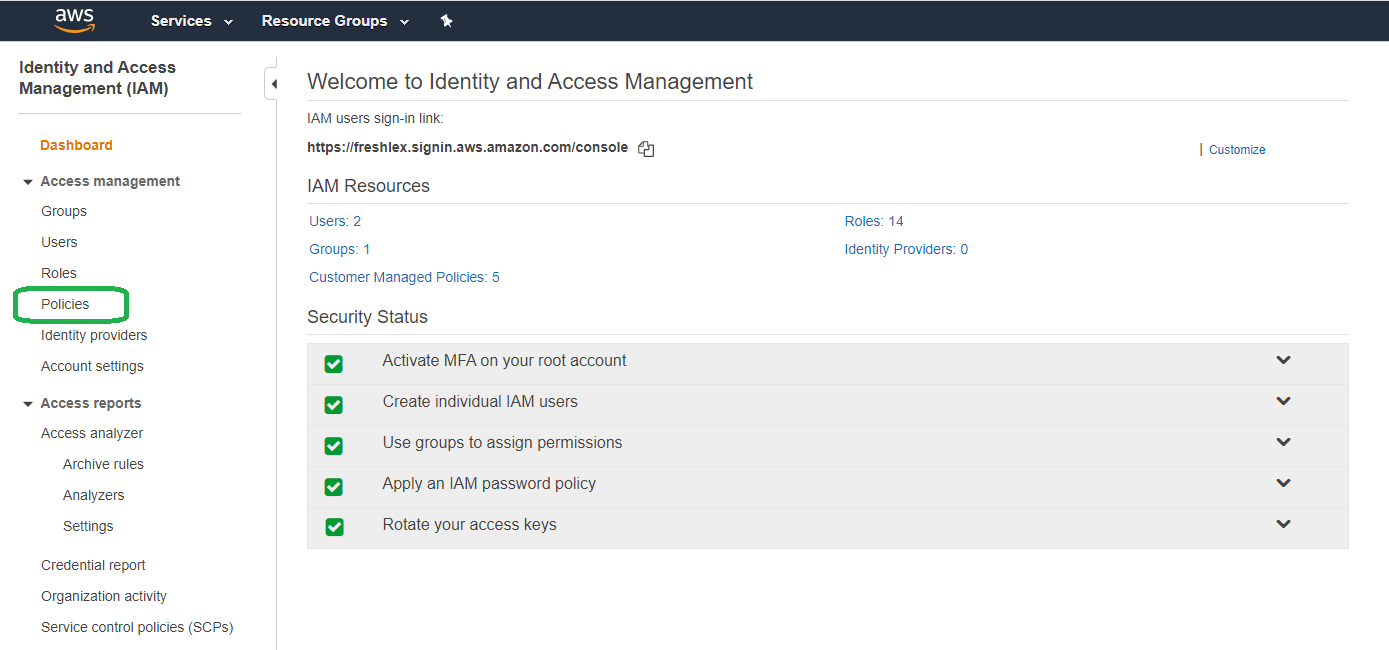
Type "IAM" into the AWS console search bar and then click it.
Select "Policies."
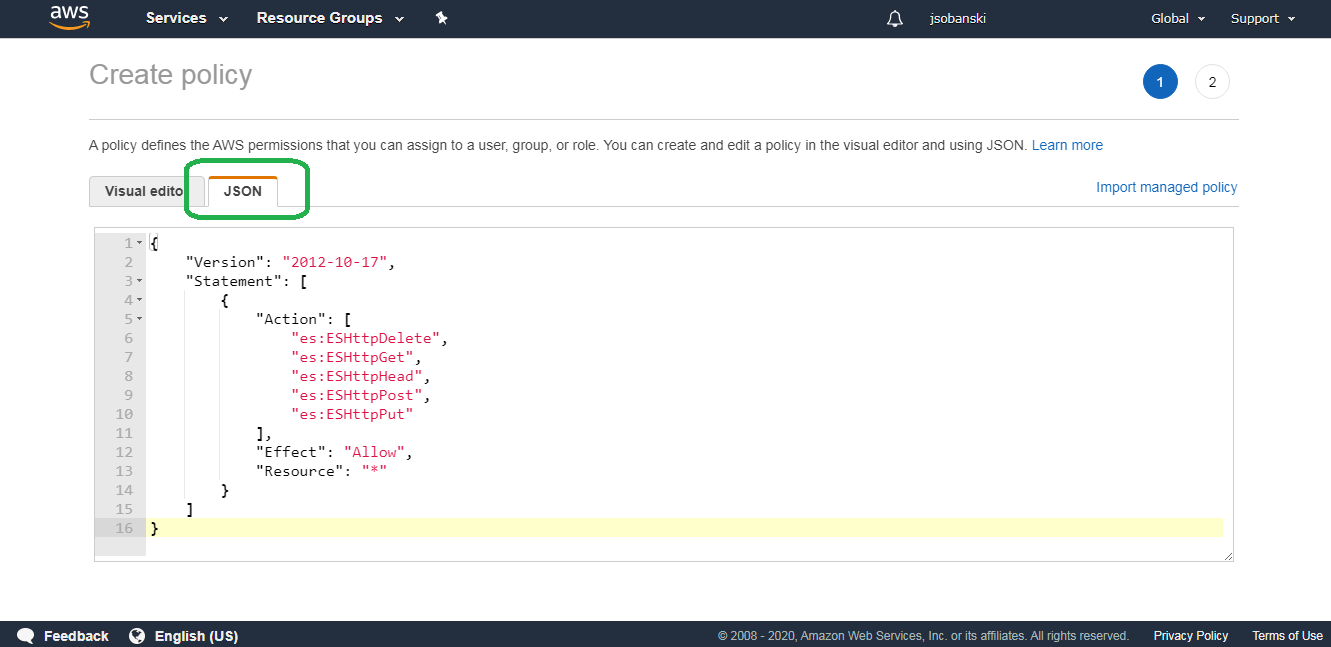
Select JSON and paste in the following JSON:
{
    "Version": "2012-10-17",
    "Statement": [
        {
            "Action": [
                "es:ESHttpDelete",
                "es:ESHttpGet",
                "es:ESHttpHead",
                "es:ESHttpPost",
                "es:ESHttpPut"
            ],
            "Effect": "Allow",
            "Resource": "*"
        }
    ]
}
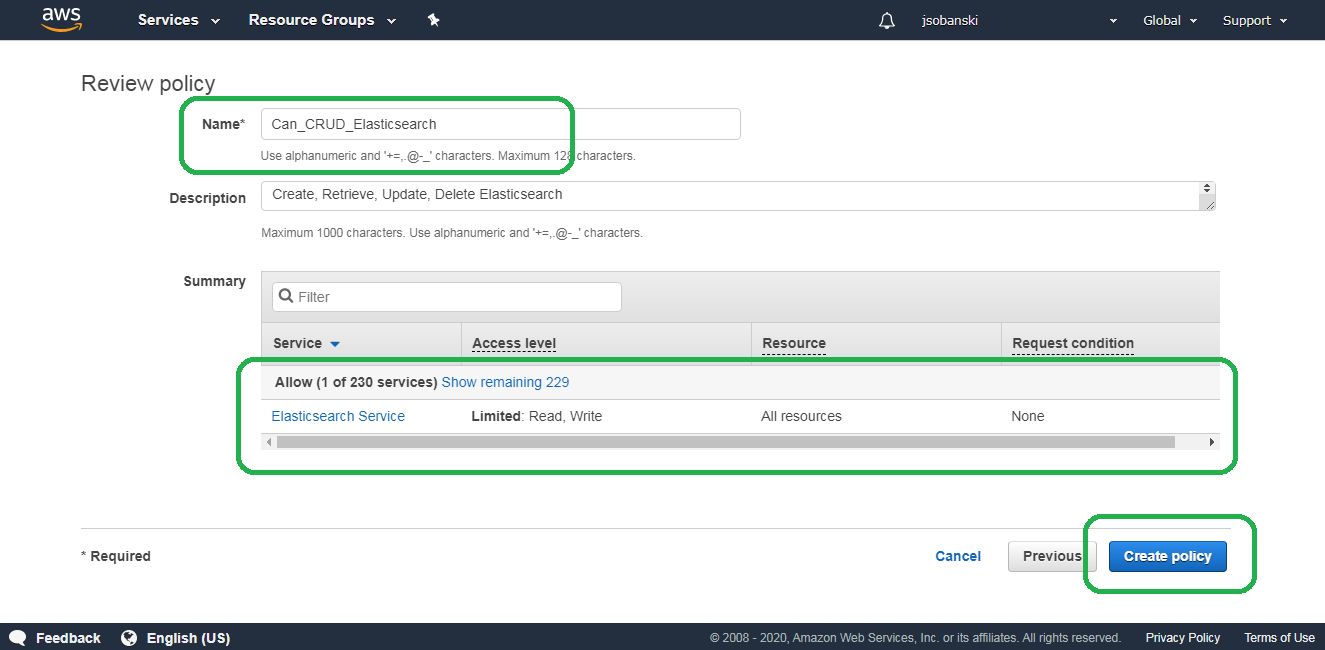
Click Review policy, name your policy Can_CRUD_Elasticsearch and then click Create policy
3.2 Create an IAM Role with attached Policy
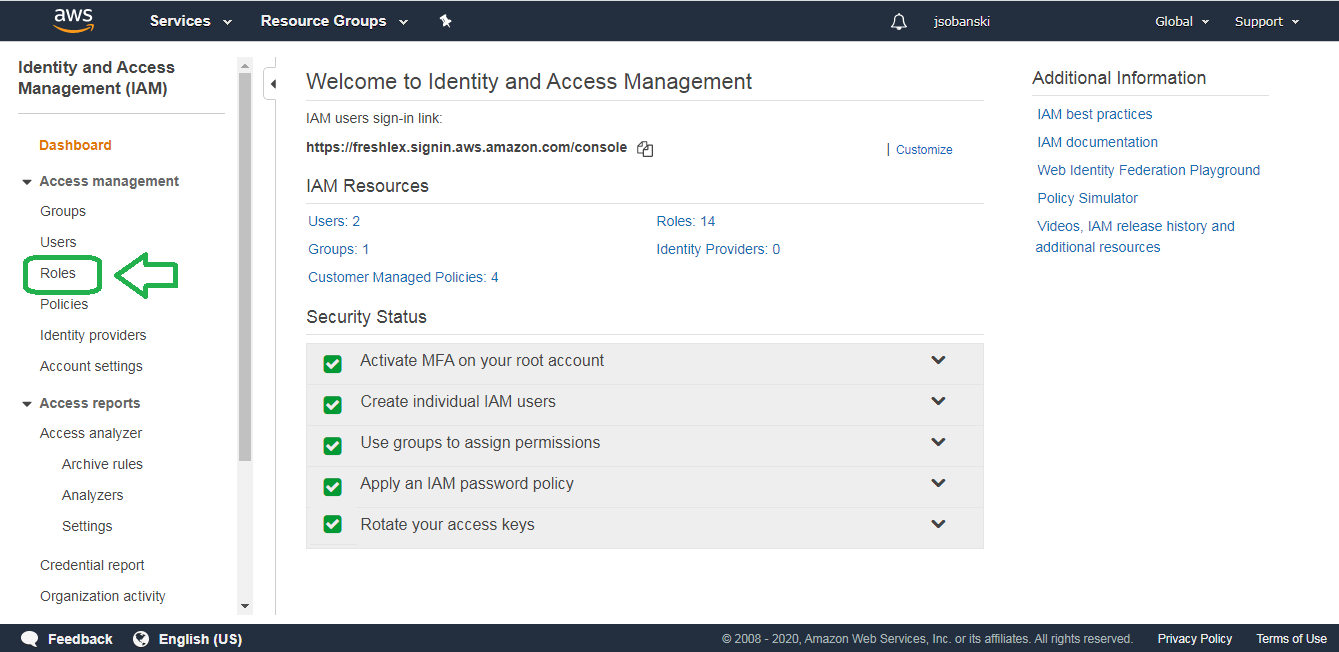
On the Dashboard, click "Roles."
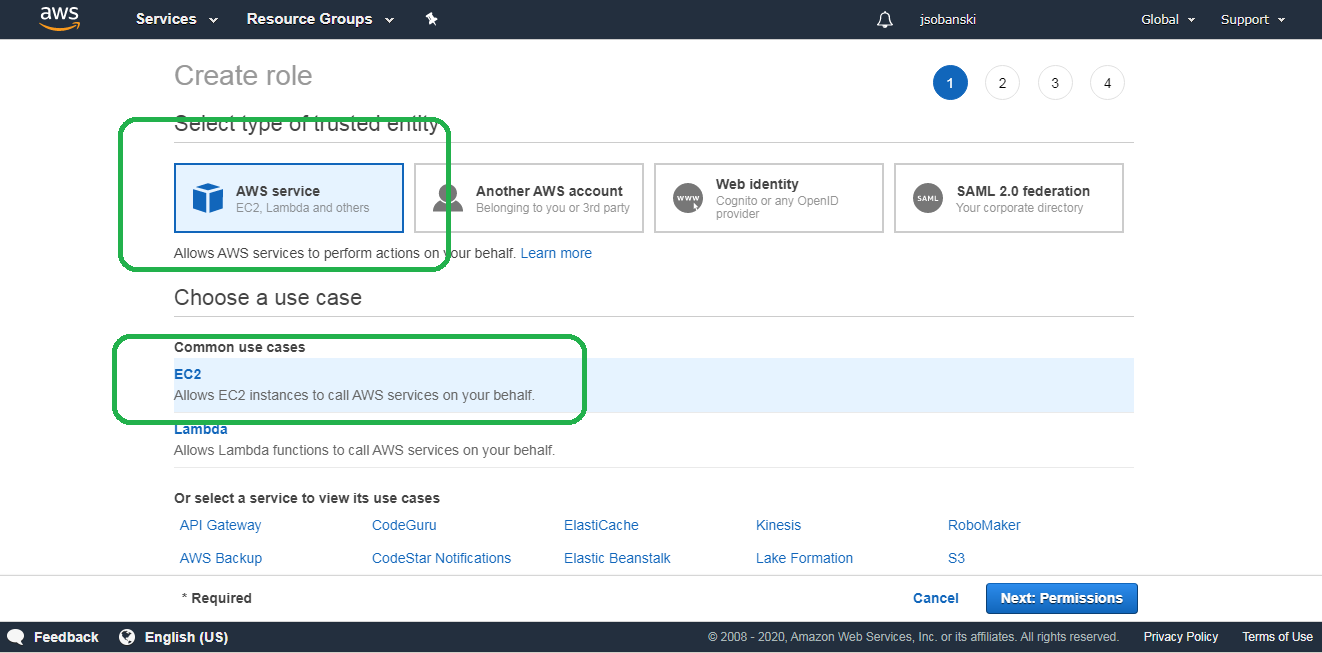
Under Create Role select AWS service for your trusted entity and then EC2 under common use case.
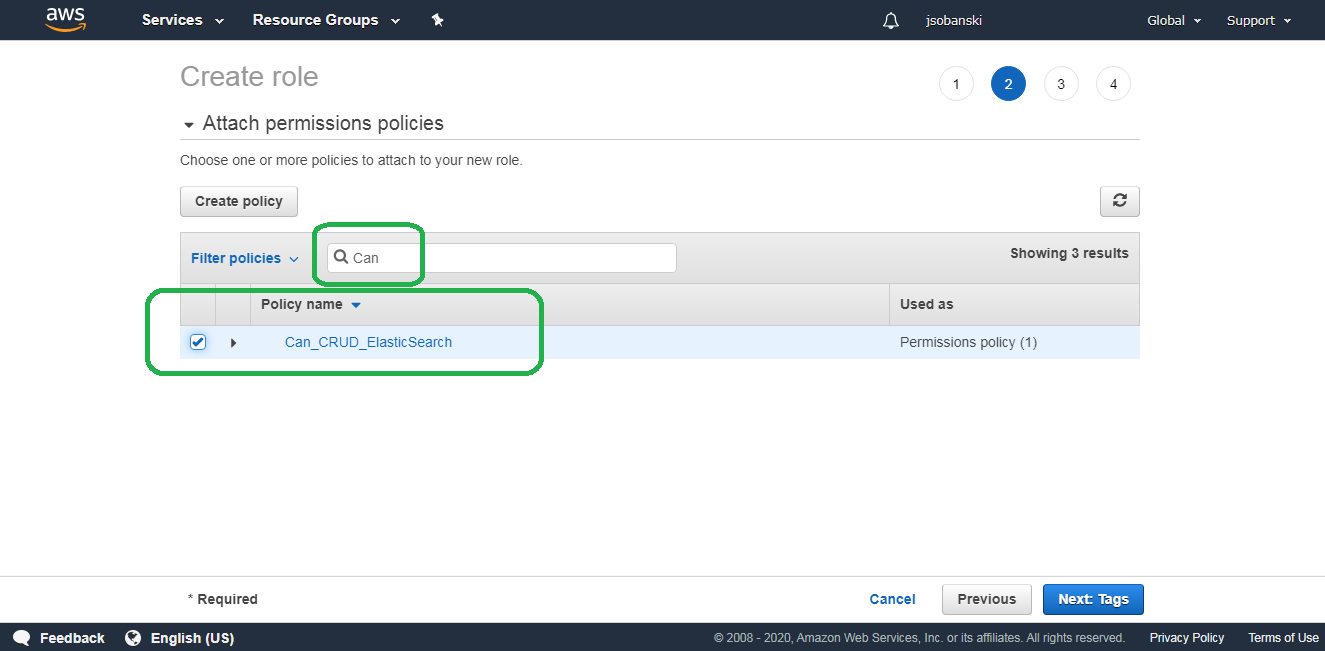
On the second page of Create Role attach the policy you created above. Simply type Can_CRUD_Elasticsearch into the search bar and then check the box next to its name.
Skip the Tags and go to page four. Since this role grants EC2 instances (e.g. Ubuntu servers) access to Amazon services, I named it EC2_Can_Use_Services.

Click Create role.
3.3 Trust Elasticsearch
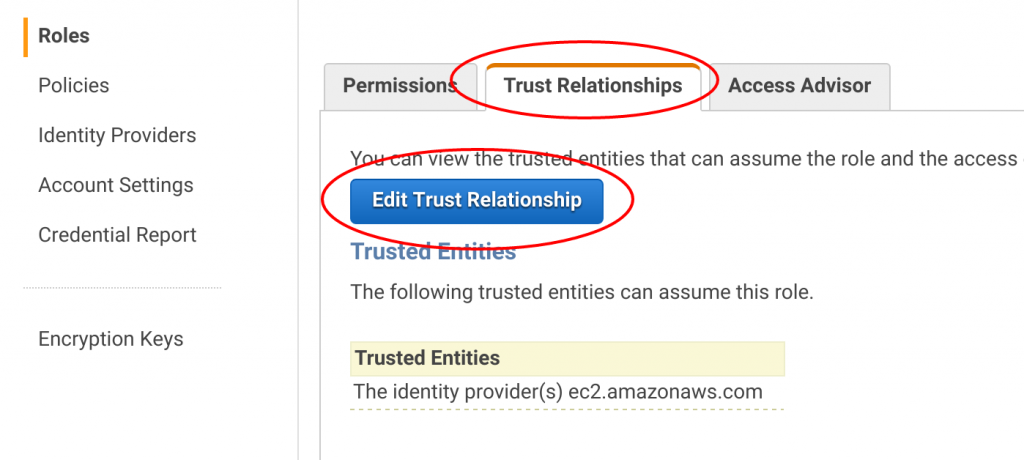
After you click Create role, AWS returns you to the IAM Role dashboard. If not, enter EC2_Can_Use_Services into the find bar and click your new EC2_Can_Use_Services role. From here, click the Trust Relationship tab and click Edit Trust Relationships.
Copy and paste the following JSON into the "Policy Document" field.
{
  "Version": "2012-10-17",
  "Statement": [
    {
      "Effect": "Allow",
      "Principal": {
        "Service": "ec2.amazonaws.com",
        "Service": "es.amazonaws.com"
      },
      "Action": "sts:AssumeRole"
    }
  ]
}
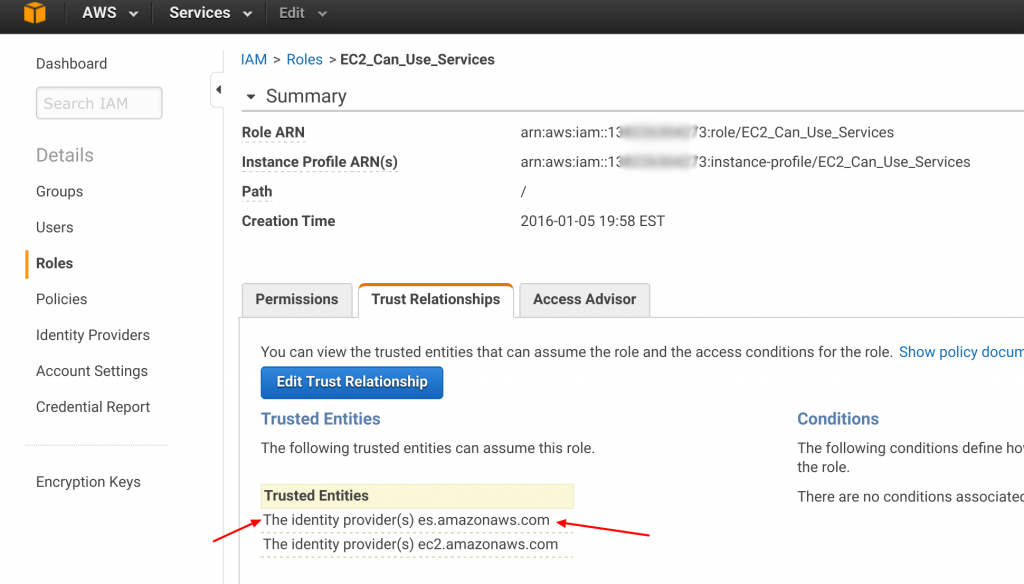
After you click update trust relationship, the IAM dashboard reads as follows:
4. Connect to the Elasticsearch Service
4.1 Launch an EC2 instance with the IAM role
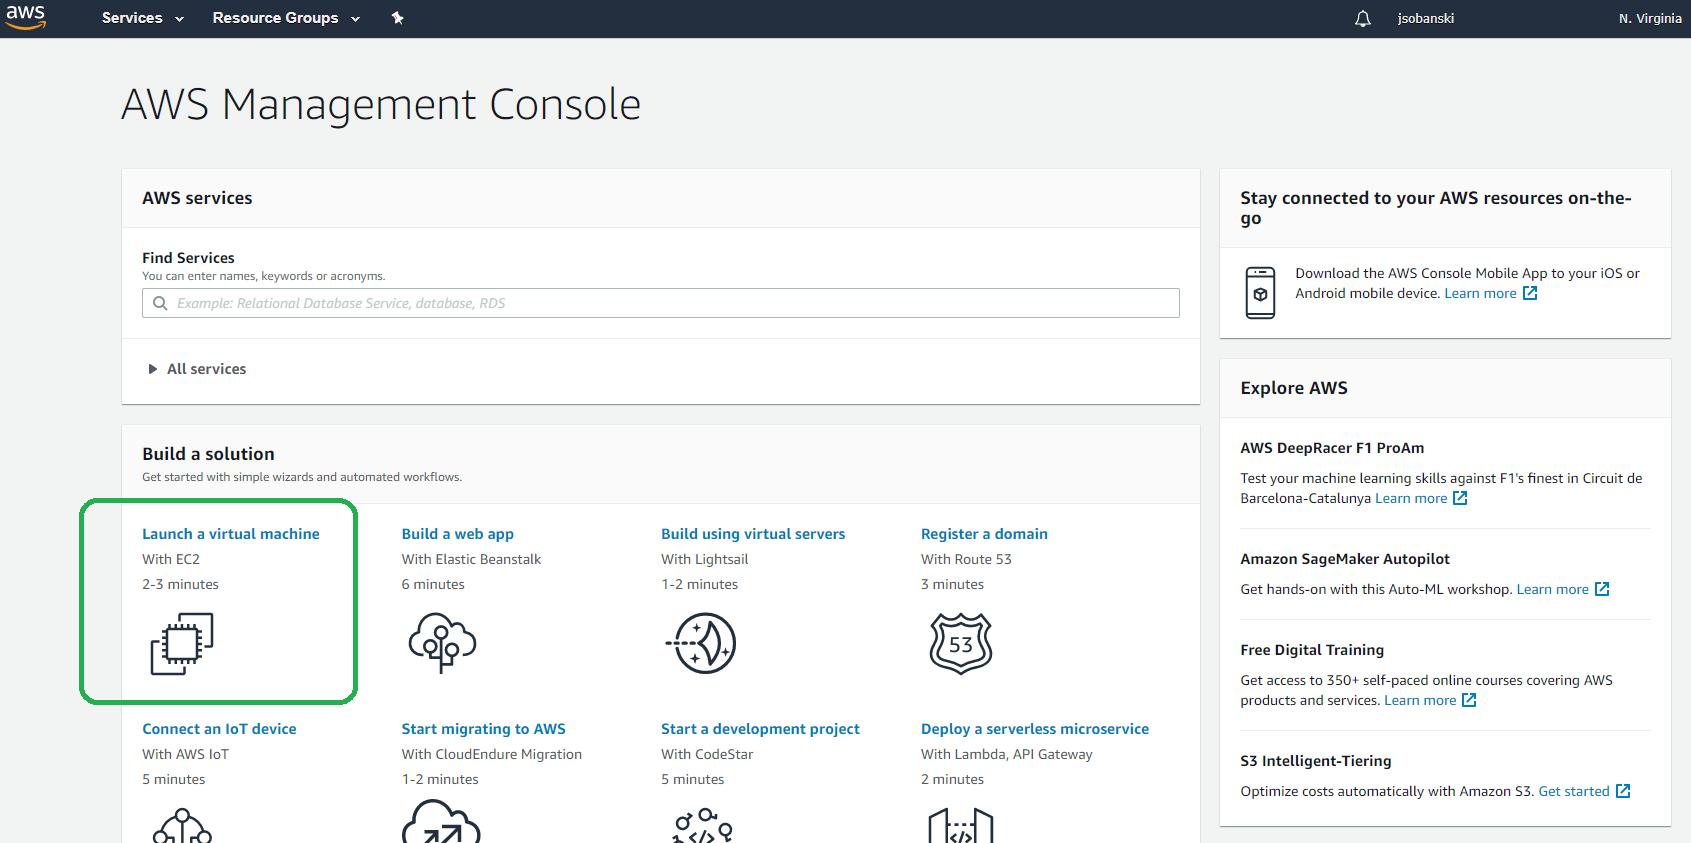
From the AWS Management Console, click Launch a Virtual Machine or type EC2 into the search bar and then click Launch Instance.
In Step 1: Choose an AMI Instance, select Ubuntu Server 18.04 LTS.
In Step 2: Choose an Instance Type select t2.micro or your preferred instance type.
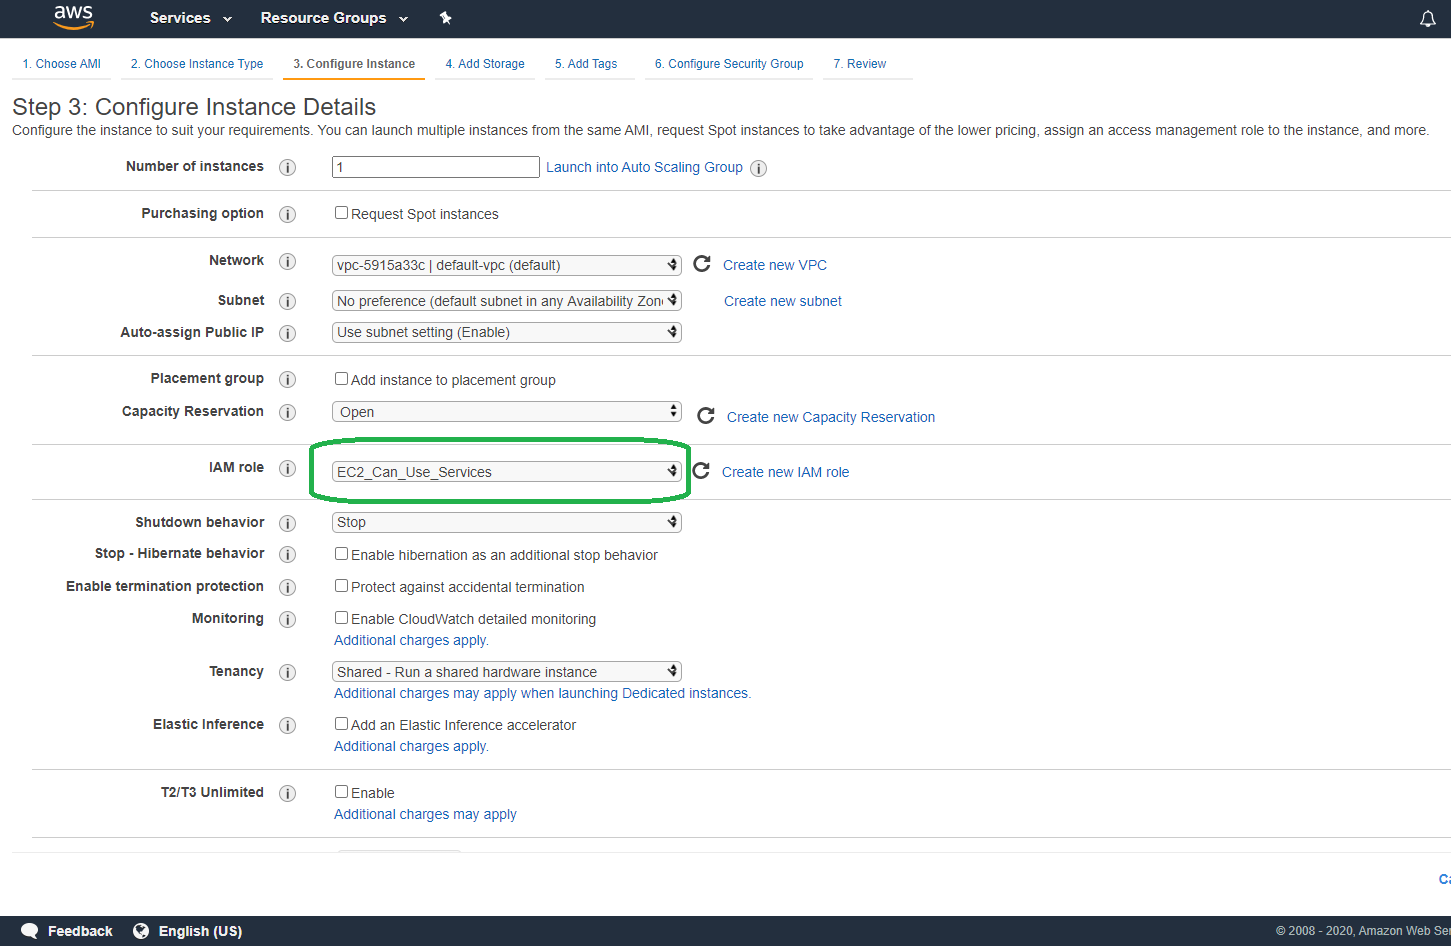
In Step 3: Configure Instance Details select EC2_Can_Use_Services under IAM role.
Now click "Review and Launch" and then launch. AWS will take a few minutes to launch the instance.
4.2 Configure the instance.
For security reasons, you should update your server's Operating System (OS).
ubuntu@ip-172-31-52-51:~$ sudo apt-get -y update
ubuntu@ip-172-31-52-51:~$ sudo apt-get -y dist-upgrade
Since we now live in 2020, and the Python foundation End of Life'd (EOL) Python 2, I assume that you will use Python 3.
Ensure that you have Python 3 installed:
ubuntu@ip-172-31-52-51:~$ python3 --version
Python 3.6.9
4.3 Create a Virtual Environment
A virtual environment allows you to install python packages like a maniac without permanently hosing your server. You create an environment, install packages to that environment, activate the environment, use the environment, and then deactivate the environment (at which point you can re-activate it at a later date). Virtual environments allow you to have several different versions of Python packages on the same server without any confusion or clobbering.
ubuntu@ip-172-31-52-51:~$ sudo apt-get install python3-venv
Create the virtual environment and then activate the environment with source.
ubuntu@ip-172-31-52-51:~$ python3 -m venv connect_to_es
ubuntu@ip-172-31-52-51:~$ source ./connect_to_es/bin/activate
(connect_to_es) ubuntu@ip-172-31-52-51:~$ cd connect_to_es/
(connect_to_es) ubuntu@ip-172-31-52-51:~/connect_to_es$
The shell prefixes the prompt with the name of your virtual environment (connect_to_es).
This indicates that you activated your virtual environment.
Install the following packages into your environment:
- boto3
- elasticsearch
- requests
- requests-aws4auth
Note that you need to install the proper version of the Elasticsearch client. In this HOWTO I installed Elasticsearch version 7.4, so I need to install version seven of the Elasticsearch client. See the Elasticsearch Docs for simple instructions.
In the case of 7.4 I simply type:
$ pip install 'elasticsearch>=7.0.0,<7.14'
Install all of the required packages into your virtual environment:
(connect_to_es) ubuntu@ip-172-31-52-51:~/connect_to_es$ pip install boto3 requests requests-aws4auth 'elasticsearch>=7.0.0,<7.14'
A pip freeze writes the installed packages to the screen:
(connect_to_es) ubuntu@ip-172-31-52-51:~/connect_to_es$ pip freeze
boto3==1.13.21
botocore==1.16.21
certifi==2020.4.5.1
chardet==3.0.4
docutils==0.15.2
elasticsearch==7.7.1
idna==2.9
jmespath==0.10.0
pkg-resources==0.0.0
python-dateutil==2.8.1
requests==2.23.0
requests-aws4auth==0.9
s3transfer==0.3.3
six==1.15.0
urllib3==1.25.9
4.4 Write a Python Script
In the AWS management console, click the Elasticsearch service and copy the address for your endpoint.
In my example, I have the following URI for my Elasticsearch endpoint:
https://search-testdomain-wpk2kadnkwzoqzid2msl4es2km.us-east-1.es.amazonaws.com/
Remove the https:// and trailing slash from the URI and enter it into the following script under the parameter host.
#!/usr/bin/env python3
# connect_to_es.py
from elasticsearch import Elasticsearch, RequestsHttpConnection
from requests_aws4auth import AWS4Auth
import boto3
import json

# Remove the https:// and trailing slash from your ES endpoint
# https://search-testdomain-wpk2kadnkwzoqzid2msl4es2km.us-east-1.es.amazonaws.com/

host = 'search-testdomain-wpk2kadnkwzoqzid2msl4es2km.us-east-1.es.amazonaws.com'
region = 'us-east-1'

service = 'es'
credentials = boto3.Session().get_credentials()
awsauth = AWS4Auth(credentials.access_key, credentials.secret_key, region, service, session_token=credentials.token)

es = Elasticsearch(
    hosts = [{'host': host, 'port': 443}],
    http_auth = awsauth,
    use_ssl = True,
    verify_certs = True,
    connection_class = RequestsHttpConnection
)

print(json.dumps(es.info(), indent=4, sort_keys=True))
Our Python script uses the Boto3 library to access the credentials of the IAM Role assigned to our EC2 Instance. This allows us to sign and encrypt requests to the Elasticsearch Service without having to install ACCESS KEYS into our home directory.
Now, from your active virtual environment, execute the script with the following command.
(connect_to_es) ubuntu@ip-172-31-52-51:~/connect_to_es$ python3 connect_to_es.py
The script returns the following output, which indicates that the script succesfully signed and encrypted the request, using the IAM policy.
{
    "cluster_name": "138226304273:testdomain",
    "cluster_uuid": "Ef-k0ho8TZqTvuGttbhw9g",
    "name": "0fb4e11ccfafe89e61c8c037fa0bea4c",
    "tagline": "You Know, for Search",
    "version": {
        "build_date": "2020-05-05T04:47:22.951128Z",
        "build_flavor": "oss",
        "build_hash": "unknown",
        "build_snapshot": false,
        "build_type": "tar",
        "lucene_version": "8.2.0",
        "minimum_index_compatibility_version": "6.0.0-beta1",
        "minimum_wire_compatibility_version": "6.8.0",
        "number": "7.4.2"
    }
}
Congratulations! You connected an Ubuntu server in the cloud to the Elasticsearch service without compromising your security posture. You did not need to install your AWS_ACCESS_KEY or AWS_SECRET_KEY into your server. You did not need to figure out the Public IP address of your EC2 instance in order to update the security policy of the Elasticsearch service. You can now spin up more servers and have them connect to Elasticsearch. Just (1) Ensure they have the same Account ID (by default they will) and (2) Ensure that you attach the proper IAM role to your server creation time.
You can also take things a step further and use this process to connect Lambda to the Elasticsearch service.