In this tutorial you will:
- Connect a Flask server to the Bootstrap service
- Create a trivial Jinja2 template for a Quiz form
- Use Bootstrap to validate forms on the client side
- Use a Flask "flash" message to validate forms on the server side
Let's get right into it. If you haven't already, ensure you are in the virtual environment for your flask_to_es project.
ubuntu@ip-172-31-35-80:~$ cd flask_to_es/
ubuntu@ip-172-31-35-80:~/flask_to_es$ . bin/activate
(flask_to_es)ubuntu@ip-172-31-35-80:~/flask_to_es$
To use Bootstrap with Flask, we need to easy_install the Flask-Bootstrap package.
(flask_to_es)ubuntu@ip-172-31-35-80:~/flask_to_es$ easy_install flask-bootstrap
Searching for flask-bootstrap
Reading https://pypi.python.org/simple/flask-bootstrap/
Best match: Flask-Bootstrap 3.3.5.7
Downloading https://pypi.python.org/packages/source/F/Flask-Bootstrap/Flask-Bootstrap-3.3.5.7.tar.gz#md5=4471ad68dbf71a3c68e00bd0e1301a9f
Processing Flask-Bootstrap-3.3.5.7.tar.gz
Writing /tmp/easy_install-j9tmnj/Flask-Bootstrap-3.3.5.7/setup.cfg
Running Flask-Bootstrap-3.3.5.7/setup.py -q bdist_egg --dist-dir /tmp/easy_install-j9tmnj/Flask-Bootstrap-3.3.5.7/egg-dist-tmp-yeciJJ
Adding Flask-Bootstrap 3.3.5.7 to easy-install.pth file

Installed /home/ubuntu/flask_to_es/lib/python2.7/site-packages/Flask_Bootstrap-3.3.5.7-py2.7.egg
Processing dependencies for flask-bootstrap

...

Finished processing dependencies for flask-bootstrap
For the next step we need to "bootstrap" our application. Vim application.py and add the following two lines:
from boto.connection import AWSAuthConnection
from flask import Flask, render_template, request, redirect, url_for, flash
from models import Quiz, QuizForm
from datetime import datetime
from config import DevConfig
import json
### Add the next line
from flask_bootstrap import Bootstrap

application = Flask(__name__)
application.config.from_object(DevConfig)
### And also add this line
Bootstrap(application)
Your application.py should look like this:
Now, edit templates/take_quiz_template.html to match the following:
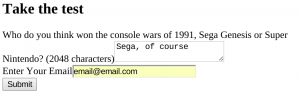
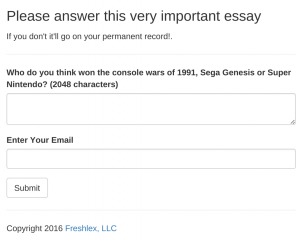
Look at the beauty of "{{ wtf.quick_form(form) }}." That one line of template magic converts your form model (in models.py) into a clean, professional HTML form, complete with client side form validation. Now start your server and go to the page in a browser (don't forget the :5000). If you recall from HOWTO 2, our form page looked very ugly:
Now, thanks to bootstrap, we have a beautiful page, replete with client-side validation. Try to submit without filling out either field and you will get an alert.
Fill out the form and click submit and shut down the flask server. For the last part of this HOWTO, we will use the Flask "flash" object to send fancy alerts to our client's browser. We create our function in the "before_first_request" decorator's stanza (I'll show the complete code for application.py as well):
def flash_errors(form):
    for field, errors in form.errors.items():
        for error in errors:
            flash(u"%s - %s" % (
                getattr(form, field).label.text,
                error
            ))
We then call this function in our route, if validation fails. We already have logic in place to check for failed validation, so we just need to add one line:
@application.route('/', methods=['GET', 'POST'])
def take_test():
    form = QuizForm(request.form)
    if not form.validate_on_submit():
        # Add this new line here
        flash_errors(form)
        return render_template('take_quiz_template.html', form=form)
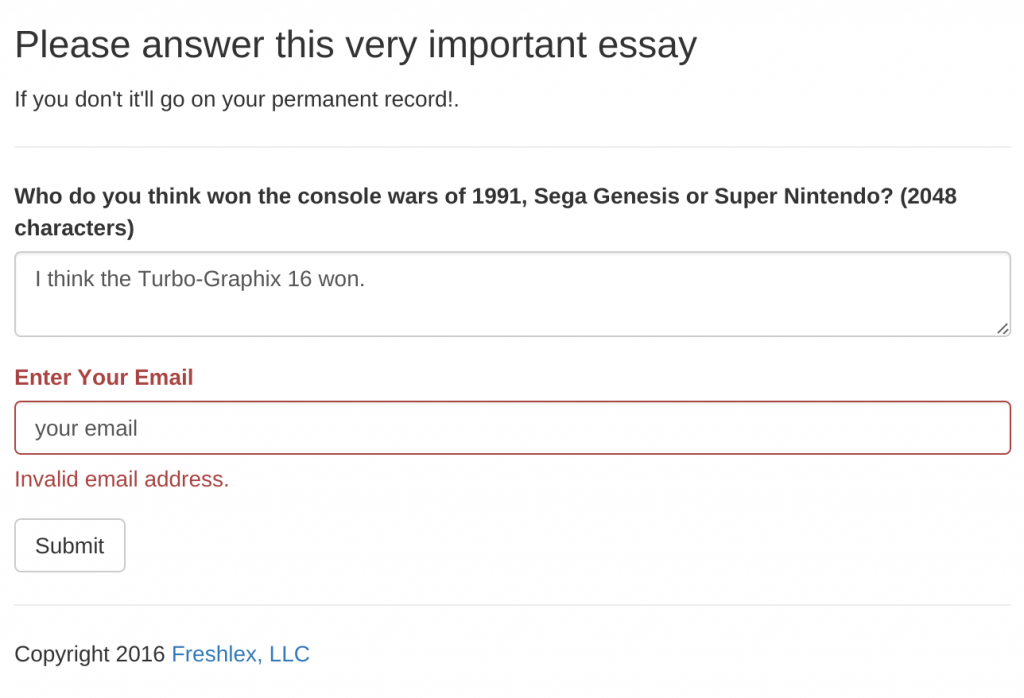
Now if you leave the email section blank, bootstrap will complain. If you put in garbage text (i.e., not an email) then the Flask server performs validation and you see the flash message. Try it out. Type in nonsense for the email field:
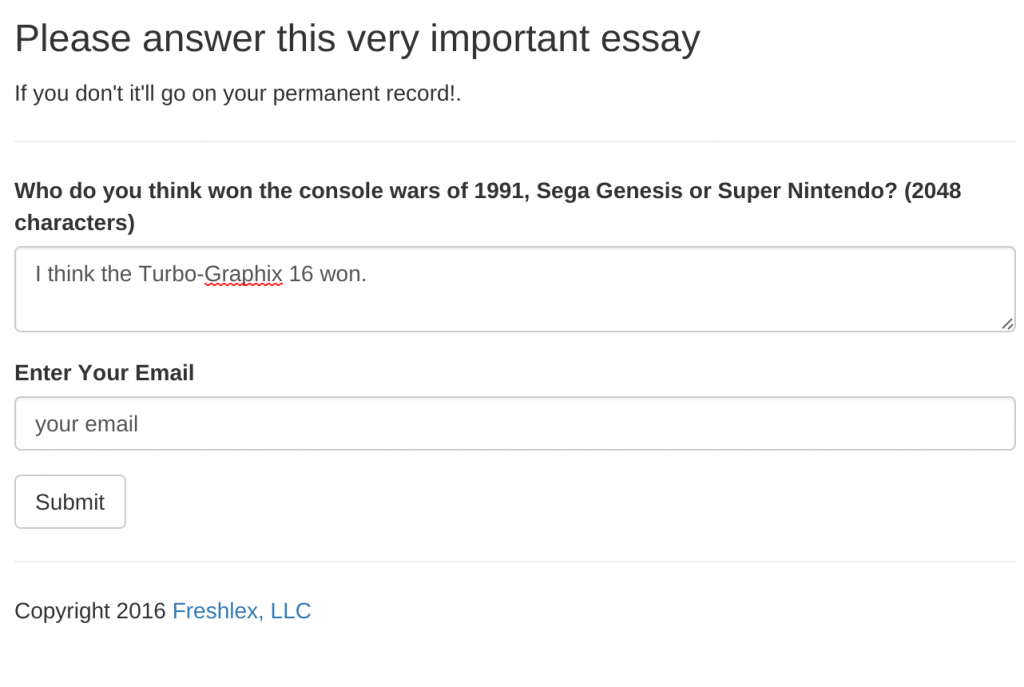
Click submit and you will see the flash error beneath the email field.
The code for the updated application.py follows:
In the next HOWTO we will deploy to ElasticBeanstalk!