FastAI provides Jupyter notebooks to wrangle data, train models, optimize models and then serve models.
I recommended FastAI to my Data Scientist friends and they found the FastAI Jupyter layout and workflow both cumbersome and confusing.
GCP provides the Google AutoML Vision service, an alternative to FastAI (and any roll-your-own vision service, for that matter), which automates the tedious aspects of AI Vision efforts.
AutoML Vision simplifies labeling and then automates training, optimization and serving of the model.
GCP provides a no code method to create, deploy and serve AI Vision models at scale!
In this HOWTO we will accomplish the following:
- Create a Google Cloud Storage Bucket
- Acquire and label data
- Train a Vision model that identifies Mods vs. Rockers
- Fix data labels via GUI
- Re-train and tune a vision model
- Serve a Vision model
- Send our served model a test image
Create a bucket.
We must get the AutoML vision service some labeled data.
We will create a Google Cloud Storage bucket for this purpose.
You will upload two folders to this bucket, one for each class, mods and rockers.
You will also upload a line-delimited CSV file to this bucket that records the URI of each image in the bucket, followed by a label.
For example:
gs://mods-rockers/mods/00000000.jpg,mods
gs://mods-rockers/mods/00000001.jpg,mods
gs://mods-rockers/mods/00000002.jpg,mods

<snip>

gs://mods-rockers/rockers/00000097.jpg,rockers
gs://mods-rockers/rockers/00000098.jpg,rockers
gs://mods-rockers/rockers/00000099.jpg,rockers
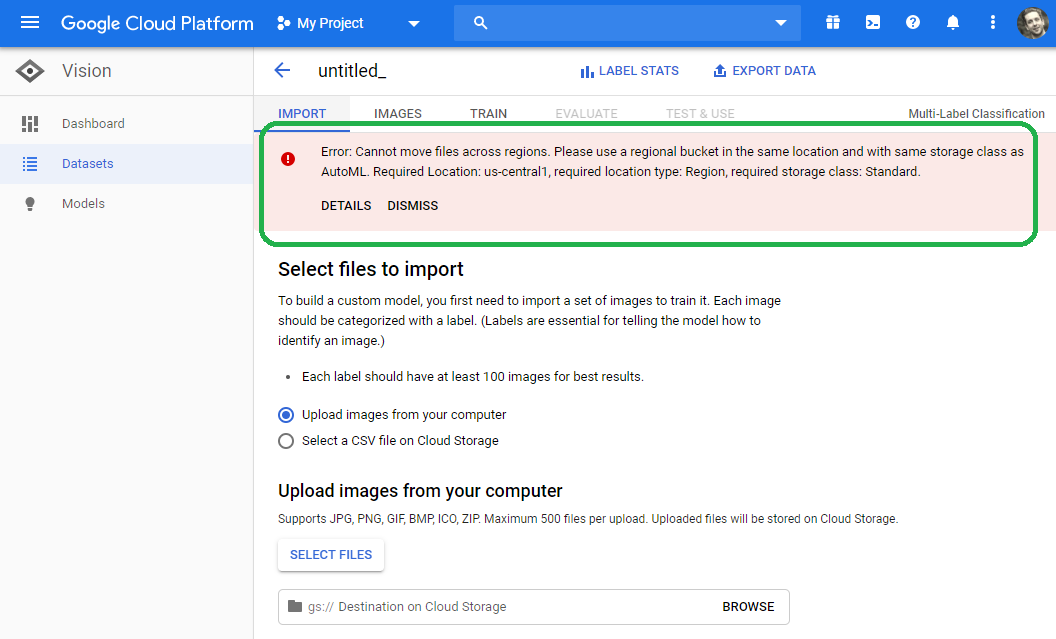
IMPORTANT: Ensure that you use a regional bucket in us-central1, location type: Region and required storage class: Standard.
If you do not use the proper bucket configuration, you will receive the following error when you attempt to import your dataset.
The following commands create a bucket, apply permissions to AutoML and give AutoML permissions to access a bucket.
From the cloudshell, export your USERNAME as an environment variable.
Be sure to enter your USERNAME in the following command:
sobanski_htc@cloudshell:~ (mods-rocker-project)$ export USERNAME=<your email address>
Now enable AutoML to access a bucket.
sobanski_htc@cloudshell:~ (mods-rocker-project)$ export PROJECT_ID=$DEVSHELL_PROJECT_ID
sobanski_htc@cloudshell:~ (mods-rocker-project)$ gcloud projects add-iam-policy-binding $PROJECT_ID --member="user:$USERNAME" --role="roles/automl.admin"
Updated IAM policy for project [mods-rocker-project].
bindings:
- members:
  - user:my@email.com
  role: roles/automl.admin
- members:
  - serviceAccount:service-4011961642212@gcp-sa-automl.iam.gserviceaccount.com
  role: roles/automl.serviceAgent
- members:
  - serviceAccount:service-4011961642212@compute-system.iam.gserviceaccount.com
  role: roles/compute.serviceAgent
- members:
  - serviceAccount:4011961642212-compute@developer.gserviceaccount.com
  - serviceAccount:4011961642212@cloudservices.gserviceaccount.com
  role: roles/editor
- members:
  - user:smy@email.com
  role: roles/owner
etag: AxYhhFi=
version: 1

sobanski_htc@cloudshell:~ (mods-rocker-project)$
 gcloud projects add-iam-policy-binding $PROJECT_ID --member="serviceAccount:custom-vision@appspot.gserviceaccount.com" --role="roles/ml.admin"
Now create the bucket:
sobanski_htc@cloudshell:~ (mods-rocker-project)$ gsutil mb -p $PROJECT_ID -c standard -l us-central1 gs://<your-bucket-name>/
Get a dataset.
If you do not have a labeled dataset, use the FastAI dataset notebook to quickly download a labeled dataset, separated by folder.
If you do have a labeled dataset you can skip this section.
Launch AI Platform
Spin up an AI platform notebook for this task.
Log into the Google Cloud Platform (GCP) console at console.cloud.google.com [Non-referral link].
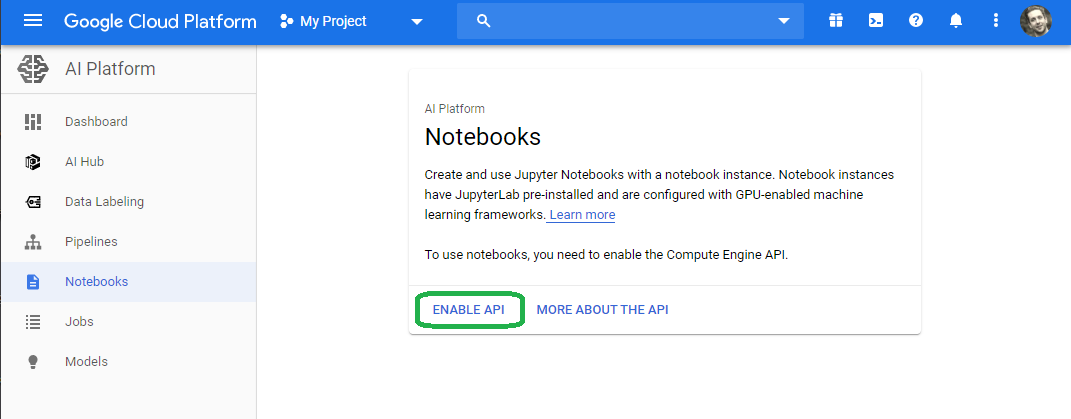
Type notebooks into the search bar, click Notebooks AI Platform and then click Enable API.
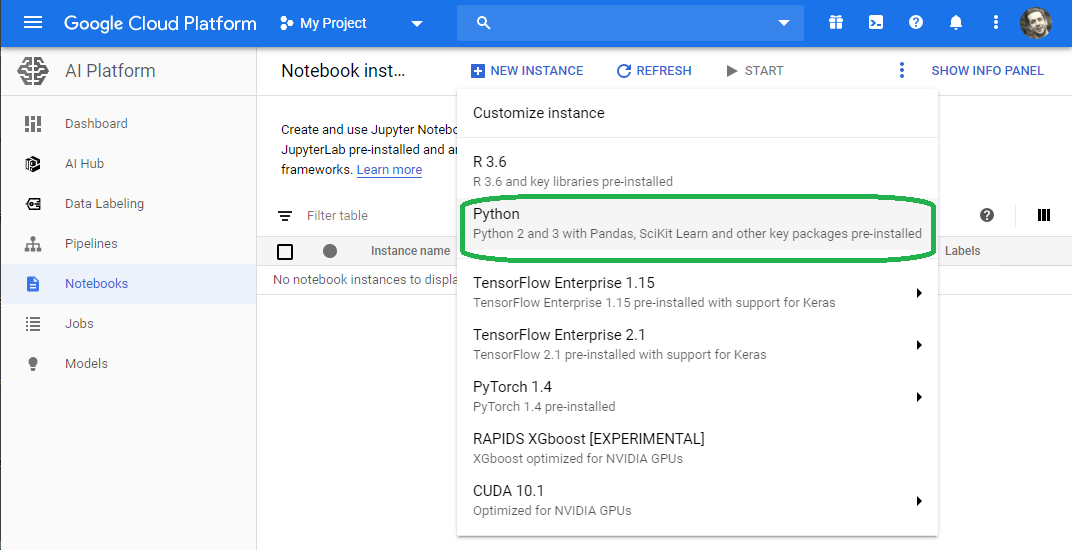
Click New Instance and then select Python.
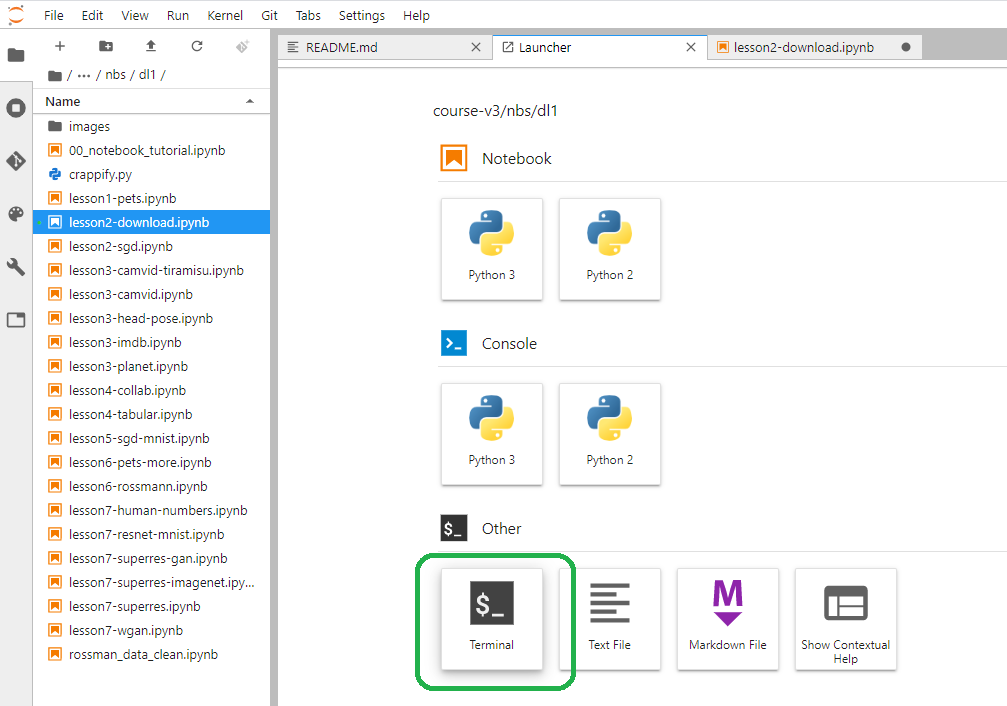
Launch a terminal.
Install FastAI Course v3
From the terminal install the FastAI course v3.
$ clone https://github.com/fastai/course-v3.git
Install the required FastaAI libs.
Since this is an ephemeral notebook, you will not need to worry about virtual environments.
$ pip install fastai
Collecting fastai
  Downloading fastai-1.0.60-py3-none-any.whl (237 kB)
     |████████████████████████████████| 237 kB 4.6 MB/s
Requirement already satisfied: numpy>=1.15 in /opt/conda/lib/python3.7/site-packages (from fastai) (1.18.1)

...

Building wheels for collected packages: nvidia-ml-py3
  Building wheel for nvidia-ml-py3 (setup.py) ... done
  Created wheel for nvidia-ml-py3: filename=nvidia_ml_py3-7.352.0-py3-none-any.whl size=19189 sha256=42f79de382946ce4af88196dfdcf55cda496237f7db498bd2cc1cce3f788fba6
  Stored in directory: /home/jupyter/.cache/pip/wheels/df/99/da/c34f202dc8fd1dffd35e0ecf1a7d7f8374ca05fbcbaf974b83
Successfully built nvidia-ml-py3
Installing collected packages: wasabi, srsly, murmurhash, cymem, plac, preshed, catalogue, blis, thinc, spacy, torch, torchvision, nvidia-ml-py3, fastprogress, fastai
Download the images
From the GUI, Navigate to nbs --> dl1 --> lesson2-download.ipynb.
Select Edit --> Clear All Outputs.
Follow the instructions up to the Download images section to create and upload your mods.csv and rockers.csv tables.
These tables include URLs that point to images from each class.
Once you are at the Download Images section, replace the presented code with the code below.
This prevents you from needing to scroll up to the prior section.
classes = ['mods','rockers']
path    = Path('data/brighton_seafront')
for folder in classes:
    dest = path/folder
    dest.mkdir(parents=True, exist_ok=True)
path.ls()
for c in classes:
    file = '{}.csv'.format(c)
    dest = path/c
    download_images(file, dest, max_pics=200)

for c in classes:
    print(c)
    verify_images(path/c, delete=True, max_size=500)
I present the updated code in the following graphic.
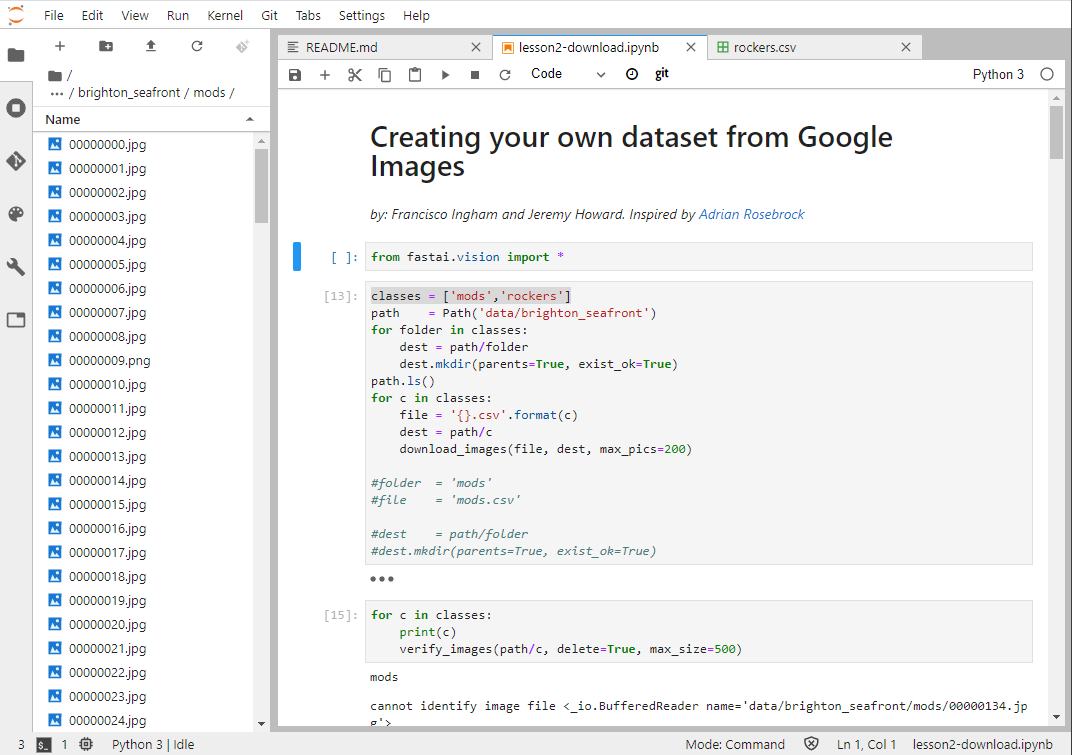
Be sure to run the next verify_images cell.
Label the data
At this point you should have two folders, one named mods and one named rockers.
If you used the AI platform to create your data set folders, then change directories to brigton_seafront.
~$ cd course-v3/nbs/dl1/data/brighton_seafront/
Export the name of your Google Cloud Storage (GCS) bucket.
NOTE: Do not use the bucket name mods-rockers since I own that bucket.
~/course-v3/nbs/dl1/data/brighton_seafront$ export BUCKET_NAME=mods-rockers
Brighton seafront contains two sub-directories, mods and rockers.
Create a spreadsheet that appends the URI for the image, followed by the label.
All of the images in the mods directory will get the label mods and all of the images in the rockers directory will get the label rockers.
~/course-v3/nbs/dl1/data/brighton_seafront$ for name in `ls mods`; do echo gs://$BUCKET_NAME/mods/$name,mods >> labeled_data.csv; done
~/course-v3/nbs/dl1/data/brighton_seafront$ for name in `ls rockers`; do echo gs://$BUCKET_NAME/rockers/$name,rockers >> labeled_data.csv; done
The first few lines of the labeled_data.csv file read:
~/course-v3/nbs/dl1/data/brighton_seafront$ head -n3 labeled_data.csv
gs://mods-rockers/mods/00000000.jpg,mods
gs://mods-rockers/mods/00000001.jpg,mods
gs://mods-rockers/mods/00000002.jpg,mods
And the last few lines read:
~/course-v3/nbs/dl1/data/brighton_seafront$ tail -n3 labeled_data.csv
gs://mods-rockers/rockers/00000097.jpg,rockers
gs://mods-rockers/rockers/00000098.jpg,rockers
gs://mods-rockers/rockers/00000099.jpg,rockers
Copy labeled_data.csv, the mods folder, the rockers folder and all of their contents to your GCS bucket.
~/course-v3/nbs/dl1/data/brighton_seafront$ gsutil -m cp -r labeled_data.csv mods/ rockers/ gs://$BUCKET_NAME
At this point be sure to destroy the AI Platform notebook so that you do not incur any charges.
Train the model
Enable the API
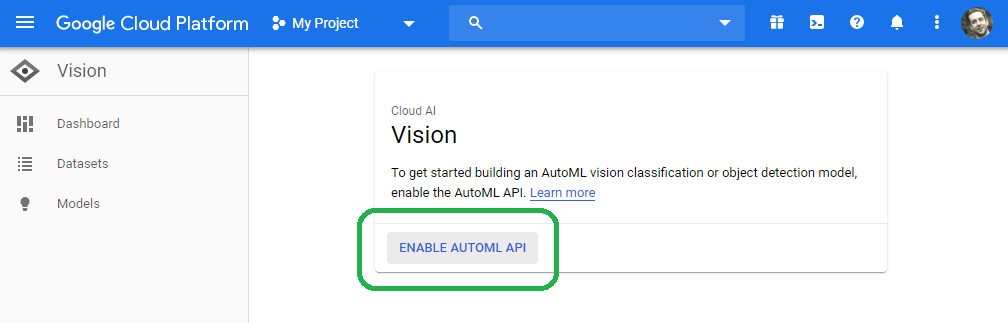
Log into the Google Cloud Platform (GCP) console at console.cloud.google.com [Once again, this is a non-affiliate link].
In the search bar, type Vision and then click ENABLE AUTOML API.
Upload your Dataset
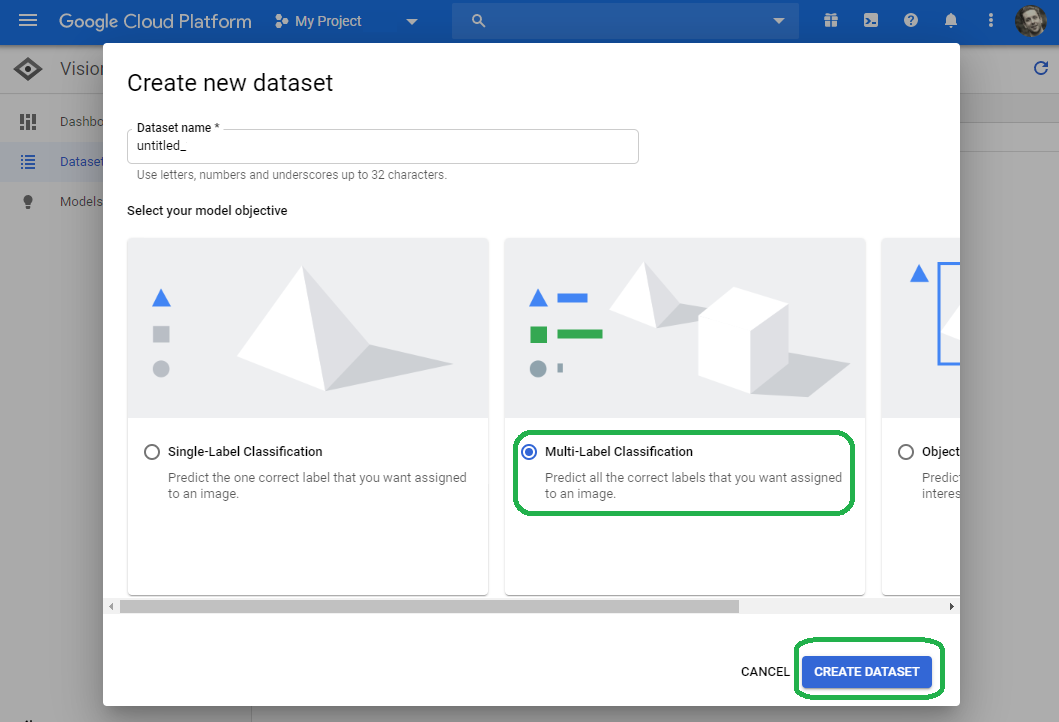
Click Get Started --> New Dataset --> Multi-label classification
Under Select files to import, select Select a CSV file on Cloud Storage and then enter the URI for the labeled_data.csv file on your bucket.
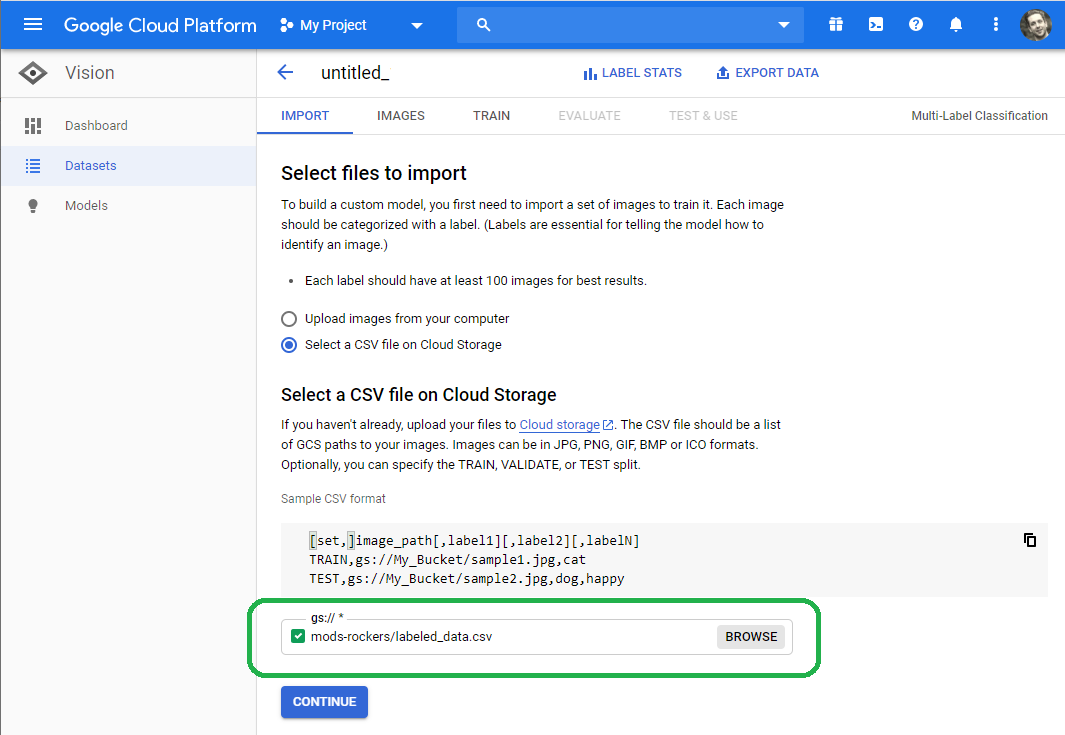
The import will take several minutes.
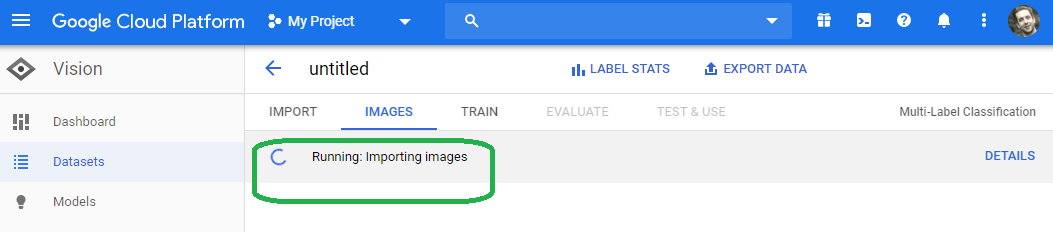
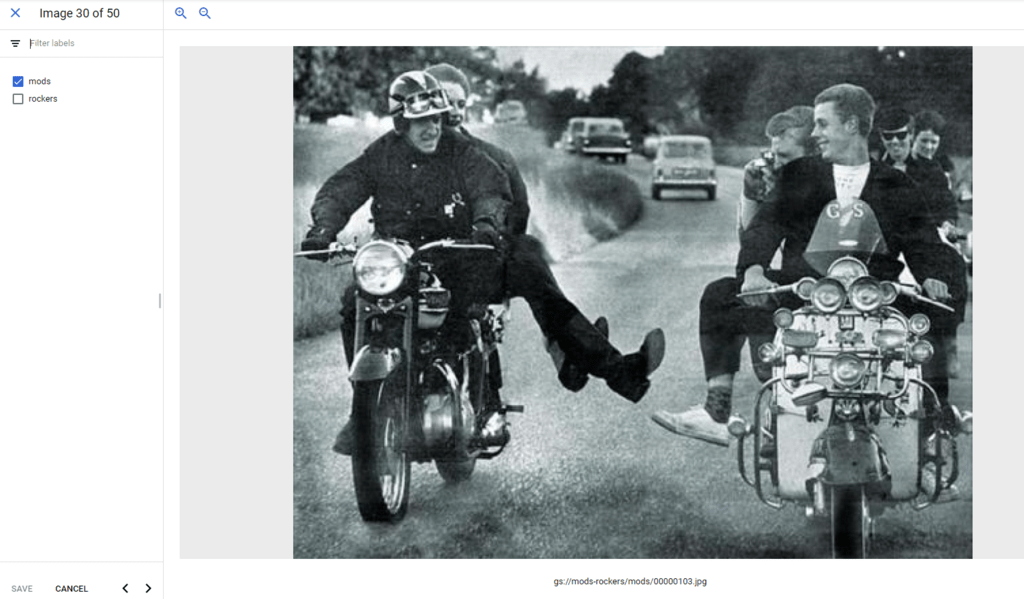
View Images
After the import completes, you will see your labeled images.
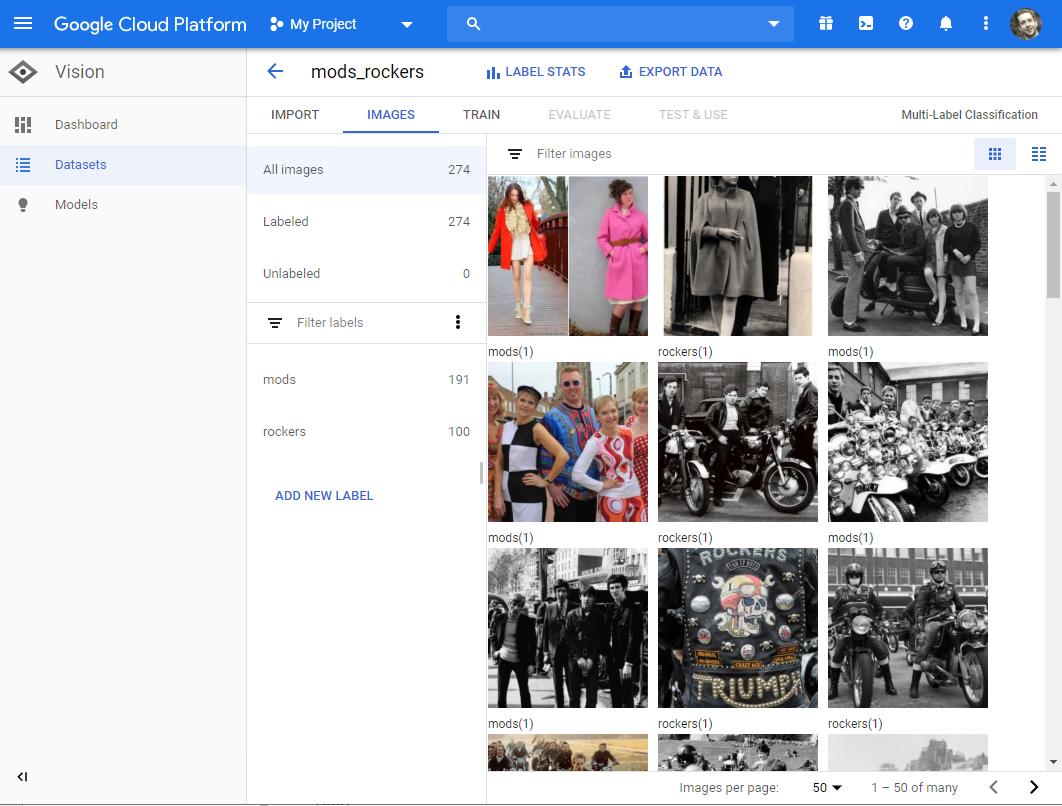
A brief perusal of the images shows that some pictures (highlighted in red) include incorrect labels.
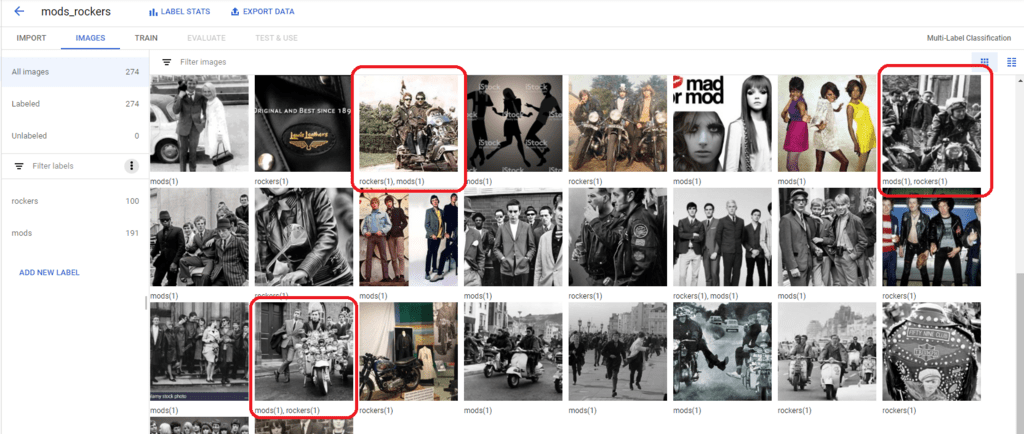
For now, let's ignore the bad labels and see what happens.
Train your Model
Select Start Training
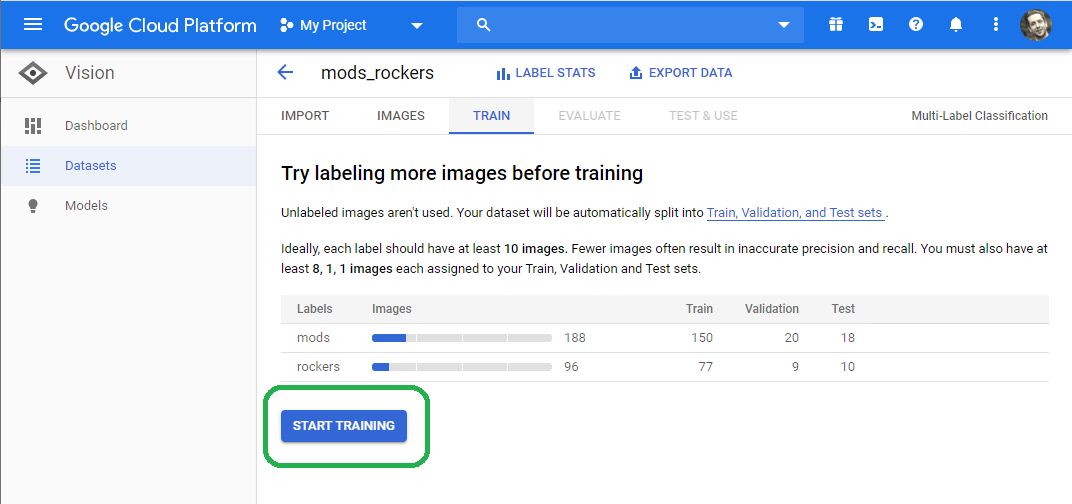
The training will use 16 GPU hours.
Since GCP farms the training out in parallel, the 16 GPU hours take less than an hour.
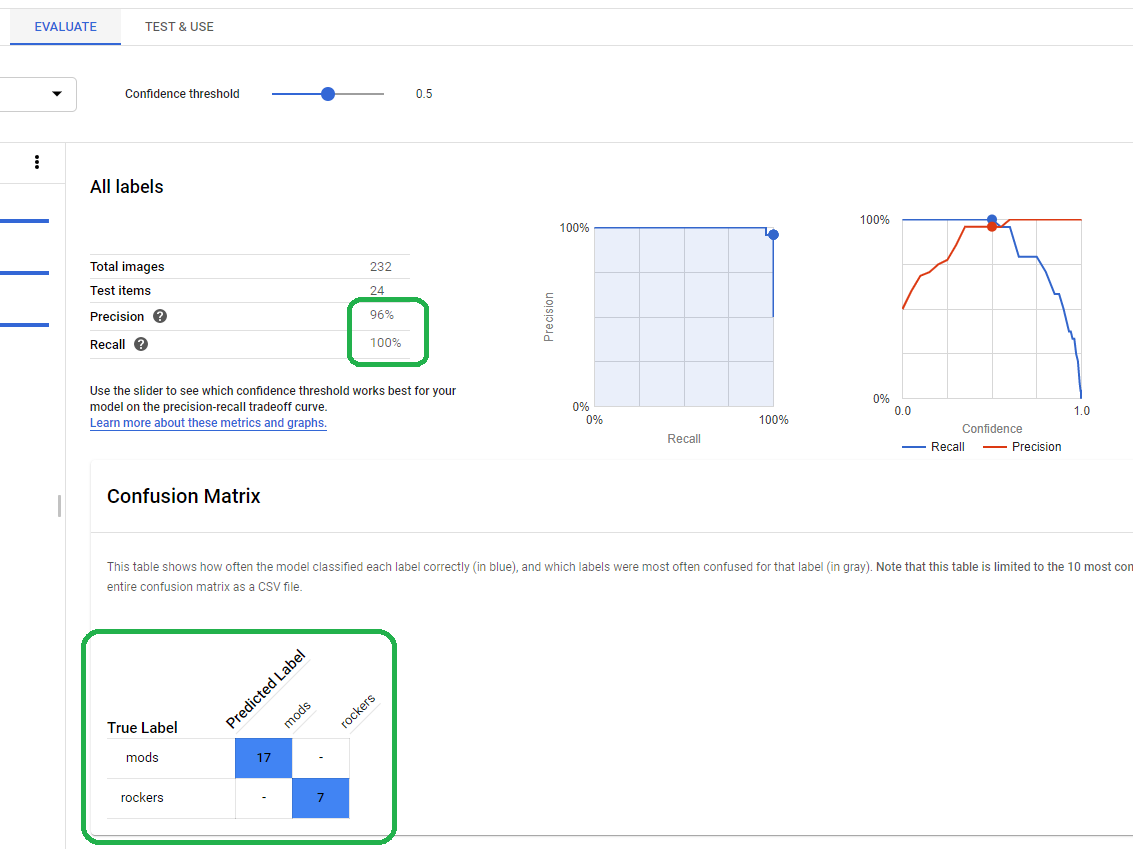
Evaluate your Model
After the training completes, click Evaluate.
You will see that the model provides sub 90% precision and recall, as noted by the confusion matrix (highlighted in green).
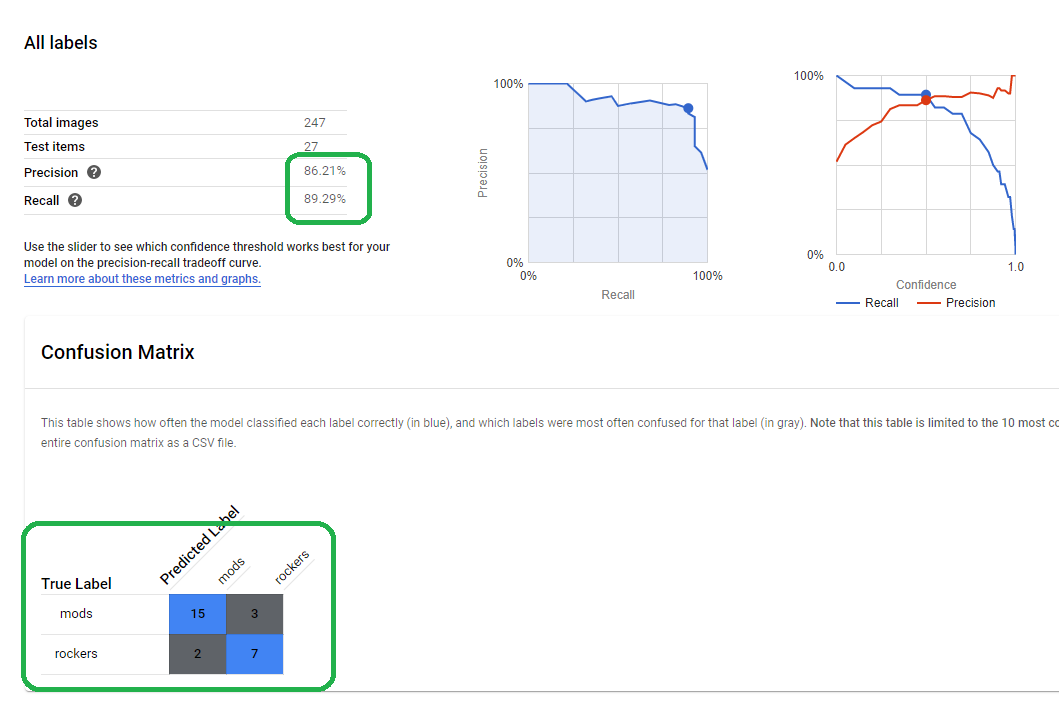
Drill down for more details and you will see that the false positives for mods includes two pictures of mods.
This points to a labeling problem.
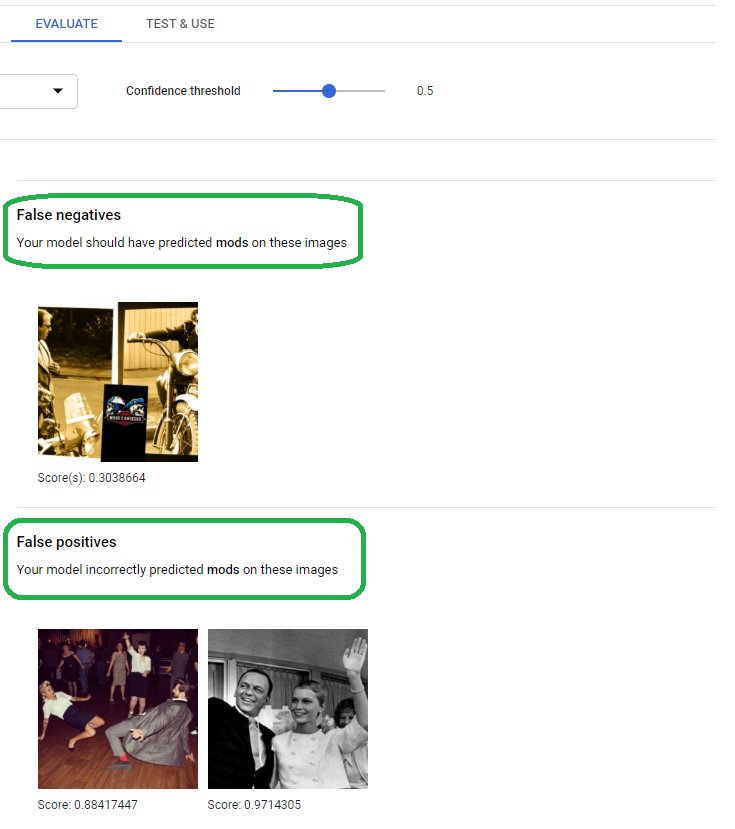
NOTE: Upon second glance, the picture on the right depicts Teddy Boys. Should I label Teddy Boys Mods, Rockers or delete the picture? Answer in the comments below!
Fix Labels
Click images and change the labels of the troublesome images (or just delete them if you're lazy right now).
I have a rocker motorcycle labeled mod and a picture that includes both mods and rockers labeled as just mods.
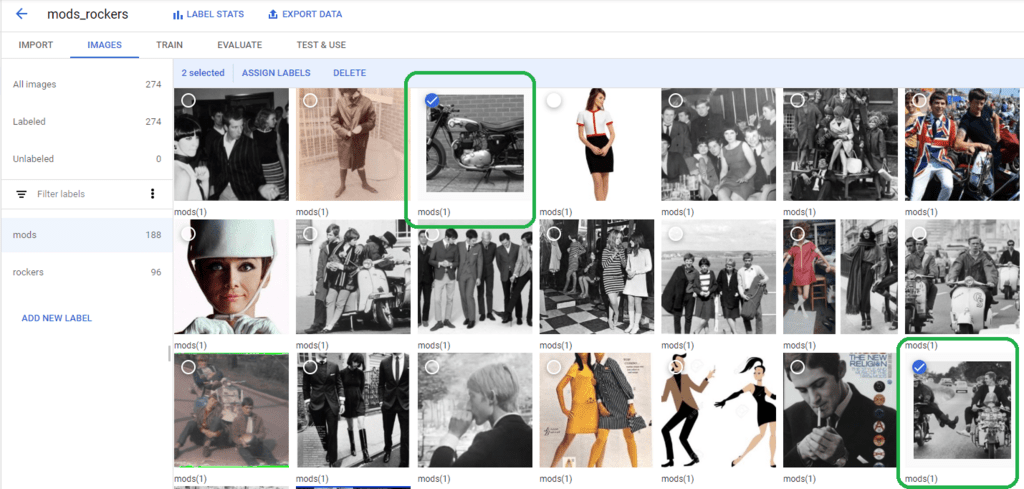
I like this picture, a bunch of rockers attempting to murder two helmet-less mods, who find it funny.
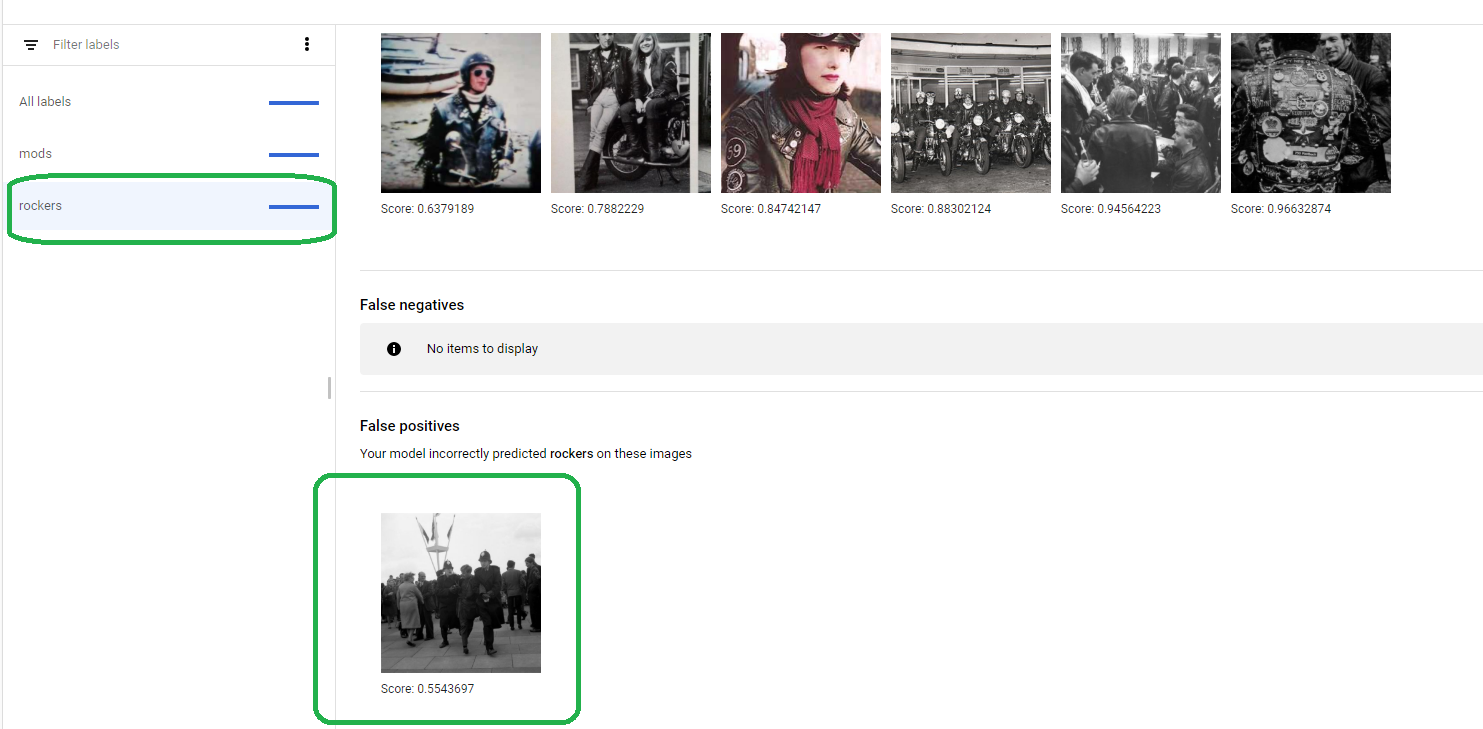
Re-train model
After we clean up the data and re-train, we see a perfect confusion matrix.
Drilling down we see our model gave a mod under arrest the rocker label.
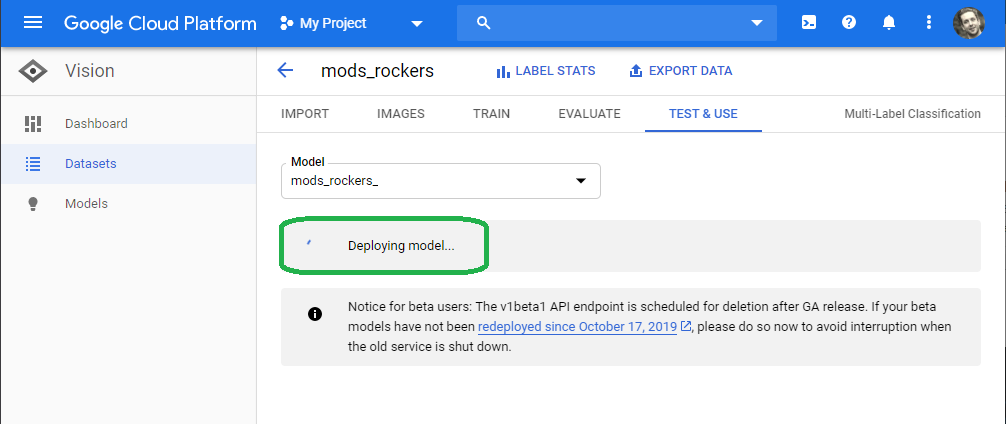
Deploy the model
Unlike FastAI, the Google AI Platform provides one-click deployment of your model.
Click Test & Use and the Deploy Model.
GCP takes several minutes to deploy the model.
After you deploy the model, click the Upload Images button and upload up to ten images.
I upload a picture of myself at the park.
The model reports, with 93% certainty that I fall under the Mod classification, vs. Rocker.
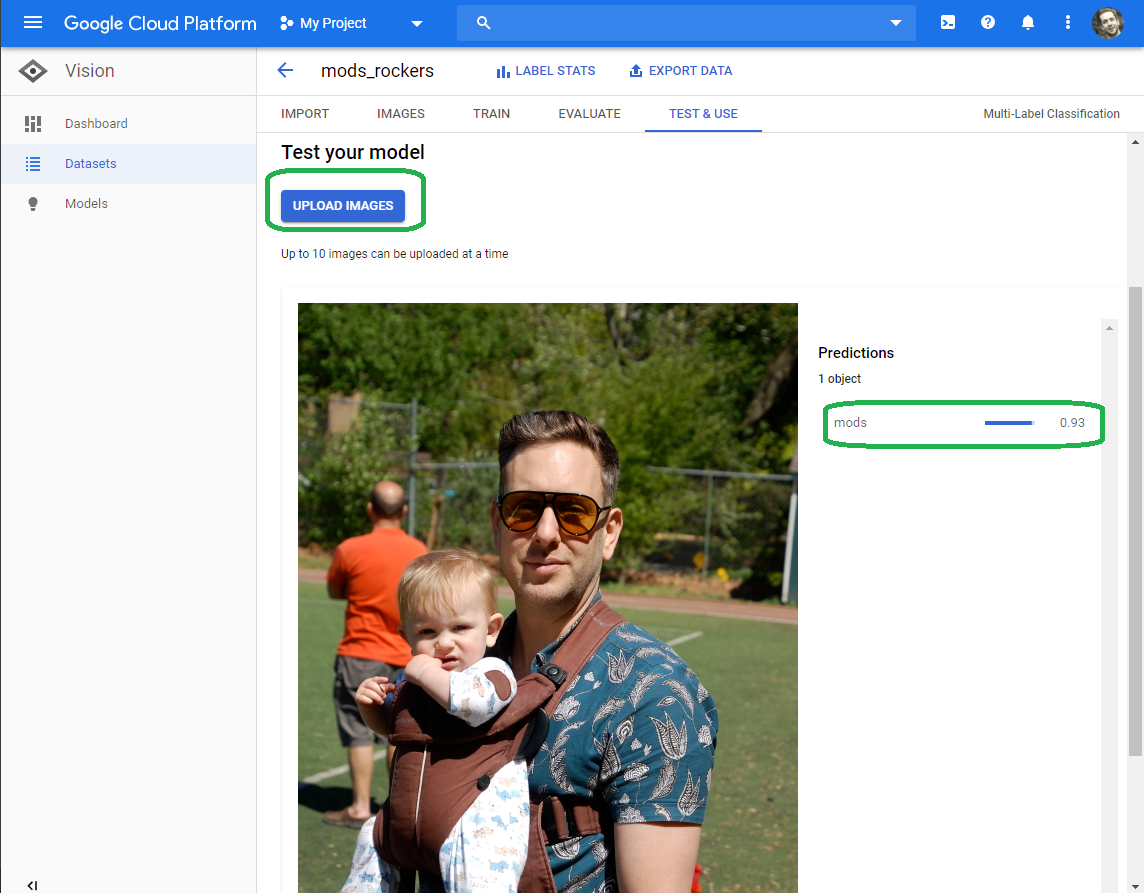
My paisley shirt and Italian sunglasses give credence to this, although I do have a Rocker hair cut (styled with Royal Crown, no less).
Conclusion
GCP provides an AutoML vision service that automates the manual FastAI tasks of training, optimizing and serving a Vision model.
AutoML vision also provides an easy to use and intuitive labeling service.
If you can get a hold of labeled data, then I would recommend the AutoML vision service.
Use the AutoML vision service for serious tasks. Google throws the kitchen sink at training and tuning.
Each model consumed sixteen (16) hours of GPU time!
My FastAI model ran for two or three minutes, on one GPU.
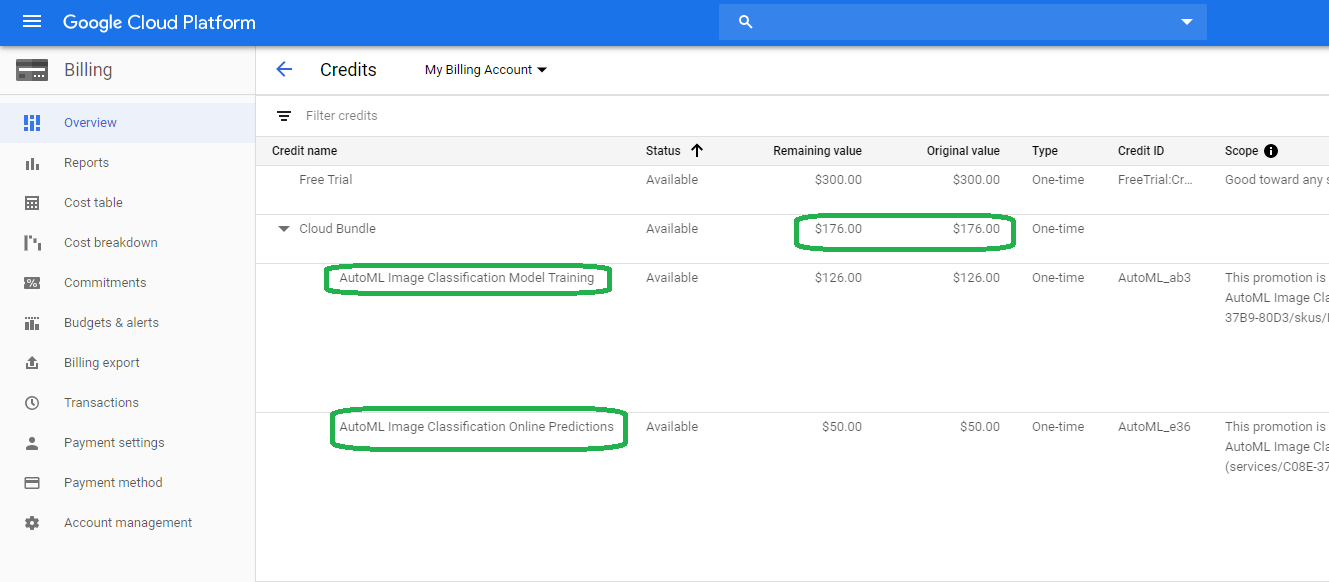
My two runs (32 hours total), cost about $100.
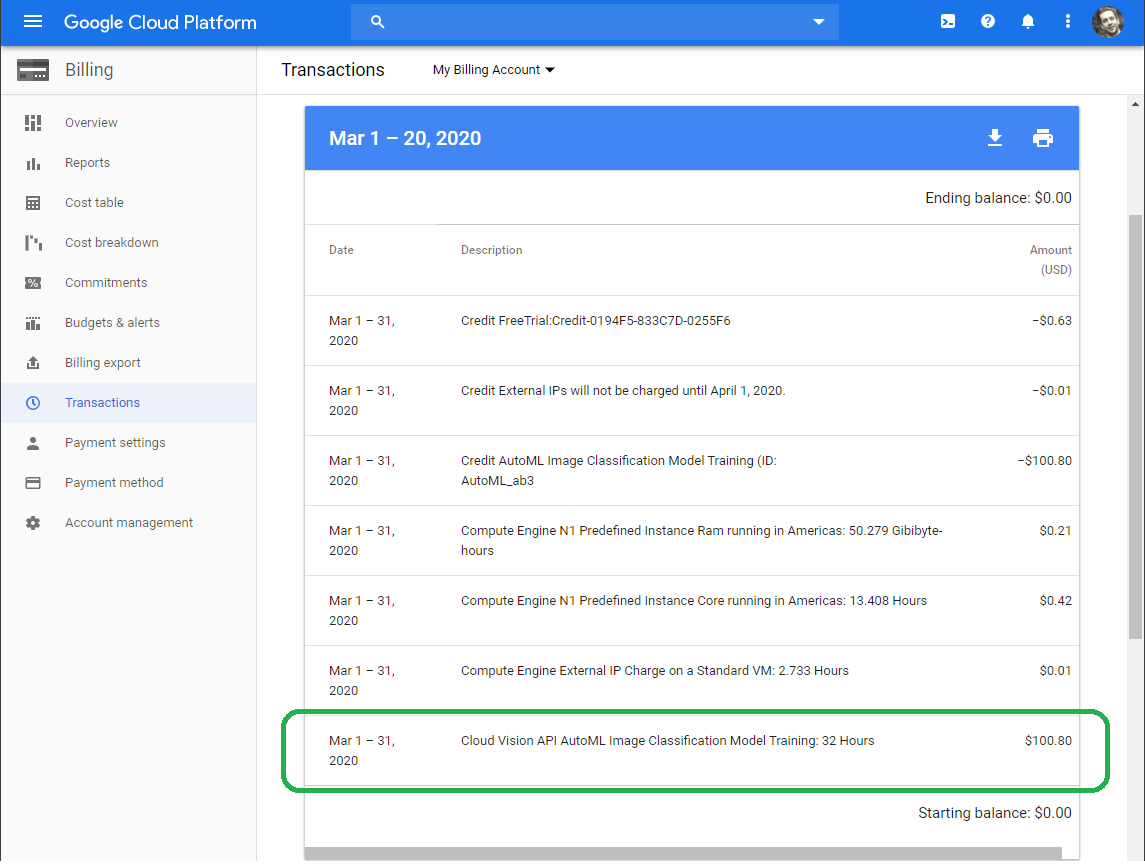
Google, however, gave me $176.00 to experiment with the model training and serving.
From Google:
Free Trial! You can try AutoML Vision Object Detection for free by using 40 free node hours each for training and online prediction, and 1 free node hour for batch prediction, per billing account. Your free node hours are issued right before you create your first model. For batch prediction, the free node hour is issued at the time of the first batch prediction is initiated. You have up to one year to use them. Prices are listed in US Dollars (USD). If you pay in a currency other than USD, the prices listed in your currency on Cloud Platform SKUs apply."
I did not need to eat into the $300 in free credits google provided when I signed up for GCP!