Fastai provides helper functions on top of Pytorch to help us wrangle, clean, and process data. In this HOWTO we will accomplish the following:
- Deploy an AWS g3.8xlarge instance
- Compile and install NVIDIA drivers on our g3.8xlarge instance
- Use a Juypter notebook to clean and organize image data
- Learn a model that classifies Mods vs. Rockers
- Deploy an image classification web app using Flask
Introduction
Fastai delivers a series of videos and Juypter notebooks that teach us how to quickly apply ML/AI techniques to real world problems. The Jupyter notebooks require Python 3 libraries and a GPU. Crestle.ai provides a one-click deployment of the required environment.

You enter your credit card and then click "run."
Unfortunately, as of August 31st, 2019, Crestle no longer provides their service to the public.
As the platform and its usage continues to evolve, we've decided to move Crestle.ai to an Enterprise model. This means that as of August 31, 2019, the service will no longer be available to individual participants.
While other platforms still provide this service to individual users, I decided that it would be a good exercise to deploy our own environment.
Deploy the FASTAI environment to AWS
In order to crunch the ML/AI data at a reasonable pace, I recommend a g3.8xlarge instance. Select this instance with the Amazon Linux Operating System.
Install the NVIDIA driver
The AWS GPU instances require a CUDA driver to enable Python to send jobs to the card.
Their web site provides decent instructions on how to install this driver, and I summarize the steps below.
The AWS Linux AMI provides the AWS Command Line Interface (CLI) and we use that CLI to fetch the latest NVIDIA driver.
$ aws s3 cp --recursive s3://ec2-linux-nvidia-drivers/latest/ .
The driver requires certain development packages, so we will install them along with other useful server packages into our Operating System.
Note: Python3 requires installation of the AWS EPEL repository
$ sudo amazon-linux-extras install epel
$ sudo yum -y install bzip2 gcc git kernel-devel-* python36 python36-dev*
Enter the following configurations into our modprobe blacklist.
$ sudo vim /etc/modprobe.d/blacklist.conf
blacklist vga16fb
blacklist noveau
blacklist rivafb
blacklist nvidiafb
blacklist rivatv
EOF
Now edit our boot configuration.
$ sudo vim /etc/default/grub
GRUB_CMDLINE_LINUX='rblacklist=nouveau'
Re-compile and install the boot configuration.
$ sudo grub2-mkconfig -o /boot/grub2/grub.cfg
Edit the NVIDIA conf file to turn off GUI Features.
$ sudo vim /etc/nvidia/gridd.conf
EnableUI=FALSE
FeatureType=0
IgnoreSP=TRUE
Run the NVIDIA compiler and reboot.
$ sudo /bin/sh ./NVIDIA-Linux-x86_64-430.30-grid.run
$ sudo reboot
You may see the following warning, just hit OK and proceed, since you will not need the GUI features of the driver.
nvidia-installer was forced to guess the X library path '/usr/lib64' and X module path
           '/usr/lib64/xorg/modules'; these paths were not queryable from the system.  If X fails
           to find the NVIDIA X driver module, please install the `pkg-config` utility and the
           X.Org SDK/development package for your distribution and reinstall the driver.
Once the server reboots, you can test to see if the driver installed.
$ nvidia-smi -q | head

==============NVSMI LOG==============

Timestamp                           : Wed Aug 21 00:07:40 2019
Driver Version                      : 430.30
CUDA Version                        : 10.2

Attached GPUs                       : 2
GPU 00000000:00:1D.0
    Product Name                    : Tesla M60
We will use a Python virtual environment to check to see if Python can use the GPU.
FASTAI recommends we use Conda to install their required libraries and we will.
I find Conda, however, to be extremely slow, so for this quick hello world we will use PIP.
$ python3 -m venv aws
$ cd aws/
$ source ./bin/activate
(aws) $ pip install -U pip
(aws) $ pip install torch
Now run the Python interpreter and verify that Python can use the GPU.
(aws) $ python
Python 3.6.8 (default, Apr 25 2019, 21:02:35)
[GCC 4.8.5 20150623 (Red Hat 4.8.5-36)] on linux
Type "help", "copyright", "credits" or "license" for more information.
>>> import torch
>>> torch.cuda.is_available()
True
>>>
Install the Conda libraries
If Python can use the GPU, deactivate the virtual environment to proceed.
(aws) $ deactivate
$
Now install Conda. You may want to visit the Anaconda website to see if they provide an updated version.
Once installed, log out of your session and then log back in to install the conda commands into your path.
$ curl -XGET https://repo.anaconda.com/archive/Anaconda2-2019.03-Linux-x86_64.sh -O
$ bash Anaconda2-2019.03-Linux-x86_64.sh
$ exit
With Conda installed, create and activate a Conda environment. I named mine boot (For Bootstrap).
$ conda create -n boot python=3.6.8 anaconda
$ conda activate boot
FASTAI requires Torch, and torch requires OS level development libraries.
(boot)$ sudo yum -y install libxml2-devel libxslt1-dev zlib1g-dev g++
Now, since I find Conda to be painfully slow, I will just install the packages via PIP (while in my conda environment).
Feel free to use the install command if you prefer.
Note: If you choose to use Conda channels to install packages, ensure that you have the correct package name. I, for example, commanded Conda to install pytorch when the package is in fact named torch. As a result, Conda searched for several hours for a package named pytorch, with no errors or warnings.
(boot)$ pip install fastai torch flask-bootstrap flask-wtf
We now have everything needed to start the notebook.
Start the notebook
Use git to pull the FASTAI course to your server, navigate to the dl1 directory and then start the server.
$ git clone https://github.com/fastai/course-v3.git
$ cd course-v3/nbs/dl1/
$ jupyter notebook --ip=0.0.0.0
Ensure that your EC2 instance's security group provides access to port 8888, and then access the server on this port via a web browser.
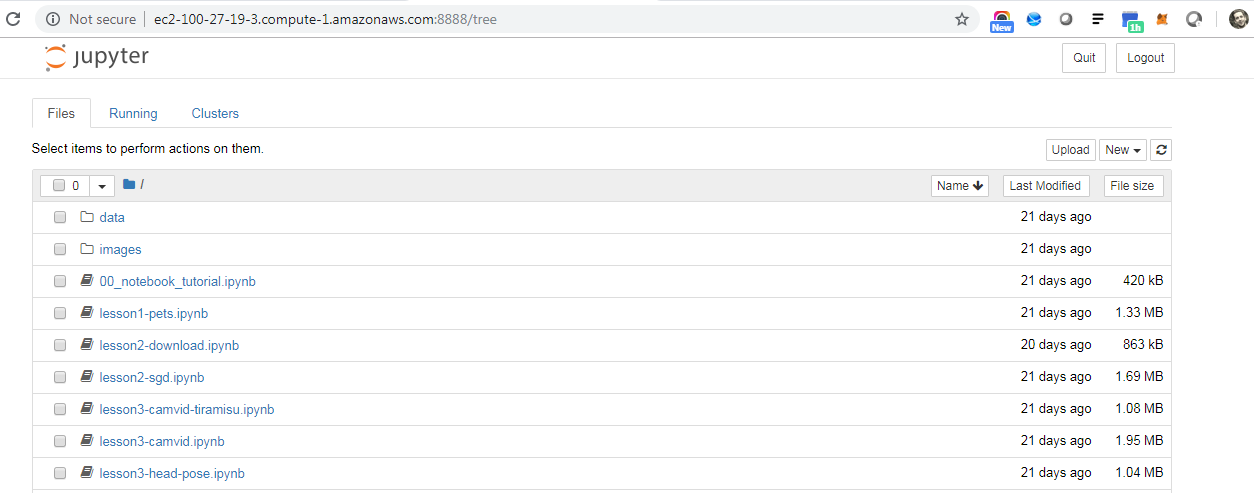
Use the notebook to clean the data
Launch the lesson2-download.ipynb, which provides the data cleaning service.
The instructions are quite clear. You use the Chrome developer tools to gather the URLs of pictures from Google images that match your classes.
I ran these instructions and produced mods.csv and rockers.csv files.
Once you have these files on your server, the steps get confusing, since the notebook expects you to scroll back for each section.
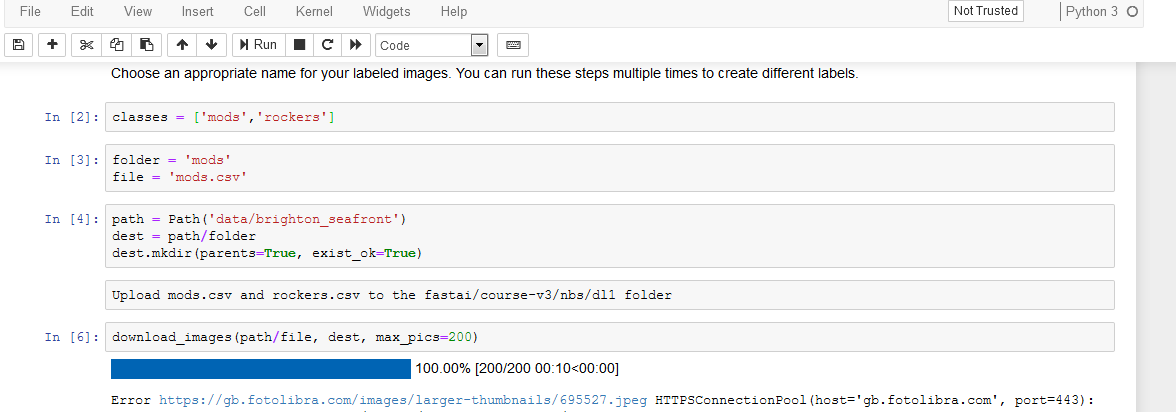
To ease this confusion, I created separate cells for the mods and rockers steps.
The mods cells set folder to mods, file to mods.csv and the parent folder to data/brigthon_seafront.
I also add a cell to download the files.
The notebook directs us to upload the mods.csv file to the dl1 folder, which you do via the notebook UI.
Be sure to upload this file before you execute the download command.
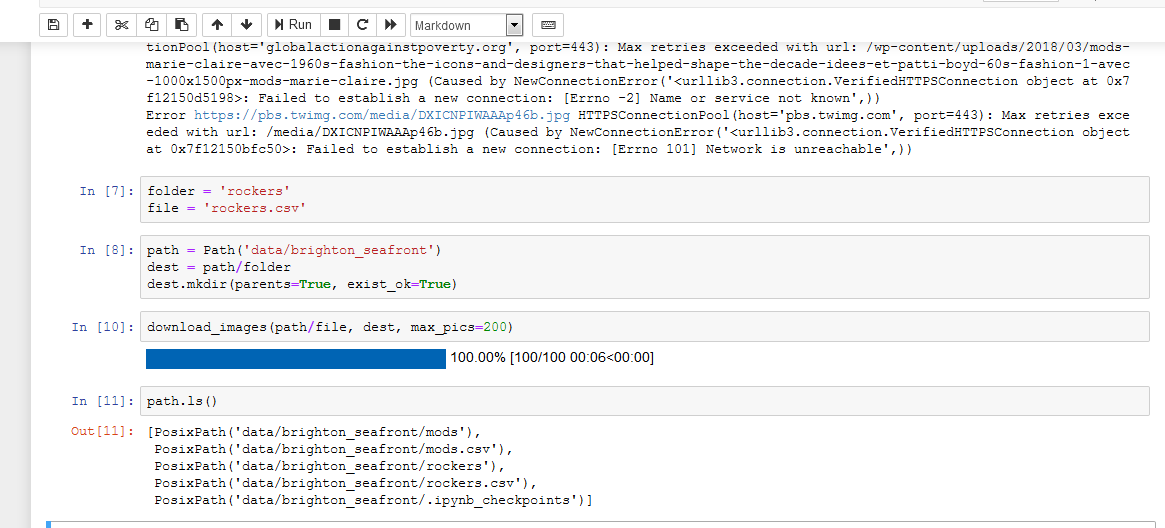
I then create a new set of cells to set folder to rockers, file to rockers.csv and the same parent folder.
Once again, I add a cell to download the files and print the results.
Run the cells until you get to the learn.recorder.plot() step.
learn.lr_find(start_lr=1e-5, end_lr=1e-1)
learn.recorder.plot()
Plot the image. This image helps us select the learning rate boundaries.
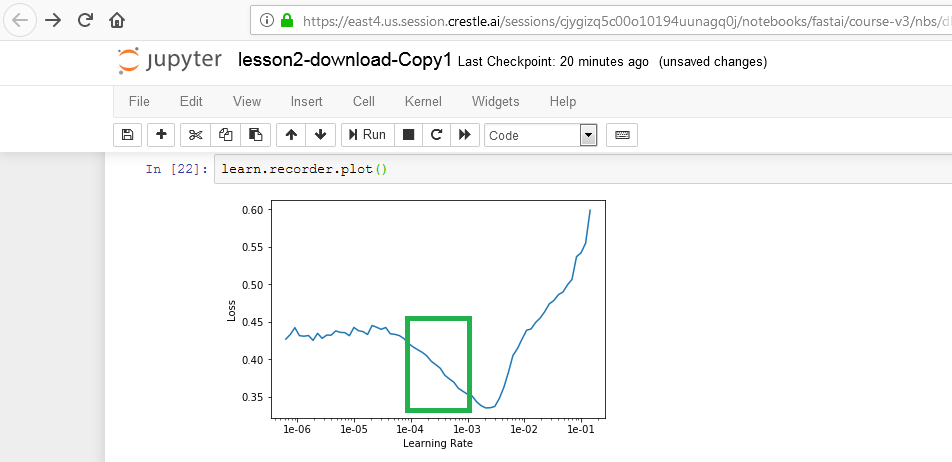
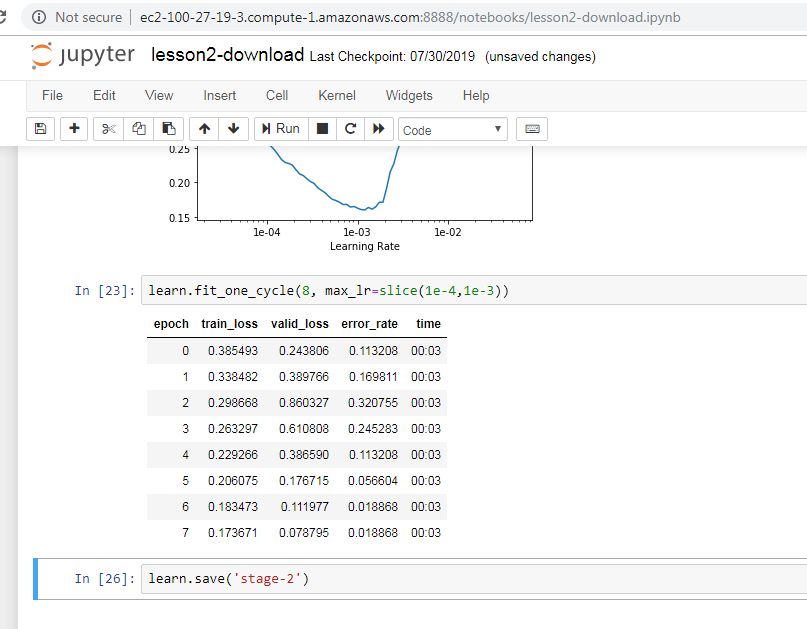
Based on this image, we want to set the learning rate between 1e-4 and 1e-3.
learn.fit_one_cycle(8, max_lr=slice(1e-4,1e-3))
Keep running the model until you get to the image cleaner step.
As you can see, our data set includes images with incorrect labels.
The image on the right, for example, shows a mod, not a rocker.
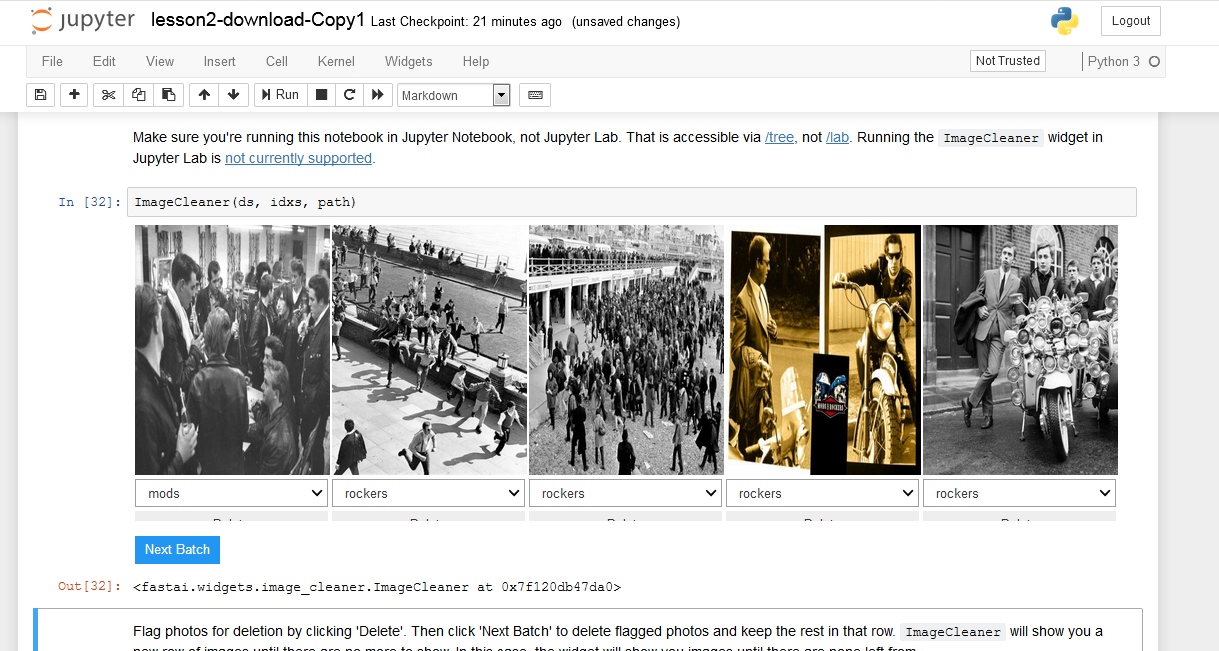
Once you used the widget to fix the data, go back to the following cell, uncomment it and run it.
np.random.seed(42)
data = ImageDataBunch.from_csv(path, folder=".", valid_pct=0.2, csv_labels='cleaned.csv',
         ds_tfms=get_transforms(), size=224, num_workers=4).normalize(imagenet_stats)
Notice that this cell uses cleaned.csv, a file created by the image cleaning widget.
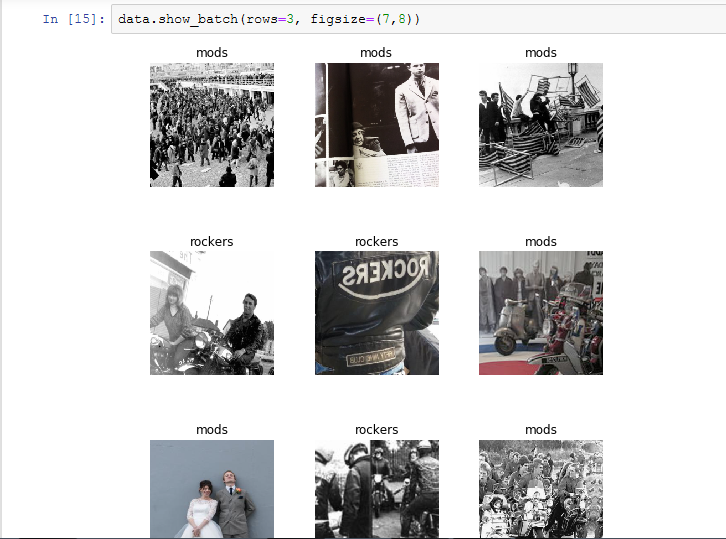
Run the next few cells. One cell will show correctly labeled data.
Re-run the learn process
Re-learn the model based on the new cleaned data set.
Run the cells right and be sure to stop at the Cleaning Up section.
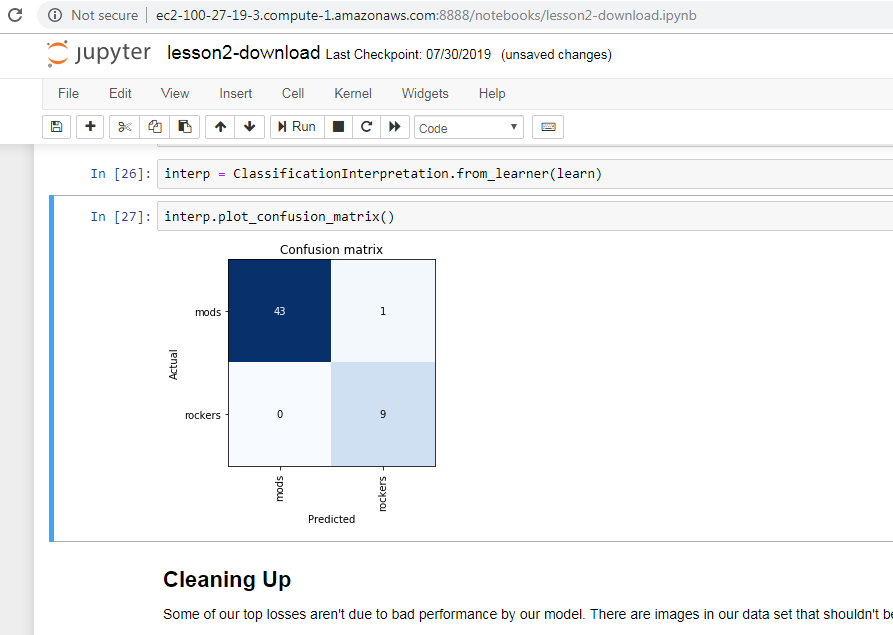
The new model has a nice, low error rate.
The Confusion matrix shows one miss.
Export the model
Skip the Cleaning Up section and proceed to the following cell.
Once there, execute the cell.
$ learn.export()
You now have a file named export.pkl (pickle) that includes the model.
You can save and kill the jupyter notebook.
Deploy the Flask App
Now that we have a model, we can create a Flask APP that allows users to upload a picture and have the model classify the picture as a mod or rocker.
In your home directory, create and enter a directory named brighton_seafront.
(boot) $ cd ~
(boot) $ mkdir brighton_seafront
(boot) $ cd brighton_seafront
In this directory create the following file, named application.py.
#!/usr/bin/env python
from fastai.vision import *
from flask import Flask, flash, redirect, render_template, url_for
from flask_bootstrap import Bootstrap
from flask_wtf import FlaskForm
from flask_wtf.file import FileField
from wtforms import SubmitField
from werkzeug import secure_filename

class Config(object):
    SECRET_KEY = 'a-bunch-of-secret-stuff'
    BOOTSTRAP_SERVE_LOCAL = True

class UploadForm(FlaskForm):
    file = FileField()
    submit = SubmitField('Submit')

application = Flask(__name__)
application.config.from_object(Config)
Bootstrap(application)

learn = load_learner('.')

@application.route('/upload', methods=['GET', 'POST'])
def upload():
    form = UploadForm()

    if form.validate_on_submit():
        filename = secure_filename(form.file.data.filename)
        form.file.data.save('uploads/{}'.format(filename))
        img = open_image('uploads/{}'.format(filename))
        pred_class,pred_idx,outputs = learn.predict(img)
        flash( 'That picture belongs to {}'.format(pred_class), 'success' )
        return redirect(url_for('upload'))

    return render_template('upload.html', form=form)

if __name__ == '__main__':
    application.run(host='0.0.0.0')
Make two directories, one named uploads and one named templates
$ mkdir uploads templates
Edit the following file, in the templates folder (e.g. templates/upload.html).
{% extends "bootstrap/base.html" %}
{% import "bootstrap/wtf.html" as wtf %}
{% block content %}
<div class="container">
{% with messages = get_flashed_messages(with_categories=true) %}
<!-- Categories: success (green), info (blue), warning (yellow), danger (red) -->
{% if messages %}
{% for category, message in messages %}
<div class="alert alert-{{ category }} alert-dismissible" role="alert">
<button type="button" class="close" data-dismiss="alert" aria-label="Close"><span aria-hidden="true">×</span></button>
<!-- <strong>Title</strong> --> {{ message }}
</div>
{% endfor %}
{% endif %}
{% endwith %}
</div>
<div class="container">
<h3>Please upload your file</h3>
{{ wtf.quick_form(form) }}
<hr>
</div>
{% endblock %}
Copy export.pkl from your course-v3 folder to the current brighton_seafront folder.
$ cp /home/ec2-user/course-v3/nbs/dl1/data/brighton_seafront/export.pkl /home/ec2-user/brighton_seafront
Now, start your Flask app.
(boot) [brighton_seafront]$ ./application.py
 * Serving Flask app "application" (lazy loading)
 * Environment: production
   WARNING: This is a development server. Do not use it in a production deployment.
   Use a production WSGI server instead.
 * Debug mode: off
 * Running on http://0.0.0.0:5000/ (Press CTRL+C to quit)
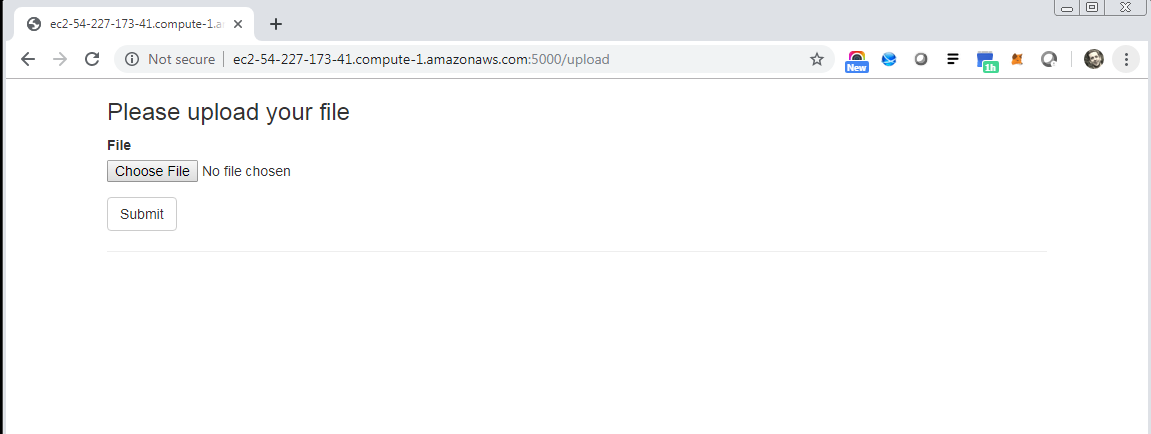
If you navigate to port 5000/upload, you will see a screen that directs you to upload a picture for classification.
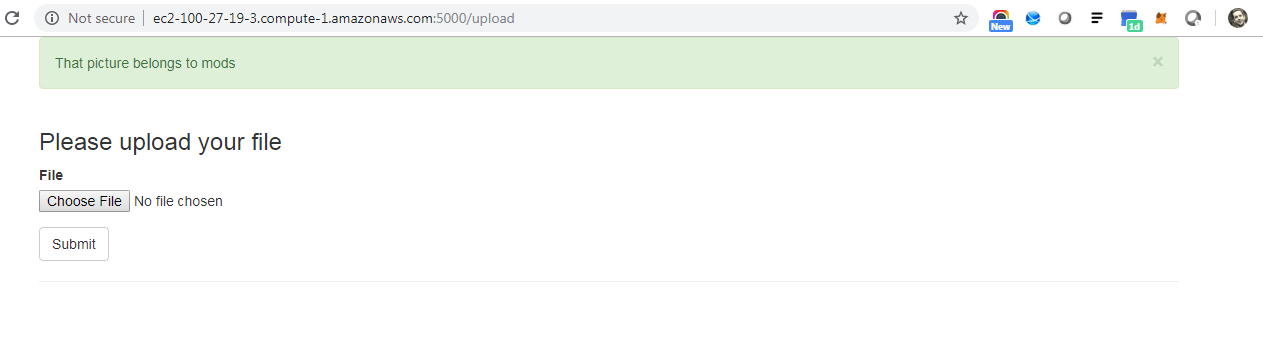
I will upload a picture of young Glam Rocker Marc Bolan, which the photographer snapped during his mod phase.

After upload, the model successfully classified Marc as a mod!
Conclusion
We created a fun APP that differentiates between mods and rockers. We created a toy application. Our application blocks, and can only accommodate one user at a time. If asynchronous web applications interest you, take a look at Python Celery or Amazon Lambda.