Flask, Lambda, API Gateway, IAM and S3 enable massively scalable web database applications. Flask provides a simple, Pythonic Model View Controller (MVC) framework to develop the application logic. Lambda and API Gateway provide pay-per-use Functions as a Service (FaaS), which eliminate idle resource costs. IAM provides a secure identity layer, to protect your assets and S3 provides an inexpensive, durable object store. Lambda and S3, furthermore, scale horizontally to accommodate unexpected traffic spikes.
In the first part of this series, I describe a Flask application with an S3 database back end. In this blog post, I demonstrate how to refactor the Flask application to leverage Lambda, which obviates the need for a dedicated 24/7 web server.
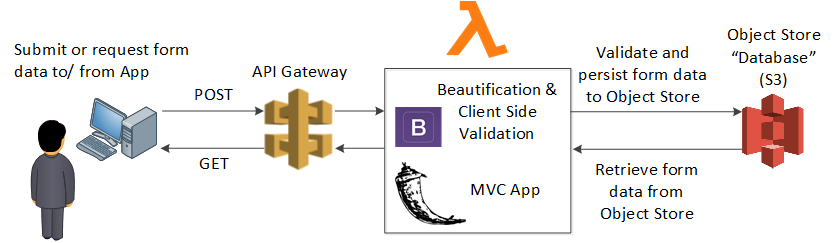
Instead of grinding through the Lambda development and integration by hand, Zappa promises to do this automatically. Zappa deploys the Flask application into Lambda as depicted below.
Test Drive the Original App
Before we get started, download and run my test app.
Be sure to edit application.py to reflect your S3 bucket name.
[~]$ git clone git@github.com:hatdropper1977/web-db-app-w-s3.git
[~]$ cd web-db-app-w-s3
[web-db-app-w-s3]$ git checkout Flask-App
[web-db-app-w-s3]$ virtualenv venv
(venv)[web-db-app-w-s3]$ source ./venv/bin/activate
(venv)[web-db-app-w-s3]$ pip install -U pip setuptools
(venv)[web-db-app-w-s3]$ pip install -r requirements.txt
(venv)[web-db-app-w-s3]$ vim application.py # Set S3_BUCKET_NAME to your bucket
(venv)[web-db-app-w-s3]$ ./application.py
 * Serving Flask app "application" (lazy loading)
 * Environment: production
   WARNING: Do not use the development server in a production environment.
   Use a production WSGI server instead.
 * Debug mode: on
 * Running on http://0.0.0.0:5000/ (Press CTRL+C to quit)
 * Restarting with stat
 * Debugger is active!
 * Debugger PIN: 123-456-789
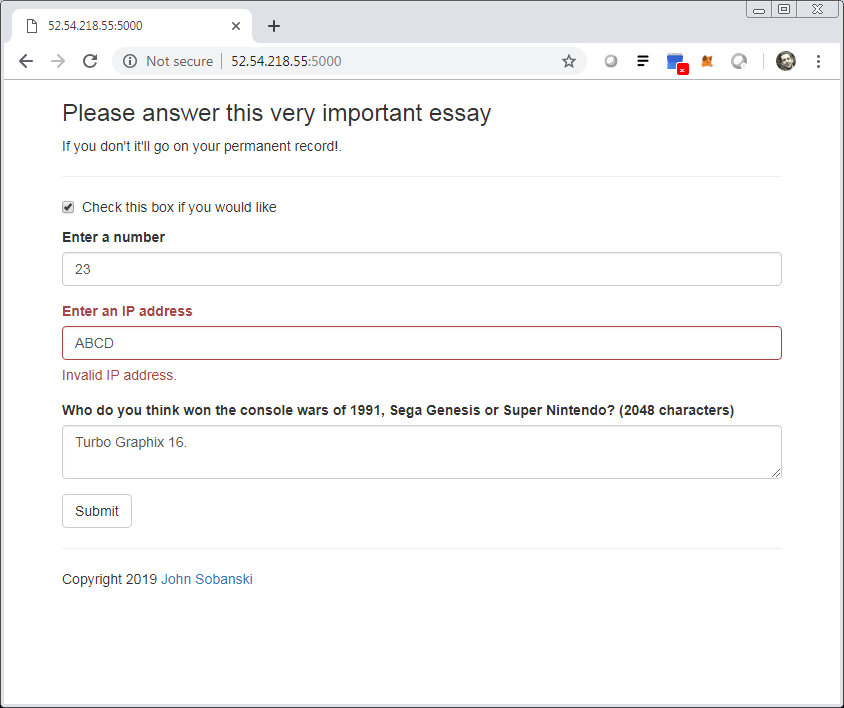
Open a web browser and access http://your ip:5000.
Notice the app performs client side validation.
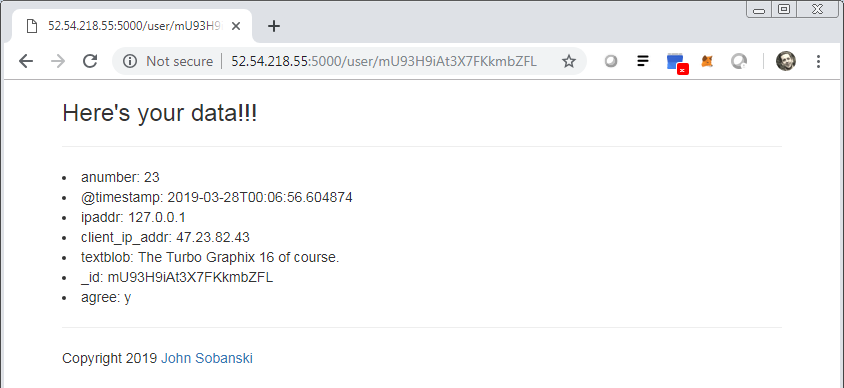
Once you submit a message, enter http://your ip:5000/user/your user key in the browser to see the database retrieval in action.
Deploy Zappa
Now that we have a working Flask application, let's install and run Zappa.
Execute zappa init and select the defaults for all of the Zappa questions.
(venv)[web-db-app-w-s3]$ pip install zappa
(venv)[web-db-app-w-s3]$ zappa init
{
    "dev": {
        "app_function": "application.application",
        "aws_region": "us-east-1",
        "profile_name": "default",
        "project_name": "web-db-app-w-s3",
        "runtime": "python2.7",
        "s3_bucket": "zappa-0yz6108b9"
    }
}
Once we have the init file, we can deploy zappa.
$ zappa deploy dev
Deploying API Gateway..
Deployment complete!: https://hbjj91si68.execute-api.us-east-1.amazonaws.com/dev
Test Drive the Deployed App
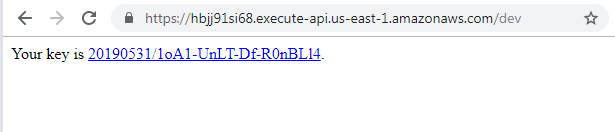
Type the URL of the API Gateway into a browser and you will see the APP.
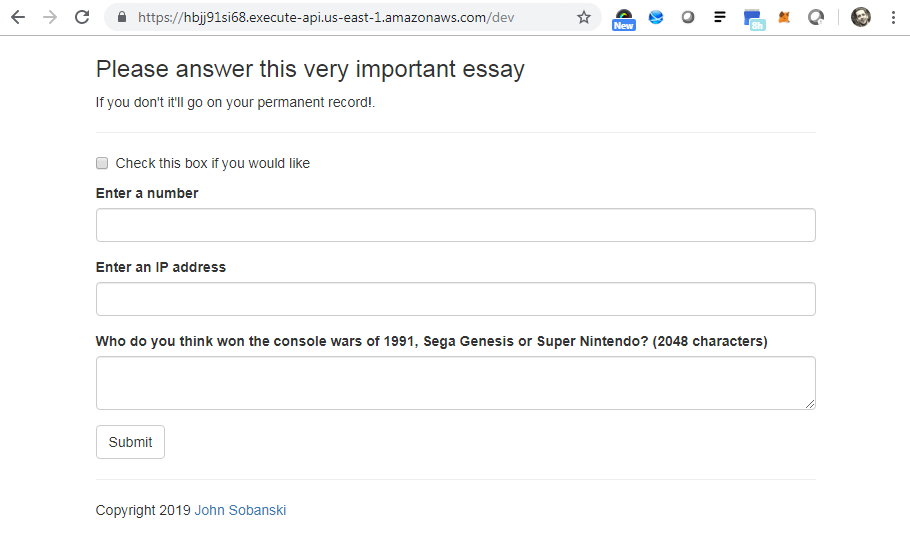
Notice that the Bootstrap validation still works, you need to enter a number in the number field, and an IP address in the IP address field.
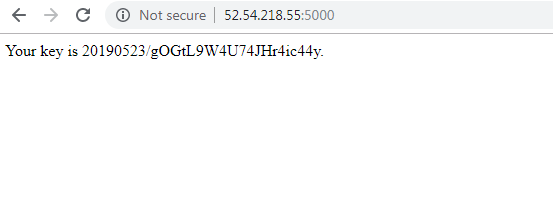
When you click Submit, the web data base application writes the form data to S3 and gives you a User ID.
Now, to check if the route works correctly, you can enter your key in the /user/user date/user key field.
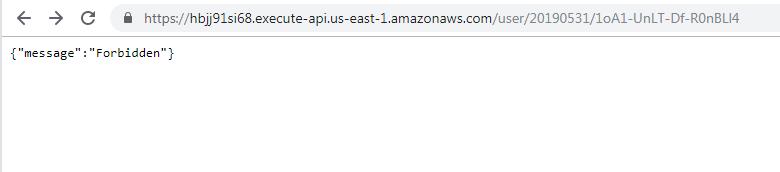
Note that since this is a "dev" deployment, I need to include dev in the URL. So I need to append /dev/user/user date/user key to the API URL.

Zappa Goodies
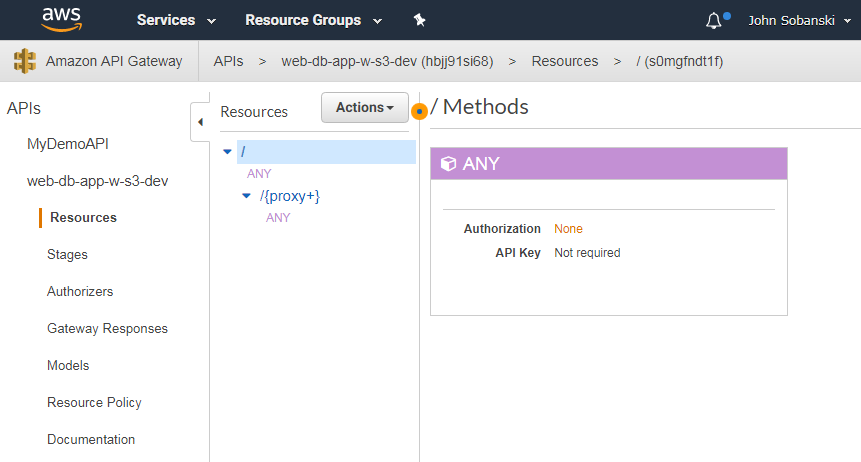
If you go to your console, you will see that Zappa automatically created an API gateway for your project. I used the default project name web-db-app-w-s3.
Zappa also created a Lambda function.
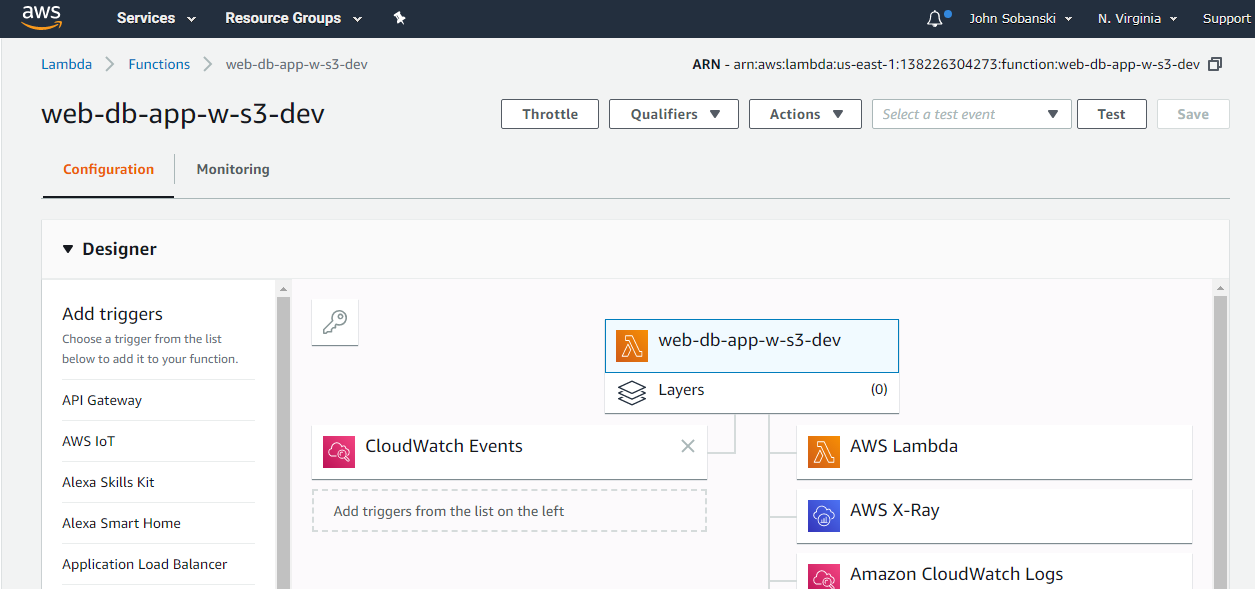
The Lambda function uses a Zappa generated Execution (IAM) Role.
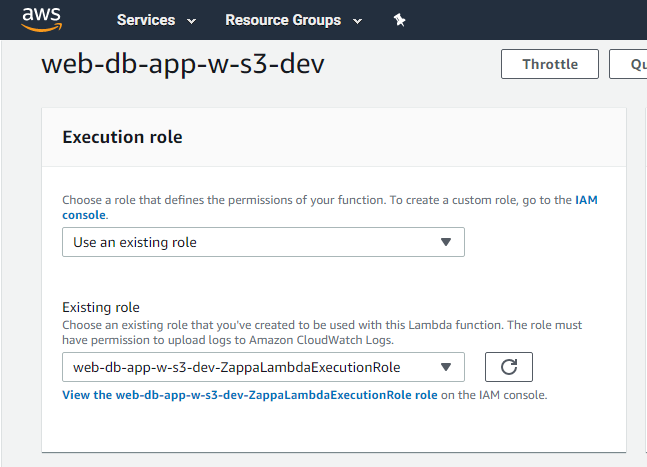
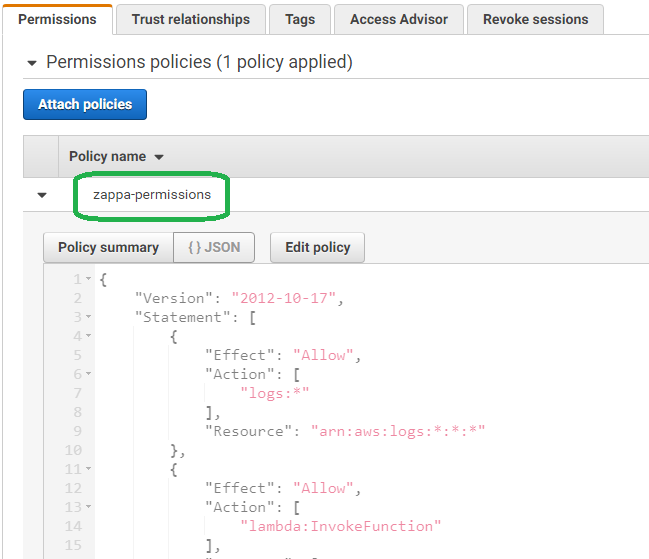
If you navigate to the IAM roles screen, you will see that Zappa generated an automatic in-line policy.
Improving the Application
I created the web-db-app-w-s3 application to demonstrate the bare minimum of database interaction, and demonstrate writes and reads of form data to/ from S3 via a web browser.
To demonstrate the read, the user needs to copy and paste his user key by hand.
I tried to improve this situation by manually adding an HREF to the return statement.
I replaced...
return 'Your key is {}/{}.'.format(S3_SUB_BUCKET_NAME,S3_OBJECT_NAME)
with...
return 'Your key is <a href=/user/{}/{}>{}/{}</a>.'.format(S3_SUB_BUCKET_NAME,S3_OBJECT_NAME,S3_SUB_BUCKET_NAME,S3_OBJECT_NAME)
This way a user has a link to click.
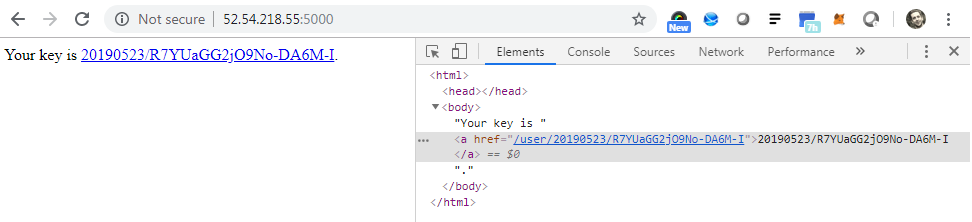
I took the lazy way out and hard coded the HREF. This approach works fine on my development server, but fails when I deploy it to Lambda via Zappa. The hard coded approach will link to api-endpoint/user/date/key but needs to link to api-endpoint/dev/user/date/key.
In order to do things correctly, I must use the Flask url_for method, along with a template.
First, the template.
{% extends "bootstrap/base.html" %}
{% import "bootstrap/wtf.html" as wtf %}
{% block content %}
  <div class="container">
  <h3>Thanks for the info!  Please bookmark the following link:</h3>
  <p>
    <a href="{{ url_for('show_user_data', user_date=user_date, user_key=user_key) }}">
      {{ user_date }}/{{ user_key }}
    </a>
  </p>
<hr>
<p>Copyright 2019 <a href="https://john.soban.ski">John Sobanski</a></p>
</div>
{% endblock %}
The url_for calls the show_user_data view in application.py
@application.route('/user/<user_date>/<user_key>')
def show_user_data(user_date,user_key):
Notice how the show_user_data view takes two arguments, which are passed to the route via the route decorator. We include the view name and these two parameters in the Jinja2 template.
We just need to update application.py to render the new template.
@application.route('/', methods=['GET', 'POST'])
def take_test():
    form = QuizForm(request.form)
    if not form.validate_on_submit():
        return render_template('take_quiz_template.html', form=form)
    if request.method == 'POST':
        S3_SUB_BUCKET_NAME = datetime.now().strftime('%Y%m%d')
        S3_OBJECT_NAME = random_string_gen()
        completed_quiz = {}
        completed_quiz['agree'] = request.form.get('agree')
        completed_quiz['anumber'] = request.form.get('anumber')
        completed_quiz['client_ip_addr'] = request.remote_addr
        completed_quiz['_id'] = S3_OBJECT_NAME
        completed_quiz['ipaddr'] = request.form.get('ipaddr')
        completed_quiz['@timestamp'] = datetime.now().isoformat()
        completed_quiz['textblob'] = request.form.get('textblob')
        S3_OBJECT_JSON = json.dumps(completed_quiz)
        s3 = boto3.resource('s3')
        s3.Object(S3_BUCKET_NAME, '{}/{}.json'.format(S3_SUB_BUCKET_NAME,S3_OBJECT_NAME)).put(Body=S3_OBJECT_JSON)
        return render_template('show_key_after_submit.html', user_date=S3_SUB_BUCKET_NAME,user_key=S3_OBJECT_NAME)
Deploy Updated App
We can update the app via the Zappa update command.
$ zappa update dev
Updating..
Your application is now live at: https://bymeej7ka2.execute-api.us-east-1.amazonaws.com/dev
Go to the URL and fill out the form. If you inspect the link, you will see that the url_for in the template knew to add dev to the path.
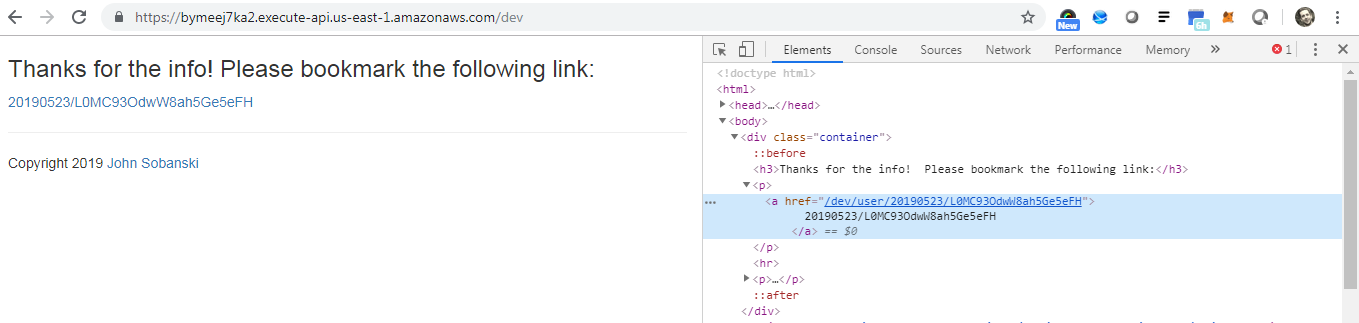
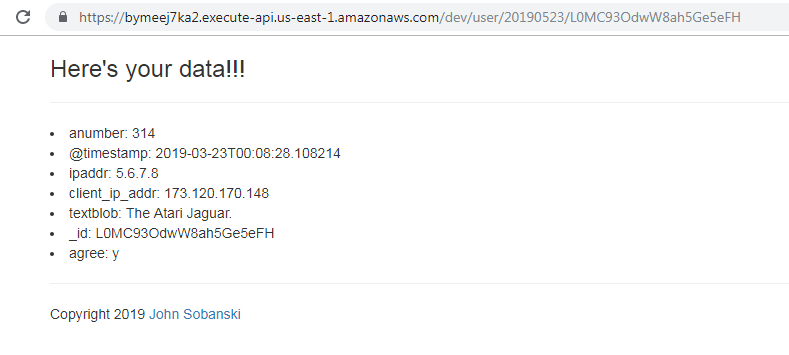
When you click the link, Flask routes to the correct view.
Conclusion
We deployed a Flask app to the horizontally scalable Lambda ecosystem. The S3 back end also scales on-demand, in contrast to traditional RDBMS which have a capacity limit, and therefore introduce bottlenecks. Zappa took care of all the hard work, setting up roles, policies and the API Gateway/ FaaS integration.
You may want to consider using this approach for your web database application. It works well with text based Web Database applications with human (vs. machine) users, such as blogs or report generation. Since we save our form data as JSON encoded text, we can easily use Amazon Athena to mine and/ or trend data.