The Python Elasticsearch Domain Specific Language (DSL) lets you create models via Python objects.
Take a look at the model Elastic creates in their persistence example.
#!/usr/bin/env python
# persist.py
from datetime import datetime
from elasticsearch_dsl import DocType, Date, Integer, Keyword, Text
from elasticsearch_dsl.connections import connections

class Article(DocType):
    title = Text(analyzer='snowball', fields={'raw': Keyword()})
    body = Text(analyzer='snowball')
    tags = Keyword()
    published_from = Date()
    lines = Integer()

    class Meta:
        index = 'blog'

    def save(self, ** kwargs):
        self.lines = len(self.body.split())
        return super(Article, self).save(** kwargs)

    def is_published(self):
        return datetime.now() < self.published_from

if __name__ == "__main__":
    connections.create_connection(hosts=['localhost'])
    # create the mappings in elasticsearch
    Article.init()
I wrapped their example in a script and named it persist.py. To initiate the model, execute persist.py from the command line.
$ chmod +x persist.py
$ ./persist.py
We can take a look at these mappings via the _mapping API. In the model, Elastic names the index blog. Use blog, therefore, when you send the request to the API.
$ curl -XGET 'http://localhost:9200/blog/_mapping?pretty'
The save() method of the Article object generated the following automatic mapping (schema).
{
  "blog" : {
    "mappings" : {
      "article" : {
        "properties" : {
          "body" : {
            "type" : "text",
            "analyzer" : "snowball"
          },
          "lines" : {
            "type" : "integer"
          },
          "published_from" : {
            "type" : "date"
          },
          "tags" : {
            "type" : "keyword"
          },
          "title" : {
            "type" : "text",
            "fields" : {
              "raw" : {
                "type" : "keyword"
              }
            },
            "analyzer" : "snowball"
          }
        }
      }
    }
  }
}
That's pretty neat! The DSL creates the mapping (schema) for you, with the right Types. Now that we have the model and mapping in place, use the Elastic provided example to create a document.
#!/usr/bin/env python

# create_doc.py
from datetime import datetime
from persist import Article
from elasticsearch_dsl.connections import connections

# Define a default Elasticsearch client
connections.create_connection(hosts=['localhost'])

# create and save and article
article = Article(meta={'id': 42}, title='Hello world!', tags=['test'])
article.body = ''' looong text '''
article.published_from = datetime.now()
article.save()
Again, I wrapped their code in a script. Run the script.
$ chmod +x create_doc.py
$ ./create_doc.py
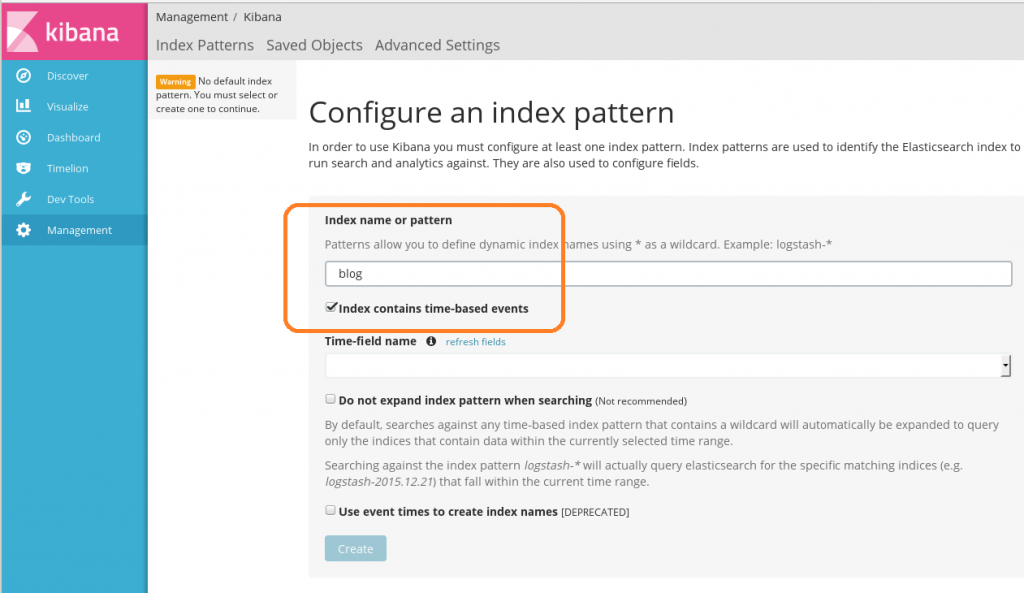
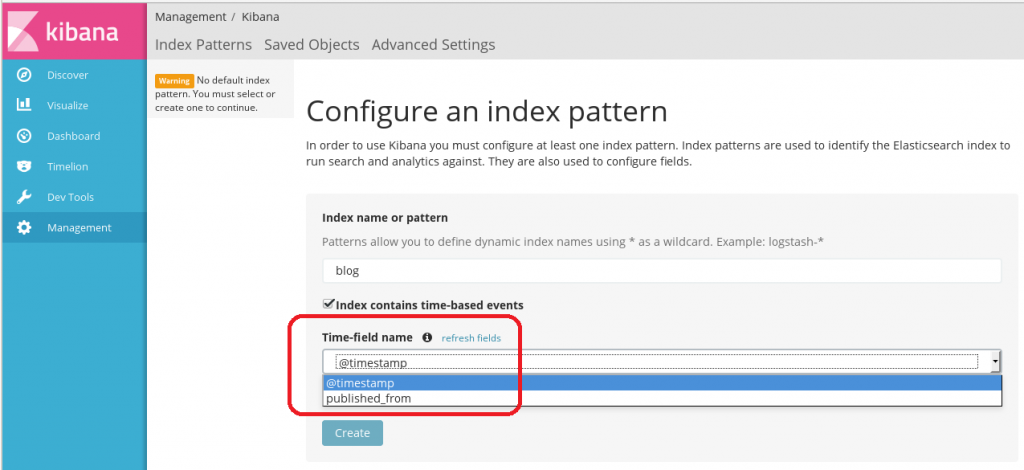
If you look at the mapping, you see the published_from field maps to a Date type. To see this in Kibana, go to Management --> Index Patterns as shown below.
 Now type blog (the name of the index from the model) into the Index Name or Pattern box.
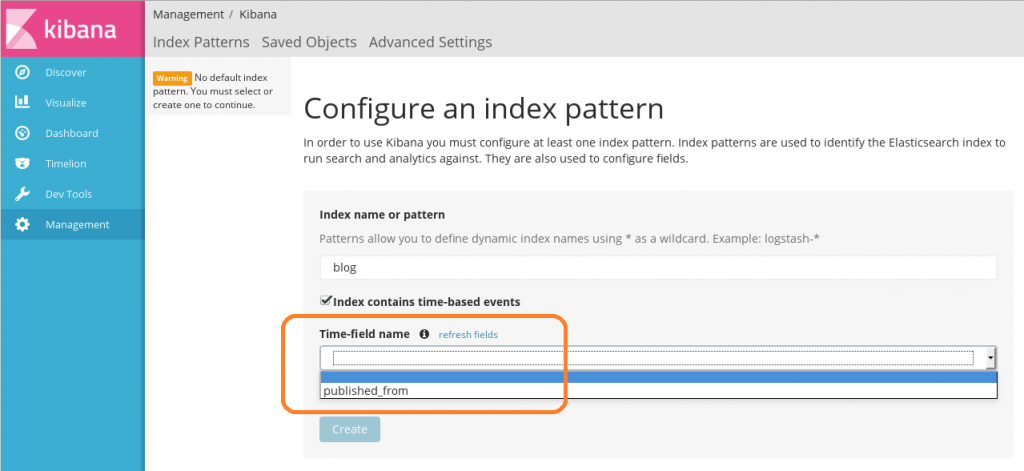
From here, you can select published_from as the time-field name.
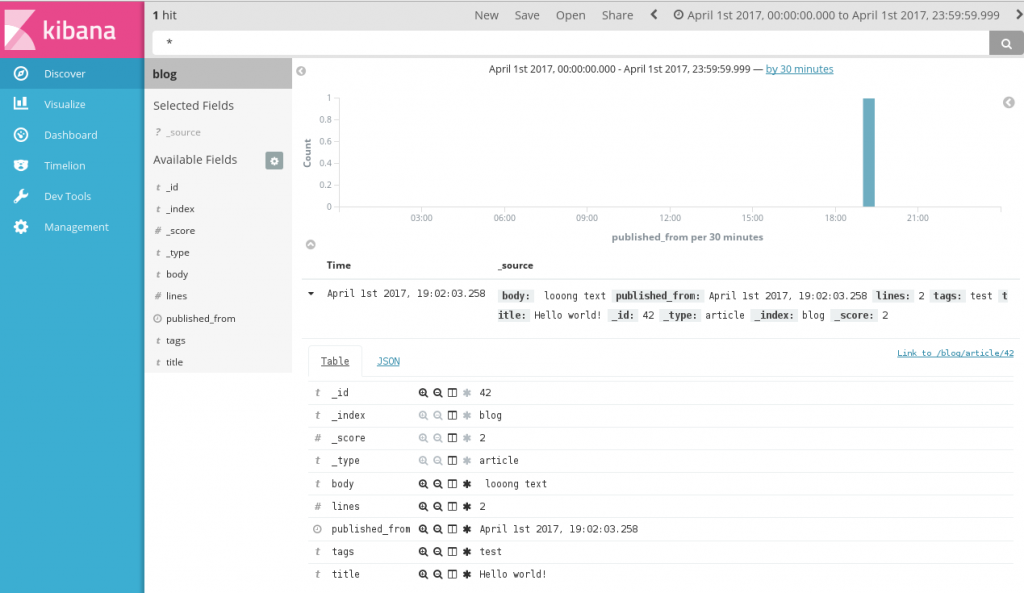
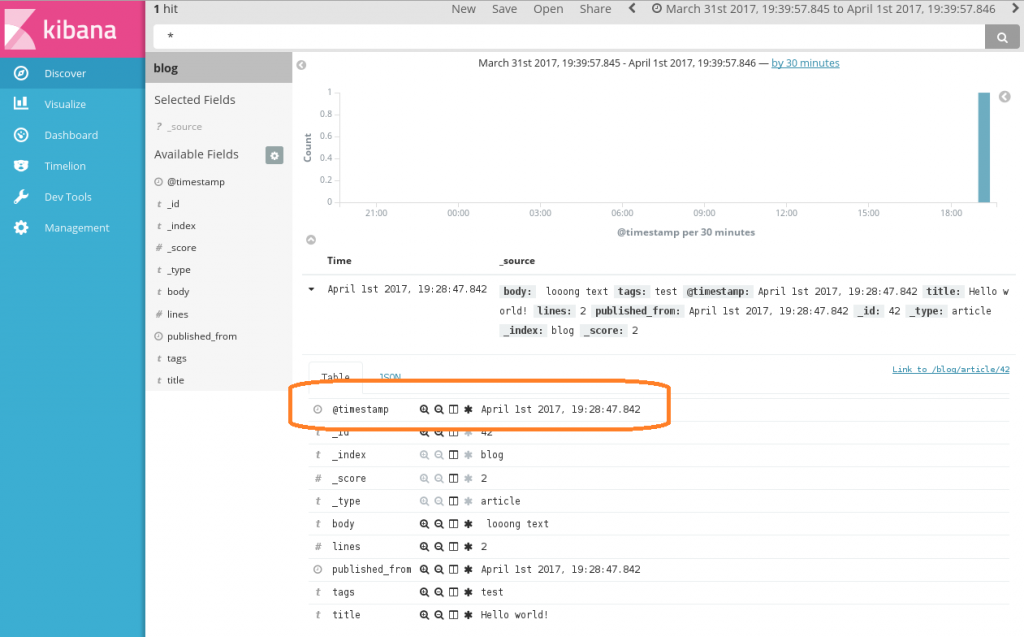
If you go to Discover, you will see your blog post.
 Logstash, however, uses @timestamp for the time-field name. It would be nice to use the standard name instead of a one-off, custom name. To use @timestamp, we must first update the model.
In persist.py(above), change the save stanza from...
def save(self, ** kwargs):
        self.lines = len(self.body.split())
        return super(Article, self).save(** kwargs)
to...
def save(self, ** kwargs):
        self.lines = len(self.body.split())
        self['@timestamp'] = datetime.now()
        return super(Article, self).save(** kwargs)
It took me a ton of trial and error to finally realize we need to update @timestamp as a dictionary key. I just shared the special sauce recipe with you, so, you're welcome! Once you update the model, run create_doc.py(above) again.
$ ./create_doc.py
Then, go back to Kibana --> Management --> Index Patterns and delete the old blog pattern.
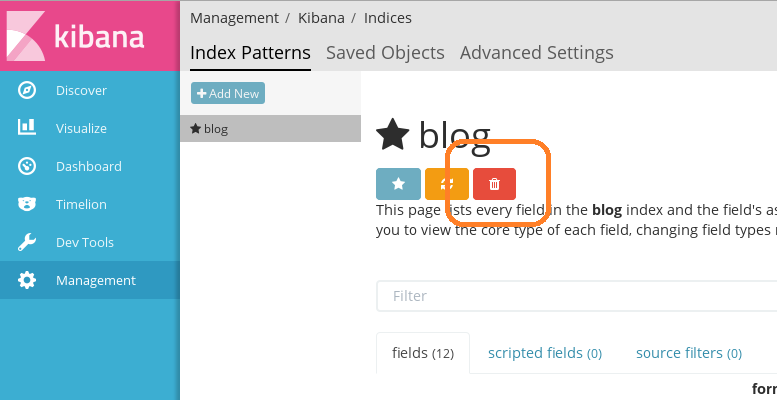 When you re-create the index pattern, you will now have a pull down for @timestamp.
Now go to discover and you will see the @timestamp field in your blog post.
You can go back to the _mapping API to see the new mapping for @timestamp.
$ curl -XGET 'http://localhost:9200/blog/_mapping?pretty'
This command returns the JSON encoded mapping.
{
  "blog" : {
    "mappings" : {
      "article" : {
        "properties" : {
          "@timestamp" : {
            "type" : "date"
          },
          "body" : {
            "type" : "text",
            "analyzer" : "snowball"
          },
          "lines" : {
            "type" : "integer"
          },
          "published_from" : {
            "type" : "date"
          },
          "tags" : {
            "type" : "keyword"
          },
          "title" : {
            "type" : "text",
            "fields" : {
              "raw" : {
                "type" : "keyword"
              }
            },
            "analyzer" : "snowball"
          }
        }
      }
    }
  }
}
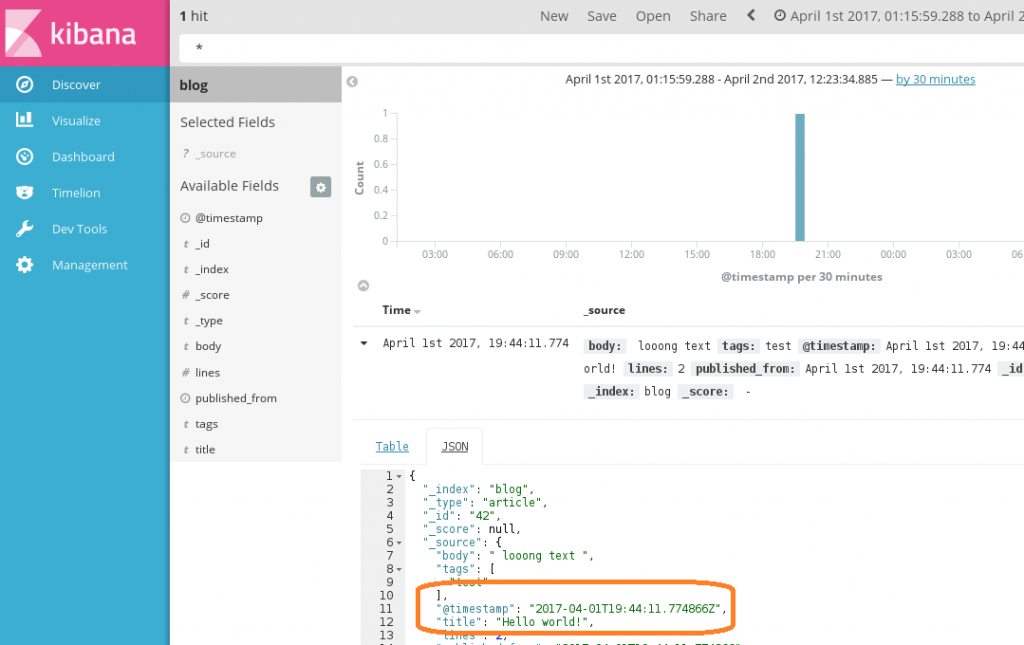
Unfortunately, we still may have a problem. If you notice, @timestamp here is in the form of "April 1st 2017, 19:28:47.842." If you're sending a Document to an existing Logstash doc store, it most likely will have the default @timestamp format.
To accomodate the default @timestamp format (or any custom format), you can update the model's save stanza with a string format time command.
def save(self, ** kwargs):
        self.lines = len(self.body.split())
        t = datetime.now()
        self['@timestamp'] = t.strftime('%Y-%m-%dT%H:%M:%S.%fZ')
        return super(Article, self).save(** kwargs)
You can see the change in Kibana as well (view the raw JSON).
That's it! The more you use the Python Elasticsearch DSL, the more you will love it.